
Installation Guide
AudioCodes SmartTAP™ 360° Live
SmartTAP 360° Live
SmartTAP 360° Live Enterprise Recording
Solution
Version 5.4

Notice
SmartTAP 360° Live | Installation Guide
Notice
Information contained in this document is believed to be accurate and reliable at the time
of printing. However, due to ongoing product improvements and revisions, AudioCodes
cannot guarantee accuracy of printed material after the Date Published nor can it accept
responsibility for errors or omissions. Updates to this document can be downloaded
from https://www.audiocodes.com/library/technical-documents.
This document is subject to change without notice.
Date Published: November-21-2021
WEEE EU Directive
Pursuant to the WEEE EU Directive, electronic and electrical waste must not be disposed of with
unsorted waste. Please contact your local recycling authority for disposal of this product.
Customer Support
Customer technical support and services are provided by AudioCodes or by an authorized
AudioCodes Service Partner. For more information on how to buy technical support for
AudioCodes products and for contact information, please visit our website at
https://www.audiocodes.com/services-support/maintenance-and-support.
Documentation Feedback
AudioCodes continually strives to produce high quality documentation. If you have any
comments (suggestions or errors) regarding this document, please fill out the Documentation
Feedback form on our website at https://online.audiocodes.com/documentation-feedback.
Stay in the Loop with AudioCodes
Abbreviations and Terminology
Microsoft Skype for Business and Microsoft Lync are used interchangeably in this document
unless otherwise specified. References to Microsoft Teams are explicitly indicated.
- 2 -

Notice
SmartTAP 360° Live | Installation Guide
Related Documentation
Document Name
SmartTAP 360° Live Release Notes
SmartTAP 360° Live Administrator Guide
SmartTAP 360° Live for Microsoft Teams Deployment Guide
Document Revision Record
LTRT Description
27198 Updated Sections: Hardware and Software Requirements; SmartTAPLive
License Management; Installation Wizard Methods; All-In-One Database
Service; Installation Wizard-Distributed Method; Installing CD-Live
Component; Distributed SmartTAPFirewall; Installing SmartTAP 360° Live for
SIP Recording; Health Monitor with HTTPS; Configure Microsoft SNMP Service
Added Sections: Microsoft Teams Installation
Removed Section: Backup (brief statement remains)
27199 License Server Installation setup was not included in PDF document (linked
correctly in HTMLoutput)
27210 Correction to the specifications for other integrations and correction to the
Microsoft Teams Bot Specifications.
27211 Added a note in the specifications regarding SBAintegration.
27212 Update to the Server Configurations and the Bot Cluster Specifications.
27213 Update to the Server Configurations
- 3 -

Content
SmartTAP 360° Live | Installation Guide
Table of Contents
1 Hardware and Software Requirements 1
SmartTAP 360° Live for Microsoft Teams Requirements 1
SmartTAP 360° Live Server Specifications 1
Microsoft Teams Bot Cluster Specifications 2
Microsoft Teams Instant Message Service CD-Live Component - Beta version for POC 4
SmartTAP 360° Live for Microsoft Teams Availability 4
SmartTAP 360° Live for Microsoft Teams Backup and Restore 4
SmartTAP SIPRec Deployment in Azure - Minimum Specifications 4
Requirements for Other Integrations 5
Server Configurations 6
Supported Virtual Machine (VM) Environments 9
VMware ESXi 9
Microsoft Hyper-V 9
Active / Standby Resiliency Configuration (Optional) 10
Supported Microsoft Windows OSS 10
Supported Microsoft Integrations 10
SBA Integration 10
Windows Updates 10
Installing Windows Updates 11
Antivirus Software and Windows Defender 11
2 SmartTAP 360° Live License Management 12
License File Creation 12
License File Installation and Verification 13
Managing Microsoft Teams Licenses in Mixed Integrations 13
License Upgrades for Legacy Integrations 14
3 Before Installing SmartTAP 360° Live 16
SmartTAP 360° Live Software Package Contents 16
Installation Prerequisites 16
Installation Wizard Methods 18
All-In-One 18
Distributed 18
Post Installation Actions 19
4 Installation Wizard - All-In-One Method 20
Database Service 22
Installing the Application Service 24
Installing the Communication Service 29
Installing the Call Delivery Service 30
Installing the Media Server 32
Installing the Remote Transfer Service 34
Completing Wizard Installation 36
- 4 -

Content
SmartTAP 360° Live | Installation Guide
Post-Installation Integration 37
5 Installation Wizard - Distributed Method 38
Microsoft Teams Installation 41
Installing SmartTAP Database Server 42
Database Service Configuration 42
Installing SmartTAP 360° Live Application Server 43
Installing SmartTAP Communication Server 43
Installing SmartTAP Media Server 44
Media Server Configuration 45
Network File Server 45
Media Server 49
Installing SmartTAP Call Delivery IP-Server 51
SmartTAP 360° Live File Server Installation 51
Firewall Configuration 52
Domain Controller Configuration 52
Installing CD-Live Component 56
Installing the License Server 61
6 Uninstalling SmartTAP 360° Live 63
7 Firewall Configuration 65
Skype for Business Recording Firewall 65
Front End Server(s) 65
Edge, Mediation or Conference Server(s) 66
SmartTAP 360° Live Server 67
SmartTAP 360° Live Media Proxy Server 67
SmartTAP 360° Live Announcement Server 68
Automated Firewall Exception Scripts for Windows Firewall 69
Distributed SmartTAP Firewall 69
Application Server (AS) 71
Communications Server (CS) 71
Database Server (DB) 72
File Server (FS) 72
Media Server (MS) 72
Remote Transfer Service (RTS) 72
Call Delivery(CD) 73
Media Delivery (MD) 74
Media Proxy (MP) 74
Announcement Server (AN) 74
Example 75
OVOC Server 75
8 Microsoft Skype for Business Deployment 76
Skype for Business Remote Branch Site 77
Before Installing Microsoft Skype for Business Components 79
- 5 -

Content
SmartTAP 360° Live | Installation Guide
Announcement Server-Specific Requirements 80
Firewall Configuration 80
SmartTAP 360° Live Monitoring Service-Specific Requirements 80
Installing Skype for Business Plugin 81
Skype for Business Plugin-Pre-install Setup on ADDomain Controller 81
Skype for Business Plugin Pre-install Setup on each Front End, SBS or SBA 85
Skype for Business Plugin Installation Procedure 94
Installing Call Delivery for Skype for Business (IP-based Recording) 101
Monitoring 103
Edge 108
Firewall Exceptions 110
Configuring Media Proxy for Call Delivery-IP 110
Configuring Call Delivery for Skype for Business 113
Installing Media Proxy Server for Skype for Business 114
Modifying Media Proxy Server Parameters 121
Installing Media Delivery Server for Skype for Business 122
Installing Announcement Server 123
Announcement Server Preinstall of Core Components and Local Replica Configuration
Store 124
Announcement Server Software Installation Procedure 128
Announcement Server-Post Installation Procedures 133
Step 1-Activate Announcement Services 133
Step 2-Add Announcement Servers to DNS 134
Step 3-Configuring Announcement Server (Skype for Business) 134
Installing SmartTAP Monitoring Service 135
SmartTAP 360° Live Monitoring Service Installation Procedure 136
Activating the SmartTAP 360° Live Monitoring Service 137
Configuring the SmartTAP Monitoring Service 138
9 Integration Configuration 141
VoIP Port Mirroring 141
Inbound / Outbound 141
Station to Station 141
Call Delivery Install for VoIP (Port Mirror) 142
Additional Configuration for VoIP Port Mirroring 145
Setting Up Monitoring Interfaces 146
Analog Trunk / Radio 147
Call Delivery Install for Analog Recording (Passive Tap) 150
Additional Configuration for Analog Trunk and Radio 152
Activity Detection 155
SmartCONTROL 156
SIP Recording (SIPRec) 157
What is SIPRec? 157
Session Recording Server (SRS) 158
Session Recording Client (SRC) 158
- 6 -

Content
SmartTAP 360° Live | Installation Guide
Configuring Gateway & SBC for SIP Recording 158
Configuring Load Balancing on the SBC Device 159
Configuring Alternative Routing on the SBC 160
Installing SmartTAP 360° Live for SIP Recording 161
Configuring Call Delivery for SIP Recording 162
Recording Genesys PureCloud Contact Center Calls Locally 163
Configuring Message Manipulation Rules Genesys PureCloud Contact Center Calls 164
Adding SmartTAP to the Genesys PureCloud Contact Center User Interface 166
10 Additional Configuration Options 169
Configuring Digital Signatures 169
Installing the Digital Signatures Property Sheet 169
Configuring LDAP 170
Pre-Requisites 170
Configuring SSO 171
Configuring HTTP/S 171
Disabling HTTP Communications on Application Server (Optional) 171
Automatic Disabling of HTTP 171
Manual Disabling of HTTP 172
Configuring SmartTAP 360° Live Components for HTTPS 172
Communication Server for HTTPS 173
Call Delivery with HTTPS 173
Media-Proxy with HTTPS 174
Announcement Server with HTTPS 174
Remote Transfer Service with HTTPS 175
Health Monitor with HTTPS 175
Media Delivery with HTTPS 176
Media Server with HTTPS 177
CD-Live with HTTPS 177
Configuring Syslog Server Connection 178
Skype for Business Plug-in 178
Location-Based Targeting in SmartTAP 178
Assign a Location Attribute to each Call Delivery Component 179
Create a Location Attribute in the SmartTAP GUI 181
Assign a Location to Each User/Device in the SmartTAP GUI 181
Verify the Target List in Each Call Delivery 183
CD-SIPREC Configuration 184
CD-SIPREC Support in TLS Transport 185
Generating Certificates Automatically 185
Generating Certificates Manually 187
Example for Creating a Self-Signed Certificate for CD-SIPREC and SBC Connection 188
Create a Certificate Signing Request (CSR) 188
Sign the Certificate at the Certificate Authority (CA) 189
Import Certificate to CD-SIPRECCertificate Store 189
11 Backup and Restore 191
- 7 -

Content
SmartTAP 360° Live | Installation Guide
Prerequisites 191
Backup 192
Restore 192
Call Delivery Service 193
Media Service 193
Media Delivery Service 193
Database 194
SmartTAP 360° Live Skype for Business Plug-in (FE, SBS, SBA) 194
Announcement Server 195
Media Proxy 195
Restoring Media 195
Bot Resiliency 196
12 Troubleshooting 197
How To Validate Port Mirror for Recording Skype for Business Calls 197
Prerequisites 197
Introduction: SmartTAP Recording Concepts 197
SmartTAP 360° Live Processing of Skype for Business Signaling 197
SmartTAP 360° Live Media Processing 198
Procedure 199
Setup Skype for Business Logging 199
Setup Sniffer 200
Capture a Test Call 200
Analysis 201
Locate Test Call in Skype for Business Log 201
Compare Call Information with Sniffer Trace 202
Determine Whether SmartTAP will Record this Call 202
Troubleshooting Skype for Business Plugin Installation 202
Enable the Browser Service 203
Use “net view” to Verify 203
Troubleshoot Skype for Business Recording 203
No Records for the Calls 203
Calls with No Audio 204
Enabling Promiscuous Mode on VMWare ESXi 204
13 Configure Microsoft SNMP Service 205
Automatic SNMP Setup 205
Manual SNMP Setup 205
- 8 -

CHAPTER1 Hardware and Software Requirements
SmartTAP 360° Live | Installation Guide
1 Hardware and Software Requirements
This chapter describes the hardware and software requirements for installing SmartTAP 360°
Live Enterprise Recording Solution including the following:
■ SmartTAP 360° Live for Microsoft Teams Requirements below
■ SmartTAP SIPRec Deployment in Azure - Minimum Specifications on page4
■ Requirements for Other Integrations on page5
■ Windows Updates on page10
SmartTAP 360° Live for Microsoft Teams Requirements
This section describes the recommended specifications for SmartTAP 360° Live Recording solu-
tion for Microsoft Teams through the Microsoft policy-based API. SmartTAP 360° Live for
Microsoft Teams can record Voice, Video, Screen Sharing and Instant Messaging for internal,
PSTN and Federated calls.
For details on SmartTAP 360° Live for Microsoft Teams Recording Policy:
https://docs.microsoft.com/en-us/microsoftteams/teams-recording-policy
This section includes the following:
■ SmartTAP 360° Live Server Specifications
■ Microsoft Teams Bot Cluster Specifications on the next page
■ Microsoft Teams Instant Message Service CD-Live Component - Beta version for POC on
page4
■ SmartTAP 360° Live for Microsoft Teams Availability on page4
■ SmartTAP 360° Live for Microsoft Teams Backup and Restore on page4
SmartTAP 360° Live Server Specifications
■ Operating System: Microsoft Windows Server 2016 or Microsoft Windows Server 2019
■ Server Specifications:
● SmartTAP server with the specifications below can handle up to 500 users and 100
audio-only concurrent recordings:
◆ Virtual Machine: Tier=Standard, Instance=DS2 v2 (2 vCPUs, 7 GB RAM, 14 GB
Temporary storage)
- 1 -

CHAPTER1 Hardware and Software Requirements
SmartTAP 360° Live | Installation Guide
● SmartTAP server with the specifications below can handle up to 3000 users and 600
audio-only concurrent recordings or up to 500 users and a combination of 100 audio
and video concurrent recordings:
◆ Virtual Machine: Tier=Standard, Instance=DS3 v2 (4 vCPUs, 14 GB RAM, 28 GB
Temporary storage)
● SmartTAP server with the specifications below can handle up to 3000 users and a
combination of 600 audio and video concurrent recordings:
◆ Virtual Machine: Tier=Standard, Instance=F8s v2 (8 vCPUs, 16 GB RAM, 64 GB
Temporary storage)
● SmartTAP server with the specifications below can handle up to 100 targeted users and
10 maximum concurrent audio-only call recordings. Post recording features for the
below machine specifications are limited to basic playback and download. In case of
maximum recording levels of 10 concurrent audio calls, the playback and download of
recordings may be delayed or take a longer time to complete.
◆ Virtual Machine: B2MS 2 vCPUs, 8 GB RAM
■ Storage: An additional managed disk is required for database storage. The estimated size of
the required disk can be calculated using the SmartTAP storage calculator (see Server
Configurations on page6). The additional managed disk is not required for POC if the
SmartTAP Server’s OS disk has sufficient space to hold the database. The disk should be a
premium SSD managed disk.
● For mixed deployments where Teams and another integration such as SIPRec
need to be deployed in the same SmartTAP solution, the other integration has to
be deployed in a separate RDD according to the specifications for the relevant
integration.
● Playback performance depends on CPUavailability; slowness of the Web
interface may be experienced when CPUresources are insufficient to execute
playback:
✔ For optimal audio playback performance, the number of concurrent
playbacks should not exceed the number of CPU cores - 1
✔ For optimal video playback performance, the number of concurrent
playbacks should not exceed half the number of CPU cores
● A server with an equivalent or higher spec must be used when the SmartTAP is
deployed On -premises or on a cloud platform other than Azure.
● Concurrent recording specifications should be equal to the maximum
simultaneous calls that can be made by the targeted users for recordings; this
includes all recording types e.g. Full Time Recording, Record on Demand, Save
on Demand.
● For integrations with third-party applications, a custom specification is required.
Microsoft Teams Bot Cluster Specifications
Microsoft Teams Bot can be deployed using one of the below options:
- 2 -

CHAPTER1 Hardware and Software Requirements
SmartTAP 360° Live | Installation Guide
■ Azure Service Fabric Cluster: Azure Service Fabric Cluster with Silver Durability with a
minimum of 5 nodes is required:
● Virtual Machine: Tier=Standard, Instance=D2 V2 (2 vCPUs, 7 GB RAM)
● Windows Server 2019 Data Center - with Containers
For more information, refer to Microsoft Service Fabric Cluster.
Table 1-1: Service Fabric Cluster Concurrent Calls Recordings Table
Media in a Call Maximum total Calls per vCPU
Voice 25
Voice and video
(p2p or group calls up to 4 streams)
9
Voice and screen sharing 15
■ Azure Standalone Cluster: Standalone cluster including one of the VM specifications below:
● Virtual Machine: Tier=Standard, Instance=DS2 V2 (2 vCPUs, 7 GB RAM)
● Virtual Machine: Tier=Standard, Instance=DS3 v2 (4 vCPUs, 14 GB RAM)
● Virtual Machine: Tier=Standard, Instance=DS4 v2 (8 vCPUs, 28 GB RAM)
Table 1-2: Standalone Cluster Concurrent Calls Recordings Table
Media in a Call Maximum total Calls per vCPU
Voice 40
Voice and video
(p2p or group calls up to 4 streams)
13
1
Voice and screen sharing 25
■ Additional mandatory Azure resources:
● Deployed in Service Fabric Cluster:
◆ Standard Load Balancer for Bot Service Fabric Cluster
◆ Virtual Machine ScaleSet – VMs for Bot Service Fabric Cluster
● Public IP address for the Standard Load Balancer (for Standard Load Balancer in case of
SFC)
● Key Vault to store Bot Service Fabric Cluster certificates
● Microsoft Azure Blob Storage
1
Maximum of 70 video concurrent calls on a single server
- 3 -

CHAPTER1 Hardware and Software Requirements
SmartTAP 360° Live | Installation Guide
■ Optional Azure resources:
● Application Insights to store Bot logs
● App Configuration to store Bot configuration
Microsoft Teams Instant Message Service CD-Live Component - Beta
version for POC
■ Installed as a component of the SmartTAP server on Azure (Ds2 V2 2 vCPUs, 7 GB RAM or
higher)
■ Installed as a Standalone VM on Azure (B2MS 2 vCPUs, 8 GB RAM)
CD-Live cannot be installed On-premises.
SmartTAP 360° Live for Microsoft Teams Availability
SmartTAP 360° Live for Microsoft Teams availability is based on Azure Virtual Machines (VM)
Service Level Agreement (SLA):
■ SmartTAP Server on Azure VM - SLA is 99.9% for one instance and 99.99% can be achieved
by deploying the two servers in different Availability Zones (optionally available at extra
cost). Refer to Azure VM SLA.
■ SmartTAP 360° Teams BOT on Azure VM - SLA 99.9% (99.95% Service Fabric Cluster). Refer
to Azure VM SLA.
■ SmartTAP Media on Azure BLOB – SLA is 99.9% for Hot tier, and 99% for Cool Tier. Refer to
Azure Blob Storage SLA.
■ The durability of Azure Blob using Local Redundant Storage (LRS) is 11 nines. Refer to
Azuire Blob Storage Durability.
SmartTAP 360° Live for Microsoft Teams Backup and Restore
Azure Virtual Machines (VM) backup/restore procedures are highly recommended.
SmartTAP SIPRec Deployment in Azure - Minimum
Specifications
SmartTAP SIPRec recording deployment can be used to record Teams PSTN calls that the SBC or
gateway handles.
For deployments other than Azure, see Requirements for Other Integrations on the
next page.
SmartTAP SIPRec server:
- 4 -

CHAPTER1 Hardware and Software Requirements
SmartTAP 360° Live | Installation Guide
■ B2MS: 2 vCPUs, 8 GB RAM: Low-profile for up to 100 users and 10 concurrent audio calls.
Post recording features for this machine specification are limited to basic playback and
download. In case of maximum recording levels of 10 concurrent audio calls, the playback
and download of recordings may be delayed or take a longer time to complete.
■ DS2_v2, 2 vCPUs, 7-GB RAM: Low-profile SmartTAP for up to 50 concurrent audio
recordings
■ F4s_v2, 4 vCPUs, 8-GB RAM: Middle-profile SmartTAP for up to 150 concurrent audio
recordings
■ F8s_v2, 8 vCPUs, 16 GB RAM: High-profile SmartTAP for up to 250 concurrent audio
recordings.
■ An additional managed disk is required for database storage. The estimated size of the
required disk can be calculated using the SmartTAP storage calculator (see Server
Configurations on the next page. The additional managed disk is not required for POC if the
SmartTAP Server’s OS disk has sufficient space to hold the database. The disk should be a
premium SSD managed disk.
■ SmartTAP SIPRec availability: SmartTAP SIPRec availability is based on Azure Virtual
Machines (VM) Service Level Agreement (SLA):
● SmartTAP Server on Azure VM - SLA is 99.9% for one instance and 99.99% can be
achieved by deploying the two servers in different Availability Zones (optionally
available at extra cost). Refer to Azure VM SLA.
■ SmartTAP SIPRec Backup/Restore: Azure Virtual Machines (VM) backup/restore
procedures are highly recommended.
● Playback performance depends on CPUavailability; slowness of the Web
interface may be experienced when there are insufficient CPUresources to
execute playback:
For optimal audio playback performance, the number of concurrent playbacks
should not exceed the number of CPU cores - 1.
● Concurrent recording specifications should be equal to the maximum
simultaneous calls that can be made by the targeted users for recordings; this
includes all recording types e.g. Full Time Recording, Record on Demand, Save
on Demand.
Requirements for Other Integrations
This section describes requirements for other integrations including Skype for Business and
Microsoft Lync including:
■ Server Configurations on the next page
■ Supported Virtual Machine (VM) Environments on page9
■ Active / Standby Resiliency Configuration (Optional) on page10
■ Supported Microsoft Windows OSS on page10
- 5 -
CHAPTER1 Hardware and Software Requirements
SmartTAP 360° Live | Installation Guide
■ Supported Microsoft Integrations on page10
■ SBA Integration on page10
■ Windows Updates on page10
■ Antivirus Software and Windows Defender on page11
Server Configurations
The following table lists the maximum available resources for three different SmartTAP 360°
Live server profiles and for the Media Proxy and Announcement servers.
● Resources refers to Audio, Video, Announcement and Screen Sharing licenses.
● When SmartTAP 360° Live server is deployed on Microsoft Azure, see
SmartTAP 360° Live for Microsoft Teams Requirements on page1
Figure 1-1: SmartTAP 360° Live Server
Server Specification Available Resources
SmartTAP 360° Live
server (Low Profile)
■ 2 Core 2.5 GHz
■ 6 GB Memory
■ 2 SATA 7200 RPM HDD/SSD*
■ PCIe slots FL / FH2**
50 resources (audio only)
25 resources when Media
Proxy Service is installed on
the same server (audio
only)
SmartTAP 360° Live
server (Medium Pro-
file)
■ 6 Cores 2 GHz****
■ 8 GB Memory
■ 2 SATA 7200 RPM HDD/SSD*
■ PCIe slots FL / FH2**
150 resources
50 resources when Media
Proxy Service is installed on
the same server (audio
only)
SmartTAP 360° Live
server*** (High Pro-
file)
■ 12 Core 2 GHz****
■ 14 GB Memory
■ 2 SATA 7200 RPM HDD/SSD*
■ PCIe slots FL / FH2**
300 resources
500 audio resources
Media Proxy
server***
■ Quad Core 2 GHz (300
resources)
■ 8 Core 2 GHz (500 audio
resources)
■ 8 GB Memory
■ SATA 7200 RPM HDD/SSD*
300 resources
500 audio resources
- 6 -

CHAPTER1 Hardware and Software Requirements
SmartTAP 360° Live | Installation Guide
Server Specification Available Resources
Announcement
server***
■ Quad Core 2 GHz
■ 8 GB Memory
■ SATA 7200 RPM HDD/SSD*
300 resources (assuming
the announcement length
does not exceed 20% of an
average call length)
*SmartTAP 360° Live server requires two dedicated HDDs/SSDs - one disk for the Windows OS,
SmartTAP 360° Live application software and DB. Another disk is required for the recorded
media. The application disk size should be large enough to hold the OS (refer to Microsoft doc-
umentation for the disk space requirements), application space and the DB space. Use the
SmartTAP storage calculator (see below)for application and DB size estimation. The size of the
media disk should be large enough to hold the media; the estimated size of the media can be
calculated using the SmartTAP storage calculator (see below). The media disk is required for
both local or remote media storage, in case of the temporarily media, make sure the media disk
has enough capacity to hold recordings’ media over a time that external storage may not be
accessible. When running the SmartTAP 360° Live Server in a virtual environment, the
HDDs/SSDs has to be dedicated and mapped to SmartTAP 360° Live server VM.
** PCIe Full Length / Full Height slots. The number of slots required is determined by the
number of Analog Stations required to record. Each card can record 24 channels (i.e., 56 Phones
will require three PCIe card slots).
*** A group of these servers can be deployed when more than the supported recording
capacity in one server is required. An additional high-end server is required to be deployed for
the Application Server and Database.
**** Higher CPU speed (higher than 2.0 GHz) is recommended to accelerate download and
playback for Video or Screen Sharing recorded calls.
● When running in a virtual environment, all specification resources in the table
above must be reserved for all servers of SmartTAP 360° Live.
● Dual GB NIC interfaces are required for VoIP Port Mirroring Integration
Configuration (this is not relevant for Skype for Business and SIP Recording).
● Playback performance depends on CPUavailability; slowness of the Web
interface may be experienced when there are insufficient CPUresources to
execute playback:
✔ For optimal audio playback performance, the number of concurrent
playbacks should not exceed the number of CPU cores - 1
✔ For optimal video playback performance, the number of concurrent
playbacks should not exceed the half the number of CPU cores
● Concurrent recording specifications should be equal to the maximum
simultaneous calls that can be made by the targeted users for recordings; this
includes all recording types e.g. Full Time Recording, Record on Demand, Save
on Demand.
- 7 -

CHAPTER1 Hardware and Software Requirements
SmartTAP 360° Live | Installation Guide
To determine the server specification, calculate the required available resources. The
calculation of the required resources is based on the number of licenses multiplied by one of
the factors specified in the table below.
Figure 1-2: License Factors
License Type Factor
Audio Recorder License 1
Video Recorder License 10
Announcement License 1
Screen Sharing License 5
■ Calculate the required number of resources on the SmartTAP 360° Live server and the
Media Proxy server according to the following formula:
Required Number of Resources = (Number of Audio Recorder Licenses)*(Audio Recorder
License Factor) + (Number of Video Recorder Licenses)*(Video Recorder License Factor) +
(Number of Screen Sharing Recorder Licenses)*(Screen Sharing Factor)
Choose the SmartTAP 360° Live server and Media Proxy server with the number of available
resources equal or higher than the required recording resources.
■ Calculate the required number of resources on the Announcement server according to the
following formula:
Required Number of Resources = (Number of Announcement Licenses)*(Announcement
License Factor)
Example 1: 100 Audio Recorder Licenses
■ Required Number of Resources = (100 Audio Recorder Licenses)*(1 Audio Recorder License
Factor) = 100
■ Choose Medium Profile SmartTAP 360° Live server and one Media Proxy server
Example 2: 30 Video Recorder Licenses
■ Required Number of Resources = (30 Video Recorder Licenses)*(10 Video Recorder License
Factor) = 300
■ Choose High Profile SmartTAP 360° Live server and one Media Proxy server
Example 3: 50 Audio Recorder Licenses and 20 Video Recorder Licenses
■ Required Number of Resources = (50 Audio Recorder Licenses)*(1 Audio Recorder License
Factor) + (20 Video Recorder Licenses)*(10 Video Recorder License Factor)= 50 + 200 = 250
■ Choose High Profile SmartTAP 360° Live server and one Media Proxy server
Example 4: 40 Audio Recorder Licenses
- 8 -

CHAPTER1 Hardware and Software Requirements
SmartTAP 360° Live | Installation Guide
■ Required Number of Resources = (40 Audio Recorder Licenses)*(1 Audio Recorder License
Factor) = 40
■ Choose either of the following:
● Medium Profile SmartTAP 360° Live server with Media Proxy service installed on the
SmartTAP 360° Live server
● Low Profile SmartTAP 360° Live server and separate Media Proxy server
Example 5: 200 Audio Recorder Licenses with Announcement
■ For SmartTAP 360° Live server and Media Proxy servers:
● Required Number of Resources = (200 Audio Recorder Licenses)*(1 Audio Recorder
License Factor) = 200
● Choose High Profile SmartTAP 360° Live server and one Media Proxy server
■ For Announcement server:
● Required Number of Resources = (200 Announcement Licenses)*(1 Announcement
License Factor) = 200
● Choose one Announcement server
Example 6: 50 Audio Recorder Licenses and 50 Screen Sharing Recorder Licenses
■ For SmartTAP 360° Live server and Media Proxy servers:
● Required Number of Resources = (50 Audio Recorder Licenses)*(1 Audio Recorder
License Factor) + (50 Screen Sharing Recorder Licenses)*(5 Screen Sharing Recorder
License Factor) = 300
● Choose High Profile SmartTAP 360° Live server and one Media Proxy server
Supported Virtual Machine (VM) Environments
VMware ESXi
■ Version 4.1 and higher (IP-based integrations only)
■ See Enabling Promiscuous Mode on VMWare ESXi on page204 for instructions on how to
enable promiscuous mode required for a SmartTAP 360° Live system that is monitoring
(tapping) the network.
Microsoft Hyper-V
■ Microsoft Windows Server 2019
■ Microsoft Windows Server 2016
■ Microsoft Windows Server 2012 R2
■ Microsoft Windows Server 2012 64bit
- 9 -

CHAPTER1 Hardware and Software Requirements
SmartTAP 360° Live | Installation Guide
Hyper-V does not support promiscuous mode. Do not use in Passive integration
environments.
Active / Standby Resiliency Configuration (Optional)
AudioCodes supports Microsoft Windows Clustering in the failover configuration, which
provides high available service to the SmartTAP application. To support this type of install, the
following is required:
■ Two identical Windows servers which meet the minimum specifications mentioned above.
■ A SAN (Storage Area Network) with iSCSI support.The SmartTAP cluster requires at least 2
Internet Small Computer System Interface (iSCSI) targets - one for the disk witness/quorum,
and another for the DB and shared application data. A 3
rd
iSCSI target “Optional” is
required for the media storage. SmartTAP should not be configured to write the media
directly to the 3
rd
media target; instead, it should be set as Media Transfer Service
destination.
Supported Microsoft Windows OSS
■ Microsoft Windows Server 2019
■ Microsoft Windows Server 2016
■ Microsoft Windows Server 2012 R2
Supported Microsoft Integrations
■ Microsoft Lync Server 2013
■ Skype for Business 2015
■ Skype for Business 2019
■ Microsoft Teams
SBA Integration
The SmartTAP 360 server with low-profile can be deployed on AudioCodes Mediant 1000B with
OSN Server (Mediant 1000B OSN4B 256 GB SSD) together with the Survivable Branch Appliance
(SBA) where the SBA is configured with up to 250 users and 8 trunks per branch.
Windows Updates
■ It is recommended to disable Automatic Windows Updates to prevent unknown side
effects.
■ AudioCodes only certifies major version Service Pack updates.
- 10 -

CHAPTER1 Hardware and Software Requirements
SmartTAP 360° Live | Installation Guide
Before applying Windows updates, ensure that a system backup is performed.
Installing Windows Updates
■ Schedule a maintenance window. SmartTAPdoes not record during this timeframe.
■ Download and install Windows updates.
■ Reboot the server, even if Windows does not ask you to reboot to finish installing updates.
■ Windows may continue installing updates after the system restart which may cause
instability within SmartTAP.
■ Once the Windows updates are complete, reboot the server again.
Antivirus Software and Windows Defender
■ No virus software is included with SmartTAP
■ No specific virus software is tested or certified
■ If installed, do not scan the following SmartTAPfolders and contents to prevent
performance impact:
● Media path: (i.e., Local D:\Media, SAN or NAS)
● …\Ai-Logix\
● ...\AudioCodes\
● ...\MySQL\
■ If installed, do not scan the following Teams BOT folders and contents to prevent
performance impact:
● C:\Program Files\Microsoft Service Fabric
● D:\SvcFab
● C:\ProgramData\SF
● C:\MiMedia
● C:\Program Files (86)\AudioCodes
■ For Windows Defender disable scanning the same file types and folders.
- 11 -

CHAPTER2 SmartTAP 360° Live License Management
SmartTAP 360° Live | Installation Guide
2 SmartTAP 360° Live License Management
This section describes the SmartTAP license process for creating and installing licenses on the
target system.
A license file must be generated for each integration type. For example, if the customer
requires Skype for Business and Microsoft Teams integrations, two separate license files must
be generated.See Managing Microsoft Teams Licenses in Mixed Integrations on the next page
for details regarding management of Teams licenses together with licenses for other integration
types.
See also License Upgrades for Legacy Integrations on page14
License File Creation
The figure below illustrates the license creation and installation process.
Figure 2-1: License Generator
1. Run the “GetSystemIdentifier.exe” file separately for each location. This file can be found in
the following locations:
● The default installation directory for the Call Delivery server is C:\Program Files
(x86)\AudioCodes\SmartTAP\CD-xx
where xx represents which type of Call Delivery is installed.
● The default installation directory for the License server installed On-premises is
C:\Program Files\AUDIOCODES\SmartTap\LicenseServer
● The default installation directory for the License server installed on Azure, refer to the
Microsoft Teams Deployment Guide.
When the above file is run, it installs a program “GetSystemIdentifier.exe” in the
installation directory. This program is automatically run and generates a file called “System-
[MachineName].dat” in the installation directory.
2. Extract the “System-[MachineName].dat” and sent to AudioCodes to create a license file
that is keyed to the customer’s hardware.
- 12 -

CHAPTER2 SmartTAP 360° Live License Management
SmartTAP 360° Live | Installation Guide
If the customer’s installation environment changes significantly, it may affect the
validation of the license file. If it becomes necessary to generate a new license file,
the “GetSystemIdentifer.exe” program can generate a new “System.dat” file simply by
double-clicking on the program. No other action is required.
3. Once the “System.dat” file is delivered to AudioCodes, an authorized employee creates a
license file using the purchased license counts from the Purchase Order.
License File Installation and Verification
Once a license file is generated, it is installed in the Call Delivery installation directory . This is
the same location as the “System.dat” file. The default installation directory locations are as
follows:
■ C:\Program Files (x86)\AudioCodes\SmartTAP\CD-xx
■ The default installation directory for the License server installed On-premises is C:\Program
Files\AUDIOCODES\SmartTap\LicenseServer
■ The default installation directory for the License server installed on Azure, refer to the
Microsoft Teams Deployment Guide.
Where xx represents the type of Call Delivery installed.
If there are multiple license files, it is important that each one is installed in the
location of its corresponding “System.dat” file. There is a one-to-one relationship
between “System.dat” and “license.lic”. If you are upgrading to Microsoft Teams
recording integration ensure that you regenerate the license files for each location
and override existing files.
The license file must be named “license.lic”. If it has been renamed to help clarify to which
system it belongs, the name must be changed back to “license.lic” before Call Delivery can load
it.
Call Delivery or License server must be restarted after the license file has been copied into the
installation directory. From this moment, the license will take effect (if it has been generated
correctly).
To verify the contents of the license file,refer to “Managing Licenses” in the SmartTAP 360° Live
Administrator Guide . The “Licenses” page under the “System” tab in the SmartTAP User
Interface display the license quantities and meta-data for each license file that is active in the
system. If the Customer Name is reported as “Demo”, then this indicates that the license has
not taken effect.
Managing Microsoft Teams Licenses in Mixed Integrations
When licenses are managed for both Microsoft Teams and other integrations then the same
process is used to create the license, however different components are used to manage the
- 13 -

CHAPTER2 SmartTAP 360° Live License Management
SmartTAP 360° Live | Installation Guide
licenses. For Microsoft Teams integration instances, the License server is used and for instances
for other integrations, the Call Delivery server is used.
The following describes the possible integration scenarios:
■ In mixed environments for separate clean standalone installations of either Microsoft
Teams and other integrations or both:
● Separate license files must be created and then installed on the License server
● Separate license files must be created and then installed on the Call Delivery server/s
Each generated licenses file must configure the same number of audio targets and audio
and video targets which represent the total number of targets in all integrations. These
totals are displayed in the SmartTAPWeb Licenses page. Target licenses can then be
allocated to users in this page (see Section"Managing Licenses in the
SmartTAPAdministrator Guide").
For example in a Microsoft Teams and Skype for Business integration with the following
data (Targeted User Licenses):
◆ Microsoft Teams: Audio Targets=100, Audio and Video targets=20
◆ Skype for Business: Audio Targets=100, Audio and Video targets=20
Both license files are configured as follows: Audio Targets=200, Audio and Video targets=40
■ In mixed environments where users are upgraded from Skype for Business to Microsoft
Teams:
● A new license file must be created and installed on the License server for Microsoft
Teams integration.
● Separate license files must be regenerated on the Call Delivery server/s where the
number of .target licenses represents the total number of targets in all integrations.
License Upgrades for Legacy Integrations
In general, SmartTAP 360° Live components are designed to be backward compatible regarding
license files. Therefore, when performing an upgrade from one SmartTAP 360° Live version to
another, it is generally not necessary to make any licensing changes with the following
exceptions:
■ If you are moving any licensed component (like Call Delivery) to another server or virtual
machine, you will need to collect a new system.dat file and regenerate the license file. This
might occur if you are changing the type of recording solution or the type of PBX being
recorded.
■ When adding one or more additional RDDs (Remote Data Delivery) as part of the upgrade,
treat the additional RDD(s) as new installations and generate license files as described for
new installations.
Prior to SmartTAP 360° Live 4.0, Call Delivery was licensed through SmartWORKS Service. For
such systems, the license file was stored in the SmartWORKS installation directory. During the
- 14 -

CHAPTER2 SmartTAP 360° Live License Management
SmartTAP 360° Live | Installation Guide
upgrade, the license file is automatically copied into the Call Delivery installation directory with
no changes, and Call Delivery will function as it did prior to the upgrade. There is no
intervention required in this case. License files located in the SmartWORKS installation directory
for SmartTAP 360° Live 4.0 and higher are ignored.
A special case occurs if the upgrade involves a SmartTAP 360° Live solution that includes Media
Delivery from a version prior to version 4.0. Before SmartTAP 360° Live 4.0, Media Delivery
relied on SmartWORKS Service, which required a license file. Beginning with SmartTAP 360° Live
4.0, Media Delivery no longer uses SmartWORKS Service and does not require a license file.
Media Delivery will ignore a license file if one is present. Its behavior is controlled by the
licenses residing with Call Delivery-IP. A new license file must be generated for CD-IP with
sufficient licenses for all of the Media Delivery components to which it communicates. The
exact license counts will depend on the customer’s existing solution.
Figure 2-2: SmartTAP 360° Live Upgrades
For upgrades of CD- SIPREC prior to SmartTAP 360° Live 4.0, a new license file must be
generated according to the license quantities originally purchased by the customer. This is done
in the same manner as for the CD-IP, which is described above.
- 15 -

CHAPTER3 Before Installing SmartTAP 360° Live
SmartTAP 360° Live | Installation Guide
3 Before Installing SmartTAP 360° Live
This chapter describes important information that you should note prior to installing SmartTAP
360° Live.
SmartTAP 360° Live Software Package Contents
The installation package must be copied to a directory on the server where the SmartTAP 360°
Live software is to be installed.
Figure 3-1: Package Contents (Root Folder)
Contents Description
Microsoft Teams Contains relevant modules as part of the Distributed Method
(see Microsoft Teams Installation on page41). For
components installed on Microsoft Azure, refer to the
Microsoft Teams Deployment Guide.
Microsoft Lync and Skype
for Business
Contains Microsoft Lync 2013, and Skype-for-Business plugin
installers for Front End Server or SBA
REST API Documentation Contains web based reference material for REST API
RESTApiWrapperLibrary Contains C# library and web based reference. Use instead of
native REST
Suite Describes the main SmartTAP 360° Live installation package
folder
Tools Contains various utilities for installing and troubleshooting
SmartTAP 360° Live
SmartTAP 360° Live
Release Notes.pdf
Describes the new features, issues resolved and any known
issues for the SmartTAP 360° Live software release.
SmartTAP 360° Live
InstallationGuide.pdf
Defines the Installation setup for the SmartTAP 360° Live
software.
Installation Prerequisites
Before running the installation wizard, the following prerequisites must be met:
- 16 -

CHAPTER3 Before Installing SmartTAP 360° Live
SmartTAP 360° Live | Installation Guide
For each machine with a Database or Communication Server installed, there must
have at least 12 GB on the drive where "mysql" is installed. View the installation path
for "mysql" by opening the Services window and viewing the executable path.
■ Base Windows 64 bit operating system installation complete without any additional
software or features enabled
■ Specific SmartTAP 360° Live hardware must be plugged into the server
■ “Optional” PCI cards for Analog Station recording
■ Specific SmartTAP 360° Live network tapping hardware/software must be setup:
● Depending upon the integration method, Port SPAN/Port Mirror configured and cable
with spanned/mirrored traffic connected to the NIC(s) ports that will be recording
● “Optional” PCI card with cabling connected to the tapping hardware on the customer
premises
■ Host Server Microsoft SNMP Agent must be installed on the Storage server if different from
the SmartTAP server for storage statistics and on the servers in branches (RDD) for system
health presentation (for more information, see Configure Microsoft SNMP Service on
page205).
■ Ensure that the Windows PowerShell script execution policy is set as follows on all of the
servers where SmartTAP 360° Live components are installed:
● Group Policy “Unrestricted”
● If Group Policy is not defined, the execution policy of the logged CurrentUser or
LocalMachine should be either Unrestricted or RemoteSigned .
● To check the execution policy, run the following command:
PS> Get-ExecutionPolicy -list
● To change the execution policy, you can run the following commands:
PS> Set-ExecutionPolicy -scope CurrentUser Unrestricted
PS> Set-ExecutionPolicy Unrestricted PS> Set-ExecutionPolicy -scope
LocalMachine Unrestricted
If the permissions are insufficient, the following message is displayed during the
installation:
- 17 -

CHAPTER3 Before Installing SmartTAP 360° Live
SmartTAP 360° Live | Installation Guide
Figure 3-2: PowerShell Script Execution Policy
■ Do one of the following:
a. If you are sure that you have set the correct execution policy, click Yes to continue.
b. If you would like to test your policy settings, click No and restart the installation.
Installation Wizard Methods
The installation package is divided into multiple elements and typically installed on one server;
however, can be installed on multiple servers depending upon customer requirements. An
Installation Wizard is provided to install SmartTAP 360° Live with one of these configuration as
follows:
■ All-In-One installation for a Single server installation platform
■ Distributed installation for a Multi-server installation platform
All-In-One
This method installs the following default SmartTAP components in a single Wizard process,
including recording and integration components. For more information, proceed to
ChapterInstallation Wizard - All-In-One Method on page20 (recording components and Chapter
Integration Configuration on page141 (integration components).
Distributed
The Distributed method allows you to perform Standalone installations of the separate
installation components. You may wish to use a Distributed installation for any of the following
reasons:
■ If you need to add/remove a specific component
■ If you need to setup survivable recording at SBA location (SmartTAP RDD)
■ If you need to install SmartTAP Media Proxy or Announcement Server for Skype for
Business.
- 18 -

CHAPTER3 Before Installing SmartTAP 360° Live
SmartTAP 360° Live | Installation Guide
■ If some SmartTAP elements will reside on different servers.
■ If you are installing Analog Station Integration.
■ If you are installing SIPRec.
■ If you wish to perform call monitoring in Skype for Business deployments, you can install
the Monitoring Service
■ Upgrade of the suite to Microsoft Teams requires the installation of the License Server and
Call-Delivery Live components (for recording Teams Instant Chat Messages).
This installation method assumes that each SmartTAP component will be installed on
a separate physical or virtual server.
■ Proceed to Chapter Installation Wizard - Distributed Method on page38.
Post Installation Actions
After you have successfully installed SmartTAP 360° Live using one of the methods described
above, there are additional actions required to fully setup the SmartTAP 360° Live network.
■ Configure Firewall rules: The deployment of the SmartTAP 360° Live servers may have to
comply with customer security policies, which require the implementation of firewall rules.
You need to configure these rules in the Enterprise. See Chapter Firewall Configuration on
page65.
■ Integrate SmartTAP 360° Live with other network components:
● Skype for Business (see Microsoft Skype for Business Deployment on page76)
● SIPRec (see Section)SIP Recording (SIPRec) on page157
● Analog trunk/radio (see Analog Trunk / Radio on page147
■ VoIP Port Mirroring to receive the unencrypted Signaling and RTP from different IP PBX
station side-tapping configurations using a mirror port or network tap appliance (see VoIP
Port Mirroring on page141
■ Additional Configuration options:
● Configuration Digital Signatures (see Configuring Digital Signatures on page169 )
● Configuring LDAP (see Configuring LDAP on page170 )
● Configuring SSO (see Configuring SSO on page171)
● Configuring HTTP/S (see Configuring HTTP/S on page171)
■ At the end of a clean installation, upgrade or maintenance update, the installer process
goes to the "PostInstallation" folder, scans the files with the extensions exe,bat and ps1and
runs each one of them in alphabetical order. AS host.properties automatically includes
multicast IP addresses in _PostInstallation folder.
- 19 -
CHAPTER4 Installation Wizard - All-In-One Method
SmartTAP 360° Live | Installation Guide
4 Installation Wizard - All-In-One Method
The installation package is divided into multiple elements and typically installed on one server;
however, can be installed on multiple servers depending upon customer requirements. This
chapter describes the most common SmartTAP 360° Live installation on a single server.
● See Installation Wizard - Distributed Method on page38 for installations that
involve more than one SmartTAP 360° Live server.
● If you are running a clean installation or upgrade, you may be prompted to restart
the server. In this case, the installer prompts for a server restart; perform this
action and then upon completion, run the installation script again.
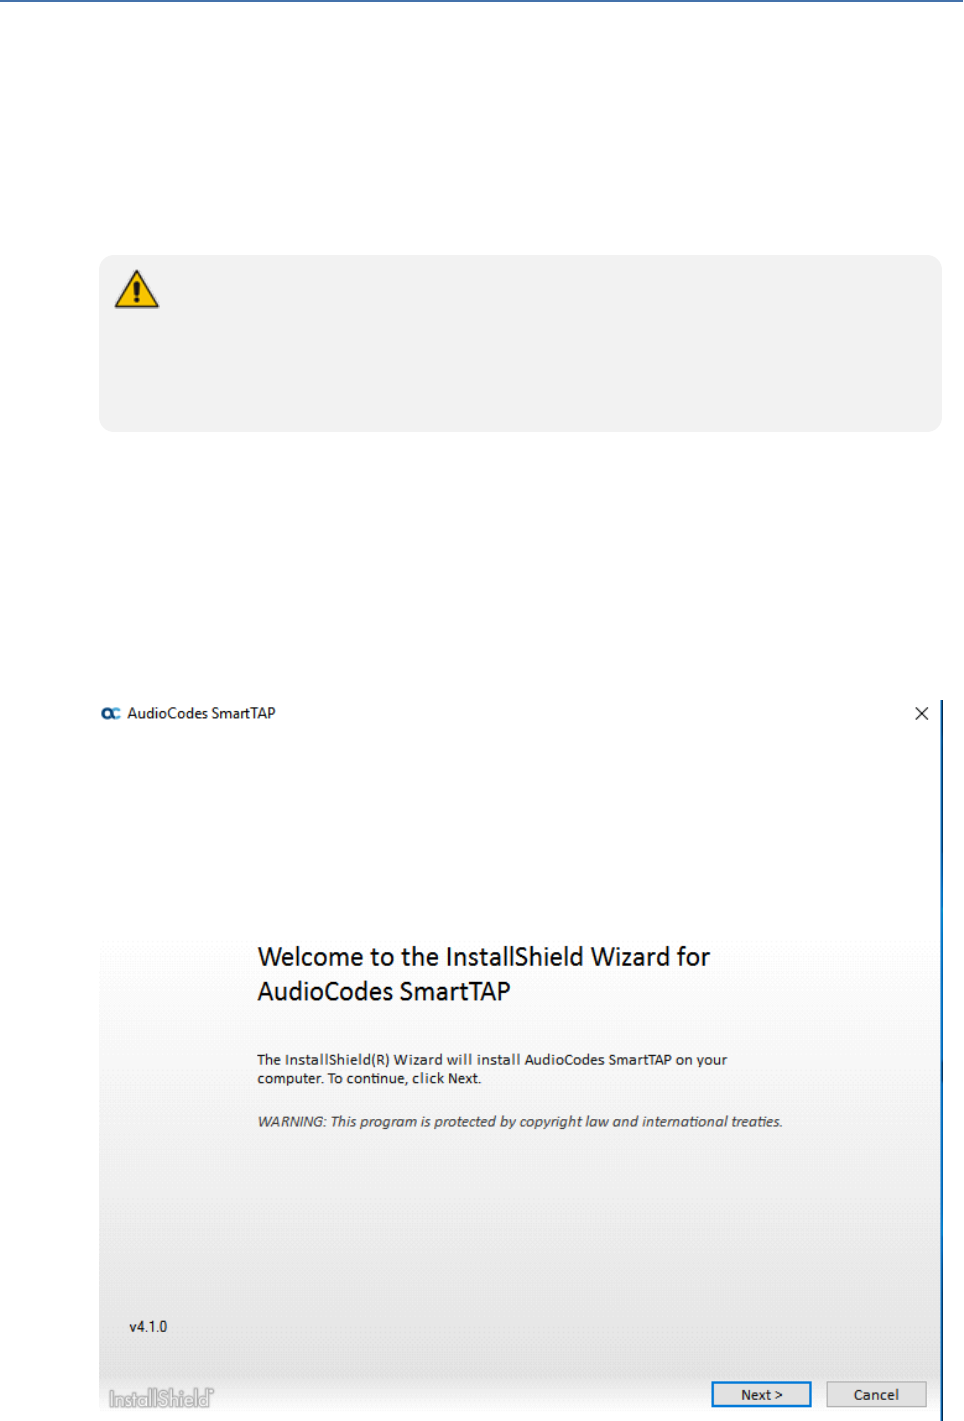
➢ To install SmartTAP 360° Live:
1. Verify all prerequisites for the installation are met before moving forward with the
installation.
2. Launch install.bat from the “Suite” folder.
3. Click Next to continue.
Figure 4-1: Installation Wizard
- 20 -
CHAPTER4 Installation Wizard - All-In-One Method
SmartTAP 360° Live | Installation Guide
4. Click Next after accepting SmartWORKS license.
5. Click Next after accepting SmartTAP 360° Live license.
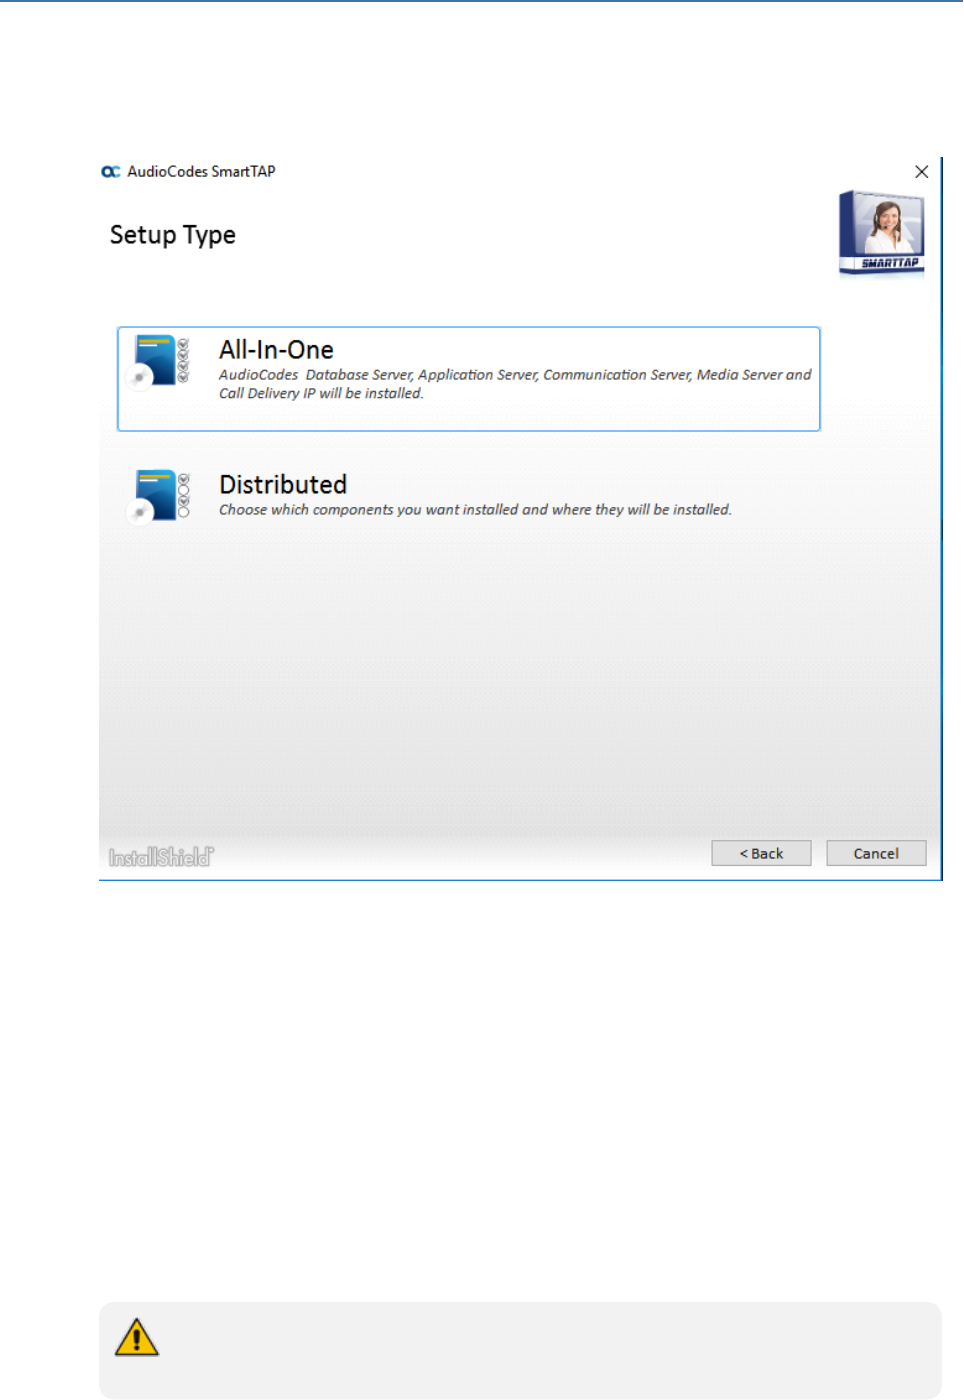
Figure 4-2: Setup Type
6. Select All-In-One:refer to the following sections:
● Installing Database Service (Database Service on the next page)
● Installing Application Server (AS) (Installing the Application Service on page24)
● Installing Communication Server (CS) (Installing the Communication Service on
page29)
● Installing the Call Delivery Service (CD) (Installing SmartTAP Call Delivery IP-Server on
page51)
● Installing Media Server (MS) (Installing the Media Server on page32)
● Installing the Remote Transfer Service (Installing the Remote Transfer Service on
page34)
For the installation of these components, unless otherwise specified, accept defaults
shown.
- 21 -
CHAPTER4 Installation Wizard - All-In-One Method
SmartTAP 360° Live | Installation Guide
Database Service
The Database installation starts in the proper sequence when all or multiple services are
selected on the installer menu.
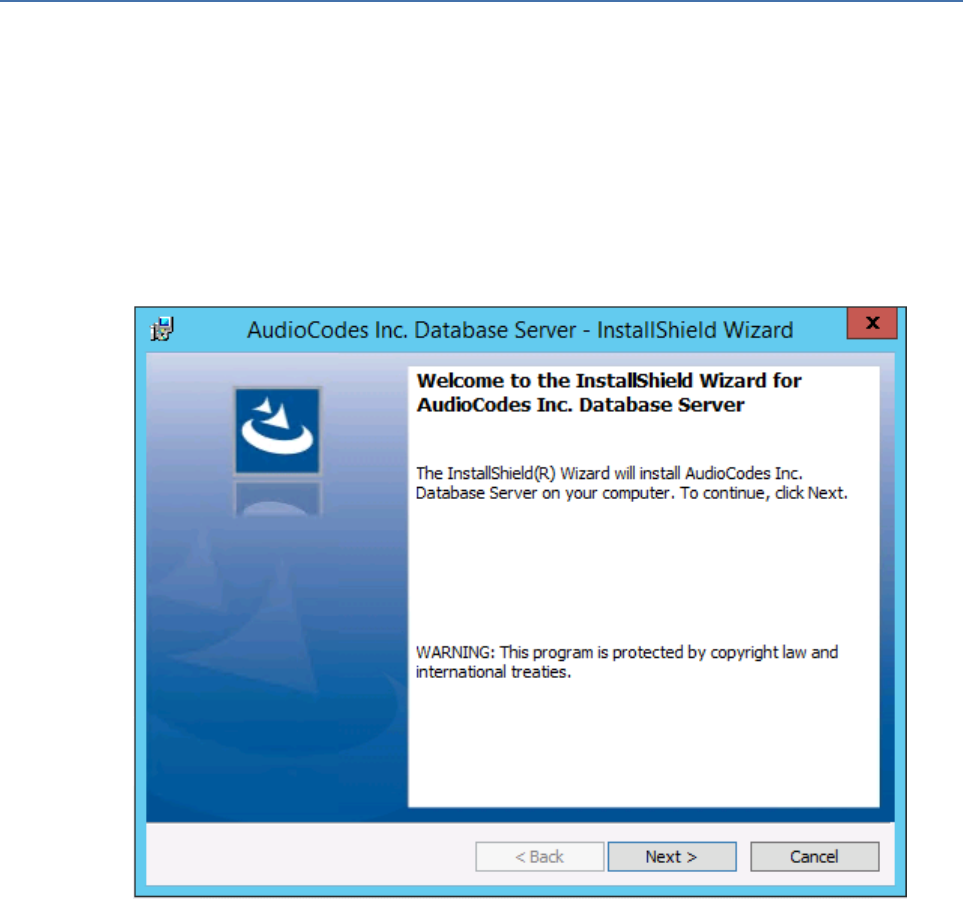
➢ To install the database service:
1. When the Database Server Installation wizard starts, click Next to install.
Figure 4-3: Database Server Installation Wizard
2. Select Complete.
- 22 -

CHAPTER4 Installation Wizard - All-In-One Method
SmartTAP 360° Live | Installation Guide
Figure 4-4: Setup Type
3. Select the path to MySql database and then click Next.
Figure 4-5: Database Path
4. Click Install.
- 23 -

CHAPTER4 Installation Wizard - All-In-One Method
SmartTAP 360° Live | Installation Guide
5. Click Finish.
● For setting up clustered configurations of the database, please contact
AudioCodes Technical Support for further information.
● When upgrading from SmartTAP 1.8.x through SmartTAP 2.2.x, you need to
manually check for the following registry key and add it if it is not present:
HKLM\SOFTWARE\Wow6432Node\Audiocodes\SmartTAP\DB\InstallDirectory=
…\MySql\MySql Server 5.0\
This is a value of type “String”. You must replace the path to MySql with the real
path on the existing system. It is important to leave the trailing backslash in place.
Once this is performed, the upgrade of the database can proceed successfully.
Installing the Application Service
The Application Service is essentially a Web server responsible for user access, management
and database control.
■ The database must be installed before proceeding.
■ This procedure also runs a silent installation of the OVOC Main Agent and OVOC Client
Agent which are used for sending alarms and status updates to the OVOCManagement
server. For more information, refer to the SmartTAP 360° Live Administrator Guide.
SNMP Trap Service must be disabled on SmartTAP servers running the Application
Server component.
➢ To install the Application service:
1. The Application Service installation starts in the proper sequence when all or multiple
services are selected on the installer menu.
2. When the Application Server installation wizard starts, click Next to install.
- 24 -

CHAPTER4 Installation Wizard - All-In-One Method
SmartTAP 360° Live | Installation Guide
Figure 4-6: Application Server Installation Wizard
If you are installing from the Suite, then the following screen may not be displayed.
- 25 -

CHAPTER4 Installation Wizard - All-In-One Method
SmartTAP 360° Live | Installation Guide
Figure 4-7: License Agreement
3. Select the “I accept the terms in the license agreement” check box and click Next.
If you are performing an upgrade, the screen below is not displayed.
- 26 -

CHAPTER4 Installation Wizard - All-In-One Method
SmartTAP 360° Live | Installation Guide
Figure 4-8: Application Information
4. Enter the IP address of the Application Server location and the IP address of the Database
location. The IP addresses should be external i.e. not the IP address of the local host. Click
Next to proceed.
Figure 4-9: Setup Type
5. Select one of the following setup types and then click Next:
- 27 -

CHAPTER4 Installation Wizard - All-In-One Method
SmartTAP 360° Live | Installation Guide
● Complete: Install to the default location: C:\Program Files\AudioCodes\SmartTAP\AS
● Custom: Change the destination location
Figure 4-10: Ready to Install
6. Click Install.
Figure 4-11: Complete Installation
- 28 -

CHAPTER4 Installation Wizard - All-In-One Method
SmartTAP 360° Live | Installation Guide
7. Click Finish.
Installing the Communication Service
The Communication Service acts like a SIP proxy and registrar to control connectivity and load
balancing between the Call Delivery devices and the Media Servers.
For setting up an HTTPSconnection between the SmartTAPApplication server and
the Communication Service, see Configuring SmartTAP 360° Live Components for
HTTPS on page172.
➢ To install the Communication Service:
1. The database must be installed first before continuing.
2. The Communication Service installation starts in the proper sequence when all or multiple
services are selected on the installer menu.
3. When the Communication Server installation wizard starts click Next to install.
Figure 4-12: Communication Server
4. Accept ALL defaults.
5. During the installation you are prompted to enter the IP address of the Application server.
6. Click Install.
7. Click Finish.
- 29 -

CHAPTER4 Installation Wizard - All-In-One Method
SmartTAP 360° Live | Installation Guide
Installing the Call Delivery Service
The Call Delivery is responsible for passively tapping or actively connecting to the telephony
environment and then determining which calls to record using the dynamic state machine and
target list. A separate Call Delivery Service will be installed for each telephony environment.
The All-In-One SmartTAP install will automatically install the CD-IP Call Delivery for IP PBX
recording environments like Skype for Business, Cisco, SIP, NEC, Siemens, etc.
For setting up an HTTPSconnection between the SmartTAPApplication server and
the Call Delivery Service, see Configuring SmartTAP 360° Live Components for
HTTPS on page172.
➢ To install the Call Delivery Service:
1. When the CallDelivery-IP installation wizard starts click Next to install.
Figure 4-13: Call Delivery Service
2. Select Network Integration Type - (Skype for Business or Other).
- 30 -

CHAPTER4 Installation Wizard - All-In-One Method
SmartTAP 360° Live | Installation Guide
Figure 4-14: Select Network Type
3. Click Next
4. To finish the CD-IP installation, choose one of the following:
● Skype for Business– See Installing Call Delivery for Skype for Business (IP-based
Recording) on page101
● Other (VoIP Port Mirror) – See Call Delivery Install for VoIP (Port Mirror) on page142
- 31 -
CHAPTER4 Installation Wizard - All-In-One Method
SmartTAP 360° Live | Installation Guide
Applies to CD-IP only:After upgrading SmartTAP 360° Live, make sure that the Call
Delivery configuration is set to the actual IP address of the servers. Using local host,
or 127.0.0.1, will no longer work correctly, although it was valid in previous versions of
SmartTAP 360° Live.
The “localIp” parameter should be set to the IP address of the Call Delivery server
where this software is installed.
The “trapDestIP” and “recorder ip” parameters should be set to the IP address where
the Application Server is installed, which may or may not be the same server.
Manually edit this section of the calldeliveryconfig.xml file:
<snmp> <network localIp=“CDRealIP" port="11161" name="SWCallDelivery"
oid="1.3.6.1.4.1.5003.9.40.1.1.2" trapDestIp=“ASRealIP" /> </snmp>
<applicationServer> <recorder
ip
="ASRealIP"
port
="80"> <protocols> <protocol>http</protocol> </protocols> </recorder>
</applicationServer>
Installing the Media Server
The Media Server is responsible for writing to file storage the incoming RTP stream from the
Call Delivery, encrypting and compressing the data.
For setting up an HTTPSconnection between the SmartTAPApplication server and
the Media Server, see Configuring SmartTAP 360° Live Components for HTTPS on
page172
➢ To install the Media Server:
1. The Media Server installation starts in the proper sequence when all or multiple services
are selected on the installer menu.
2. When the Media Server installation wizard starts, click Next to install.
- 32 -

CHAPTER4 Installation Wizard - All-In-One Method
SmartTAP 360° Live | Installation Guide
Figure 4-15: Media Server
3. Select the IP Address of the SmartTAP Server from the "Monitoring IP Address" drop-down
box.
4. In the Distributed or Remote Branch deployment, enter the real IP address for the
Communication and Application Servers.
5. In the all-in-one deployment you can leave the default 127.0.0.1 address or type in the
server IP address.
- 33 -

CHAPTER4 Installation Wizard - All-In-One Method
SmartTAP 360° Live | Installation Guide
Figure 4-16: Media Server Configuration
6. Click Next.
7. Click Install.
8. Click Finish.
Installing the Remote Transfer Service
This section describes how to install the Remote Transfer Service (RTS).
The installation script installs Microsoft .NETFramework Version 4.7.
➢ To install the RTS:
1. The RTS installation starts in the proper sequence when all or multiple services are selected
on the installer menu.
2. When the RTS installation wizard starts, click Next to install.
- 34 -

CHAPTER4 Installation Wizard - All-In-One Method
SmartTAP 360° Live | Installation Guide
Figure 4-17: RTS Configuration
3. Enter the following parameters and then click Next:
● Application Server IP address
● Transfer File Location (Location of Bin folder of installed MS component)
● Application Server Protocol (HTTP or HTTPS)
- 35 -

CHAPTER4 Installation Wizard - All-In-One Method
SmartTAP 360° Live | Installation Guide
Figure 4-18: Setup Type
4. Click Next to complete the installation.
Completing Wizard Installation
When the installer completes the installation of all the software components, a dialog window
appears indicating that the installation has completed.
1. When the installer completes the following screen appears:
- 36 -

CHAPTER4 Installation Wizard - All-In-One Method
SmartTAP 360° Live | Installation Guide
Figure 4-19: InstallShield Wizard Completed
2. Click Finish to exit the installer.
3. Proceed to Integration Configuration on page141 to complete the integration
configuration steps required before the server is ready to record calls.
Post-Installation Integration
At this point in the installation, the software is running on the server. However, the SmartTAP
360° Live recorder needs additional integration specific configuration before it is capable of
recording calls. This integration is described in Chapter Integration Configuration on page141.
- 37 -

CHAPTER5 Installation Wizard - Distributed Method
SmartTAP 360° Live | Installation Guide
5 Installation Wizard - Distributed Method
This Chapter describes the Distributed method for installing SmartTAP 360° Live.
● This installation method assumes that each SmartTAP 360° Live component will
be installed on a separate physical or virtual server.
● If you are running a clean installation or upgrade, you may be prompted to restart
the server. In this case, the installer prompts for a server restart; perform this
action and then upon completion, run the installation script again.
➢ To install the distributed method:
1. Launch install.bat from the “Suite” folder.
2. Click Next to continue.
Figure 5-1: InstallShield Wizard SmartTAP
3. Click Next after accepting SmartWORKS license.
4. Click Next after accepting SmartTAP license.
- 38 -

CHAPTER5 Installation Wizard - Distributed Method
SmartTAP 360° Live | Installation Guide
Figure 5-2: Setup Type
5. Select the Distributed installation option.
- 39 -

CHAPTER5 Installation Wizard - Distributed Method
SmartTAP 360° Live | Installation Guide
Figure 5-3: Custom Setup
6. Select the software components that you wish to install:
● Installing SmartTAP 360° Live Application Server Installation (Installing SmartTAP 360°
Live Application Server on page43)
● Installing SmartTAP 360° Live Communication Server (Installing SmartTAP
Communication Server on page43)
● Installing SmartTAP Database Server (Installing SmartTAP Database Server on page42)
● Installing SmartTAP 360° Live Media Server (Installing SmartTAP Media Server on
page44)
● Installing Announcement Server (Installing Announcement Server on page123)
● Installing Call Delivery AL (Analog Trunk / Radio on page147)
● Installing SmartTAP 360° Live Call Delivery IP-Server (Installing SmartTAP Call Delivery
IP-Server on page51)
● Installing the CD-Live Component (Installing CD-Live Component)
● Installing Call Delivery SIPREC (Installing SmartTAP 360° Live for SIP Recording on
page161)
- 40 -

CHAPTER5 Installation Wizard - Distributed Method
SmartTAP 360° Live | Installation Guide
● Installing Media Delivery (Installing Media Delivery Server for Skype for Business on
page122)
● Installing Media Proxy (Installing Media Proxy Server for Skype for Business on
page114)
● Installing Monitoring Service (Installing SmartTAP Monitoring Service on page135)
● Installing License Server (Microsoft Teams only) (Installing the License Server on
page61)
Microsoft Teams Installation
SmartTAP Live for Microsoft Teams is installed using the Distributed Method; the following com-
ponents must be installed in your Microsoft Teams deployment; these components may option-
ally be installed on separate Virtual Machines:
■ Application Server Installation (Installing SmartTAP 360° Live Application Server on page43)
■ Database Server (Installing SmartTAP Database Server on the next page)
■ License Server (must be selected when upgrading to version 5.4 in a Teams environment)
(Installing the License Server on page61).
■ Installing the CD-Live Component (Installing CD-Live Component)
This component is only required if you wish to record Teams Instant Messaging chat
recording.
In addition, the Remote Transfer Service is installed separately as a Standalone installation
component (see Installing the Remote Transfer Service (Installing the Remote Transfer Service
on page34). This component is installed as part of the BoT and needs to be upgraded and
configured as part of the installation or in the post installation (for version 5.4 and later).
■ For customers performing upgrade: Other components that are not required for Microsoft
Teams integration need to be unchecked and as a result those components currently in use
will be disabled automatically.
■ For customers performing a fresh install: Uncheck the following components that are not
required for Microsoft Teams integration:
● Announcement Server (Installing Announcement Server on page123)
● Installing Call Delivery AL (Analog Trunk / Radio on page147)
● Call Delivery IP-Server (Installing SmartTAP Call Delivery IP-Server on page51)
● Installing Call Delivery SIPREC (Installing SmartTAP 360° Live for SIP Recording on
page161)
● Installing Media Delivery (Installing Media Delivery Server for Skype for Business on
page122)
- 41 -

CHAPTER5 Installation Wizard - Distributed Method
SmartTAP 360° Live | Installation Guide
● Installing Media Proxy (Installing Media Proxy Server for Skype for Business on
page114)
● Installing Monitoring Service (Installing SmartTAP Monitoring Service on page135)
● Installing SmartTAP 360° Live Communication Server (Installing SmartTAP
Communication Server on the next page)
● Installing SmartTAP 360° Live Media Server (Installing SmartTAP Media Server on
page44)
Installing SmartTAP Database Server
This section describes the database service software installation.
It is highly recommended to configure the Firewall with the required ports to ensure
proper communication prior to the software installation. See Firewall Configuration on
page65.
➢ To install the database service software:
1. Run the Install.bat from the SmartTAP “Suite\” folder.
2. Select the Distributed software Custom Setup type.
3. Select the AudioCodes Inc. Database Server option.
4. Click Install.
5. Click Next to continue.
6. Select Complete, and then click Next to continue.
7. Click Install.
8. Click Finish to complete the installation.
Database Service Configuration
The database is configured automatically during the installation of the AS.
- 42 -

CHAPTER5 Installation Wizard - Distributed Method
SmartTAP 360° Live | Installation Guide
Installing SmartTAP 360° Live Application Server
● During an upgrade of the Application Server, the installers may mistakenly stop
and ask the user to choose between a “Complete” and “Custom” installation. If
the component was installed to a custom location, make sure the correct location
is still set in the “Custom” dialog box.”
● It is highly recommended to configure the Firewall with the required ports to
ensure proper communication prior to the software installation. See Firewall
Configuration on page65
● This procedure also runs a silent installation of the OVOC Main Agent and OVOC
Client Agent that are used to manage alarms and status updates that are sent to
OVOC management server. Refer to the SmartTAPAdministrator Guide.
➢ To install the Application Service:
1. Verify that the (DB) Database Server is installed and the MySQL service is running.
2. Run the Install.bat from the SmartTAP “..\Suite\” folder.
3. Select the Distributed software Custom Setup type.
4. Select the AudioCodes Inc. Application Server option.
5. Click Next.
6. Change the Database Server IP from "127.0.0.1" to the IP of the Database Server.
7. Click Next.
8. Select Complete, and then click Next to continue.
9. Click Install.
10. Click Finish to complete the installation.
Installing SmartTAP Communication Server
● During an upgrade of the Communication Server, the installers may mistakenly
stop and ask the user to choose between a “Complete” and “Custom”
installation.If the component was installed to a custom location, make sure the
correct location is still set in the “Custom” dialog box.”
● It is highly recommended to configure the Firewall with the required ports to
ensure proper communication prior to the software installation. See Firewall
Configuration on page65
➢ To install the Communication Server:
1. Run the Install.bat from the SmartTAP “Suite\” folder.
2. Select the Distributed software Custom Setup type.
3. Select the AudioCodes Inc. Communication Server option.
- 43 -

CHAPTER5 Installation Wizard - Distributed Method
SmartTAP 360° Live | Installation Guide
4. Click Install button to continue.
5. Click Next to continue.
6. Enter the "Application Server Name or IP” when prompted.
7. Enter the “Media Server Name or IP” when prompted.
8. Enter the “Database Server Name or IP” when prompted.
9. Since the Master DB is remote, the CS installation will install a local Slave DB with the CS.
10. The Slave DB will automatically connect to the Master DB.
11. Select Complete, and then click Next to continue.
12. Click Install.
13. Click Finish to complete the installation.
Installing SmartTAP Media Server
● The transfer of the media files between the Media Server, Application Server,
and File Server (SAN/NAS) is accomplished by using the windows SHARE
(SMB) facilities; to configure credentials for accessing an SMBaccount, see refer
to Section Configuring User Credentials for Microsoft Teams Deployments in the
SmartTAPAdministrators Guide..
● It is highly recommended to configure the Firewall with the required ports to
ensure proper communication prior to the software installation. See Firewall
Configuration on page65.
➢ To install the Media Server:
1. Run the Install.bat from the SmartTAP “Suite\” folder.
2. Select the Distributed software Custom Setup type.
3. Check on AudioCodes Inc. Media Server option.
4. Click Install to continue.
5. Click Next to continue.
6. Select the Monitoring IP Address from the drop-down list.
● Typically the IP of the physical or virtual server.
● The Monitoring IP Address is the IP address of the interface that listens for the RTP
media to be recorded. This RTP media is sent from the Call Delivery Server, Media
Delivery or Media Proxy depending upon deployment solution.
7. Enter the Communication Server IP Address when prompted.
8. Enter the Application Server IP Address when prompted.
9. Select Complete, and then click Next to continue.
- 44 -

CHAPTER5 Installation Wizard - Distributed Method
SmartTAP 360° Live | Installation Guide
10. Click Install to continue.
11. Click Finish to complete the installation.
Media Server Configuration
This procedure is not relevant if the media files are stored on the same server as the
Media Server.
Network File Server
This section describes how to create a user account for SmartTAP 360° Live on the domain. For
example “SmartTAPUser” for the Network File server.
➢ To setup the network file server accounts:
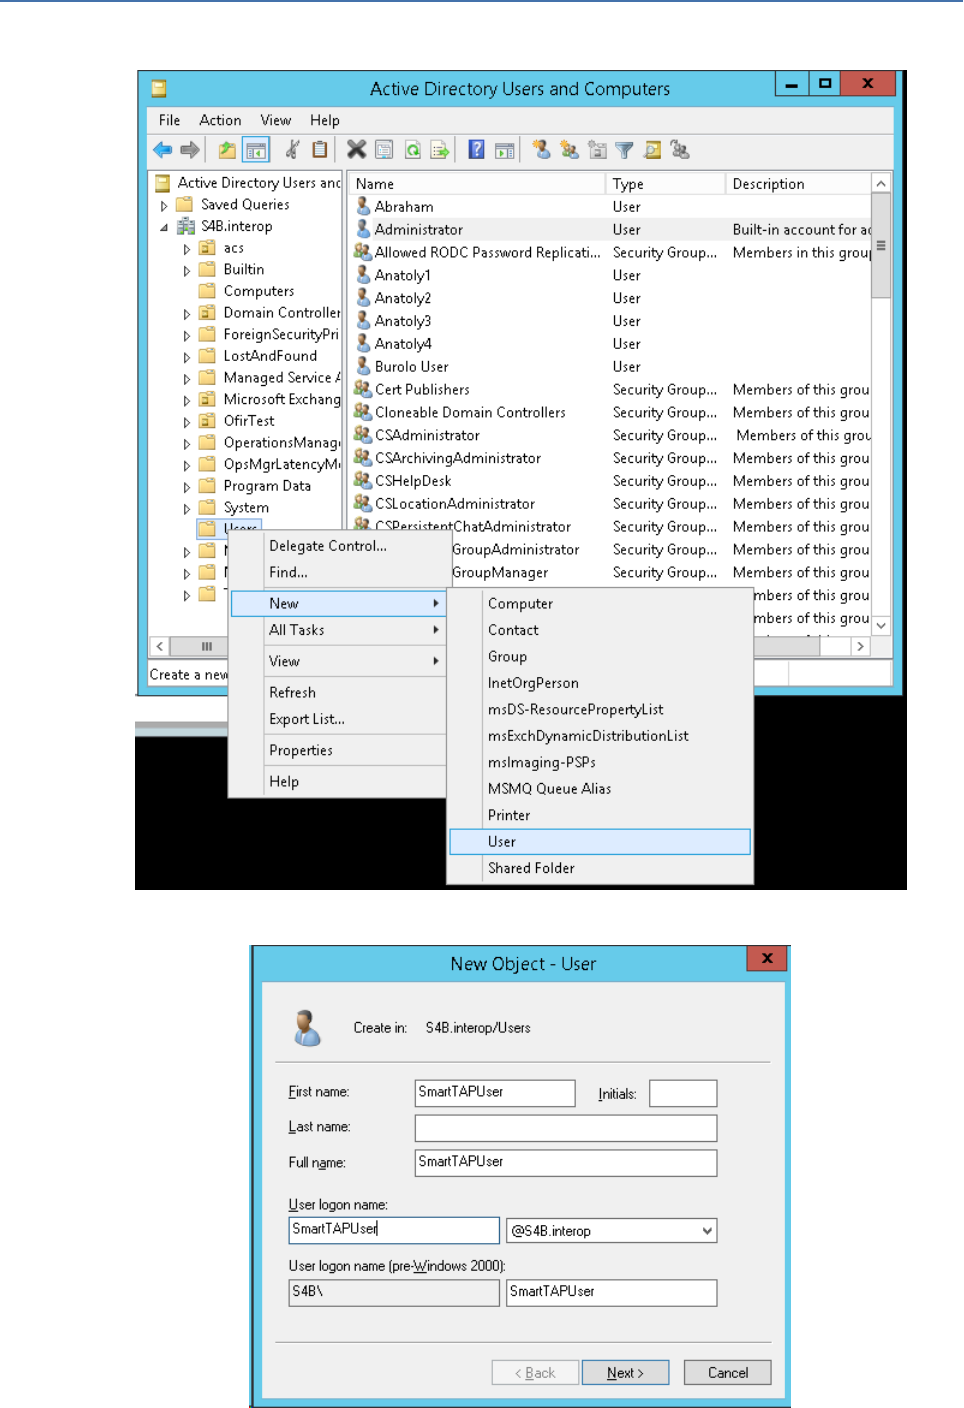
1. In the Active Directory Users and Computers folder, select the Users folder and then right-
click New > User.
- 45 -
CHAPTER5 Installation Wizard - Distributed Method
SmartTAP 360° Live | Installation Guide
Figure 5-4: Active Directory Users and Computers
Figure 5-5: New SmartTAP 360° Live User
- 46 -

CHAPTER5 Installation Wizard - Distributed Method
SmartTAP 360° Live | Installation Guide
2. Enter the name of the SmartTAP 360° Live user in the First Name and User logon name
fields and click Next.
Figure 5-6: Password Never Expires
3. Enter a password, select the “Password never expires” check box and click Next.
The following confirmation dialog is displayed:
Figure 5-7: User Add Confirmation
4. Click Finish.
5. Right-click the newly created user, choose Properties and click the Security tab.
- 47 -

CHAPTER5 Installation Wizard - Distributed Method
SmartTAP 360° Live | Installation Guide
Figure 5-8: Assign Read and Write Permissions
6. Assign “Read” and “Write” permissions and click OK.
7. Log in to the Media server as user “SmartTAP 360° Live”.
8. Access the SmartTAP 360° Live shared media storage in the File server.
9. Create, edit, and delete a test file in the storage directory.
10. Log off.
- 48 -

CHAPTER5 Installation Wizard - Distributed Method
SmartTAP 360° Live | Installation Guide
Media Server
This section describes how to add the SmartTAP domain user to the local Administrators Group
and to assign it to the SmartTAP Remote Transfer Service.
➢ Do the following:
1. Add SmartTAP user to local Administrators Group:
a. In the Active Directory Users and Computers, right-click the newly created SmartTAP
user and choose Add to a group.
Figure 5-9: Add SmartTAP user to Administrators Group
- 49 -

CHAPTER5 Installation Wizard - Distributed Method
SmartTAP 360° Live | Installation Guide
Figure 5-10: Add Smart TAP User to Administrator
b. Enter Administrator and then click Check Names. The successfully recognized entry is
underlined.
c. Click OK. A confirmation screen is displayed.
2. Assign the SmartTAP user to the AudioCodes MS-TR service:
a. Open the Services (Local) application (services.msc).
b. Select the service “SmartTAP MS-TR”, right-click Properties and click the Logon tab.
c. Select the ‘This account’ check box.
d. Click Browse to search for the domain user who has permissions for the shared media
directory in the file server.
This user may be the SmartTAP user or any other user defined for this purpose.
Figure 5-11: Assign User to SmartTAP MS-TR Service Account
e. Click Check Names. The successfully recognized entry is underlined.
f. Restart the service.
- 50 -

CHAPTER5 Installation Wizard - Distributed Method
SmartTAP 360° Live | Installation Guide
Installing SmartTAP Call Delivery IP-Server
It is highly recommended to configure the Firewall with the required ports to ensure
proper communication prior to the software installation. See Firewall Configuration on
page65.
➢ To Install the Call Delivery server:
1. Run the “Install.bat” from the SmartTAP 360° Live “Suite\” folder.
2. Select the Distributed Software Custom Setup type.
3. Click AudioCodes Inc. Call Delivery Server.
4. Click Install to continue.
5. Select “Microsoft Lync” or “Other” when prompted.
● Other: (NON Microsoft LYNC)
6. Server IP Setup Screen:
● Specify the IP of the Communication & Application Servers.
● Specify the IP of the Local Machine.
7. Click link to install Skype for Business, see Plugin Configuration.
● Return here once the configuration has completed.
● No additional CD-IP configuration should be necessary.
8. Click link to install the Other (IP), see VoIP Port Mirroring on page141.
● Return here once the configuration has completed.
● Once the installation of the CD-IP has completed, additional configuration is required,
see Additional Configuration for VoIP Port Mirroring on page145.
9. Click link to install Analog Trunk/Radio, see Analog Trunk / Radio on page147:
● Return here once the configuration has completed.
● Once the installation of the CD-AL has completed, additional configuration is required,
see Additional Configuration for Analog Trunk and Radio on page152.
10. Click Next to continue.
11. Click Install to complete the installation.
SmartTAP 360° Live File Server Installation
It is preferable, that the File Server is installed and configured before installation of
the (MS) Media Server and the (AS) Application Server.
- 51 -

CHAPTER5 Installation Wizard - Distributed Method
SmartTAP 360° Live | Installation Guide
Firewall Configuration
It is highly recommended to configure the Firewall with the required ports to ensure proper
communication prior to the software installation. See Firewall Configuration on page65.
Domain Controller Configuration
This configuration is an example of what must be performed in a windows environment to
allow the SmartTAP software running on a different server to read and write to the file server
directory where the recordings are stored. Alternatively, in the absence of a domain controller,
the same can be achieved by the configuration of windows file sharing feature.
➢ To configure the SmartTAP user on the Windows server Domain Controller:
1. Create a user account for SmartTAP on the Domain Controller. For example “SmartTAP
User”:
a. In the Active Directory Users and Computers folder, select the Users folder and then
right-click New > User.
Figure 5-12: Active Directory Users and Computers
- 52 -

CHAPTER5 Installation Wizard - Distributed Method
SmartTAP 360° Live | Installation Guide
Figure 5-13: New SmartTAP User
2. Click Next, enter a password and then configure the following settings:
a. Clear the User must change password at next logon check box.
b. Select the User cannot change password check box.
c. Select the Password never expires check box.
Figure 5-14: User Settings
The following confirmation dialog is displayed:
- 53 -

CHAPTER5 Installation Wizard - Distributed Method
SmartTAP 360° Live | Installation Guide
Figure 5-15: User Add Confirmation
3. Click Finish.
4. Add the File Server to the Domain:
a. Right-click Start > System.
Figure 5-16: System Properties
b. Select Change settings in the Computer name, domain, and workgroup settings.
c. Click Change.. in the Computer Name tab.
d. Select the Domain radio button and enter the name of the domain.
e. When prompted, enter the domain administrator user and password.
- 54 -

CHAPTER5 Installation Wizard - Distributed Method
SmartTAP 360° Live | Installation Guide
The Welcome to the <domain name> domain dialog confirms that the server is now
joined to the domain.
f. Restart the File Server.
Figure 5-17: System Properties
5. Log in into the file server as user “SmartTAP” in the domain.
6. Create the media storage directory (…\media) on the file server.
7. Share the media storage:
a. Right-click the storage directory and select Properties.
◆ Select the Sharing tab and click share… in the Network File and Folder Sharing
section.
- 55 -

CHAPTER5 Installation Wizard - Distributed Method
SmartTAP 360° Live | Installation Guide
◆ Click the Share button and enter the domain administrator user and password
when prompted.
Installing CD-Live Component
The CD- Live component is responsible for the Instant Message Chats Recording. This
component must be installed on the Azure machine that matches the Key Vault’s Access Policy
and that has been enabled with Identity. For details, see Configure Azure for Instant Messaging
Recording Application in the SmartTAP 360° Live Installation Manual.
The CD-Live component must be installed either as a component of the SmartTAP
server on Azure or on a Stand alone server on Microsoft Azure. It cannot be installed
On-premises.
➢ To install the CD-Live component:
1. When the CD-Live installation wizard starts click Next to install.
Figure 5-18: Welcome to Call Delivery Live
2. Accept the License Agreement and click Next.
- 56 -

CHAPTER5 Installation Wizard - Distributed Method
SmartTAP 360° Live | Installation Guide
Figure 5-19: License Agreement
3. Enter the Application Server IPAddress and configure HTTP/HTTPS as required.
Figure 5-20: Application Server IPAddress
- 57 -

CHAPTER5 Installation Wizard - Distributed Method
SmartTAP 360° Live | Installation Guide
4. Add the Azure Key Vault name that was created in the Microsoft Teams deployment (refer
to the Microsoft Teams Deployment Guide) and then click Next.
This field is optional and is only required for various Microsoft Teams deployment
scenarios such as IMrecording and token authentication.
Figure 5-21: Key Vault Configuration
5. Select one of the following setup types and then click Next:
● IM Recording Instant Message Recording (this option is available on Azure
deployments only)
● Data Recovery: Setup for the Data Recovery (Bot Resiliency) feature. See Section Data
Recovery (Bot Resiliency) in the SmartTAP360° Deployment Guide.
● Data Migration:Setup for data migration from third-party legacy systems (see
document "Migrating Third-party Legacy Metadata").
- 58 -

CHAPTER5 Installation Wizard - Distributed Method
SmartTAP 360° Live | Installation Guide
Figure 5-22: Setup Type
6. Select one of the following setup types and then click Next:
● Complete: Install to the default location: C:\Program Files\AudioCodes\SmartTAP\AS
● Custom:Change the destination location
7. Click Install.
- 59 -
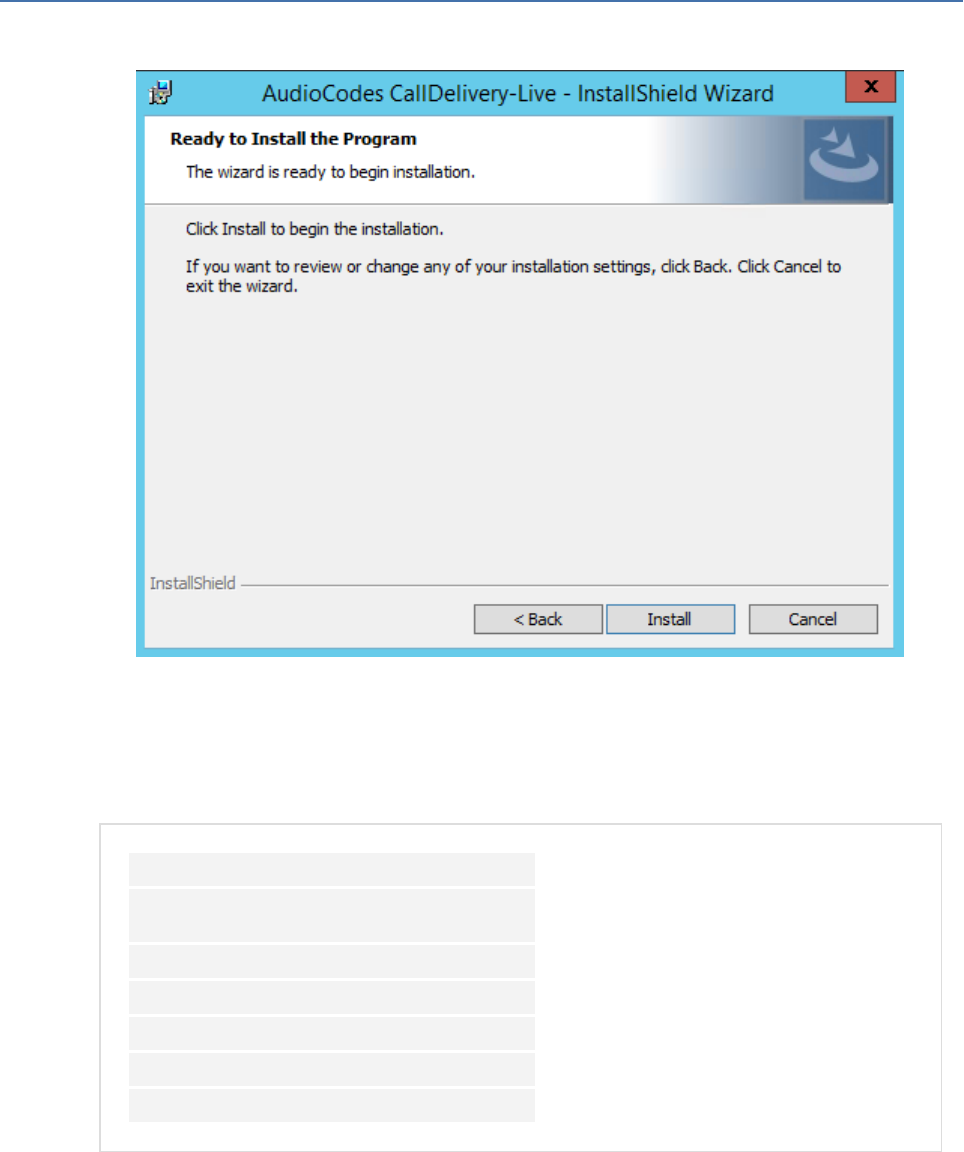
CHAPTER5 Installation Wizard - Distributed Method
SmartTAP 360° Live | Installation Guide
Figure 5-23: Ready to Install
CD-Live will receive it’s Secrets from Azure and Targets from AS.
8. (For Upgrade Only):Open the appsettings.json file ("C:\Program Files\AUDIOCODES\S-
martTap\CallDelivery-Live\appsettings.json") configuration file under
IntegrationConnectors section and add the following:
"DataRecoveryConnector": {
"TimeBetweenIterationsMilliSec":
1800000,
"MaxDegreeOfParallelism": 10,
"FailureThresholdLimit": 10,
"ResultSegmentSize": 10
}
Where:
● "TimeBetweenIterationsMilliSec" – The time interval between each execution.
● "MaxDegreeOfParallelism" – Limits the maximum number of concurrent recovery
requests allowed for the ApplicationServer.
● "FailureThresholdLimit" – Represents the maximum number of recovery retries for a
single metadata file. When threshold limit is reached an alarm is raised (
- 60 -
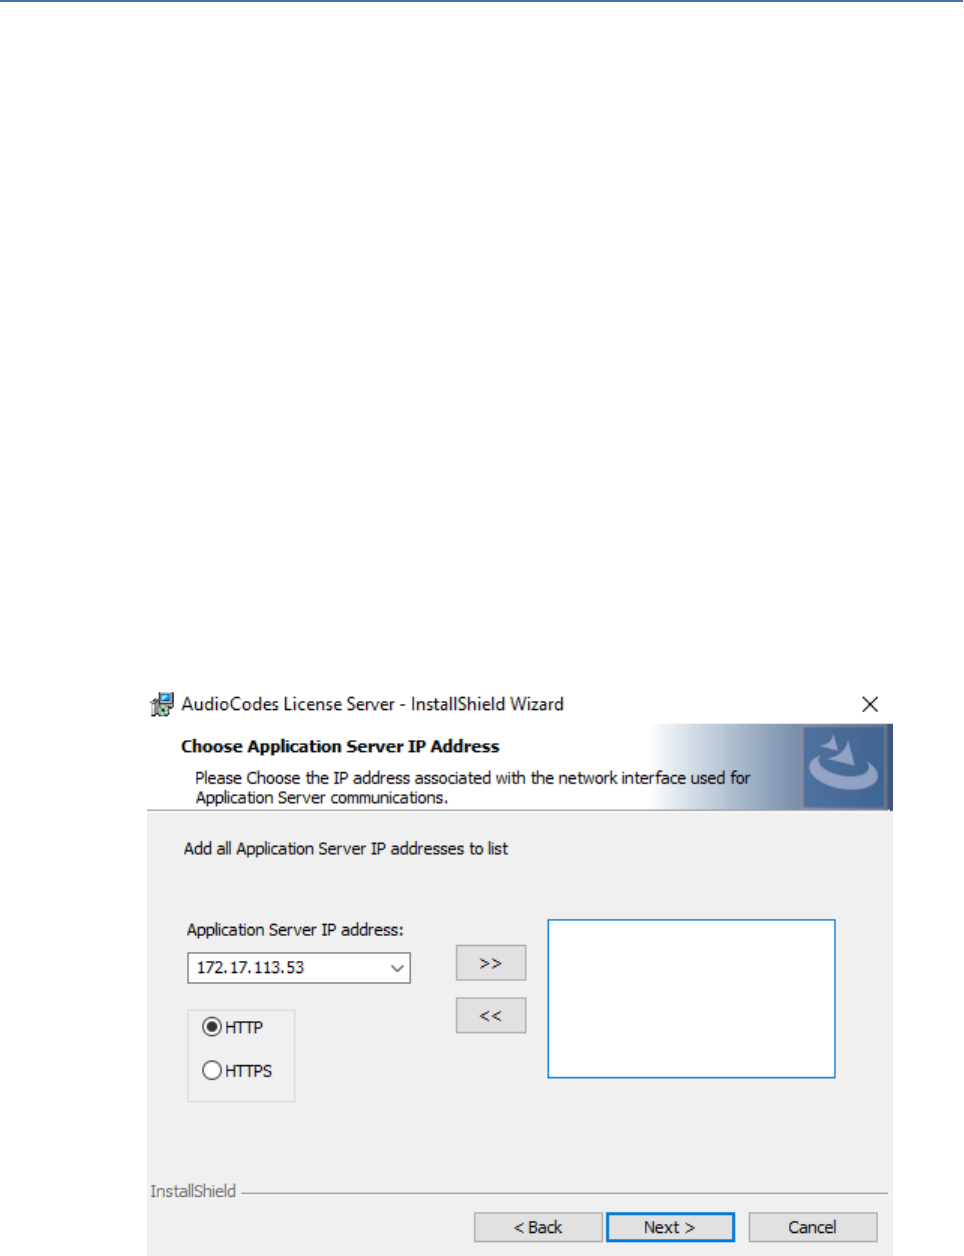
CHAPTER5 Installation Wizard - Distributed Method
SmartTAP 360° Live | Installation Guide
eventCdrRecoveryFailed, under the CallRecordingError bucket, for details refer to the
OVOCAlarms Guide)
● Files exceeding the threshold limit are copied to ‘Failed’ directory inside the storage
and will not be processed in the next execution.
● When a failure occurs, an alarm is sent to SmartTAP with a notification for the recovery
failure.
● "ResultSegmentSize" – Limits the maximum number of Blobs that can be
simultaneously downloaded
Installing the License Server
This section describes how to install the License server that is used to manage SmartTAP
licenses for Microsoft Teams deployments.
➢ To install the License Server:
1. The License server installation starts in the proper sequence when all or multiple services
are selected on the installer menu.
2. When the License server installation wizard starts, click Next to install.
Figure 5-24: License Server
3. Enter the IP Address of the SmartTAPApplication server.
4. Enter the Application Server Protocol (HTTP or HTTPS).
- 61 -

CHAPTER5 Installation Wizard - Distributed Method
SmartTAP 360° Live | Installation Guide
Figure 5-25: Setup Type
5. Click Next to complete the installation.
- 62 -

CHAPTER6 Uninstalling SmartTAP 360° Live
SmartTAP 360° Live | Installation Guide
6 Uninstalling SmartTAP 360° Live
The following describes how to uninstall SmartTAP 360° Live.
➢ To uninstall SmartTAP 360° Live:
1. Launch install.bat from the “Suite” folder.
2. From the Program Maintenance screen, click Remove to remove the SmartTAP 360° Live
component from the PC.
Figure 6-1: Program Maintenance - Remove
3. When the InstallShield Wizard Completed screen appears, click Finish.
- 63 -

CHAPTER6 Uninstalling SmartTAP 360° Live
SmartTAP 360° Live | Installation Guide
Figure 6-2: InstallShield Wizard Completed - Uninstall
- 64 -

CHAPTER7 Firewall Configuration
SmartTAP 360° Live | Installation Guide
7 Firewall Configuration
The deployment of the SmartTAP servers may have to comply with customer security policies,
which require the implementation of firewall rules. This section provides the basic information
required by the Windows administrator to configure the Windows firewall, to ensure the
required connectivity between the SmartTAP applications and services.
All Firewall ports listed are default ports.
Skype for Business Recording Firewall
Figure 7-1: Skype for Business Recording Firewall
Front End Server(s)
The following Inbound firewall exceptions are required.
Table 7-1: Front End Server(s) - Inbound Firewall
Protocol Allow Port Allowed Network
TCP 9901 DOMAIN/INTERNAL (from SmartTAP to FE)
- 65 -

CHAPTER7 Firewall Configuration
SmartTAP 360° Live | Installation Guide
Protocol Allow Port Allowed Network
TCP 12171 DOMAIN/INTERNAL (from SmartTAP Announcement Server to
FE)
The following Outbound firewall rule may be required if the FE has a particularly restrictive
firewall configuration (non-Default).
Table 7-2: Front End Server(s) - Outbound Firewall
Protocol
Allow
Port
Allowed Network
TCP 9090 DOMAIN/INTERNAL (from FE to SmartTAP CD)
TCP 80 DOMAIN/INTERNAL (from FE to SmartTAP AS)
TCP 443 DOMAIN/INTERNAL (from FE to SmartTAP AS when AS is
configured with HTTPS)
TCP 10123 DOMAIN/INTERNAL (from FE to SmartTAP MP)
TCP 10124 DOMAIN/INTERNAL (from FE to Announcement server)
Edge, Mediation or Conference Server(s)
The following Inbound firewall exceptions are required.
Table 7-3: Edge, Mediation or Conference Server(s) - Inbound Firewall
Protocol Allow Port Allowed Network
TCP 9080 DOMAIN/INTERNAL (from SmartTAP CD)
The following Outbound firewall rules are required if the Edge Server has a particularly
restrictive firewall configuration:
Table 7-4: Edge, Mediation or Conference Server(s) - Outbound Firewall
Protocol
Allow
Port
Allowed Network
UDP 40000-
45000
DOMAIN/INTERNAL (towards SmartTAP)
TCP 80 DOMAIN/INTERNAL (from SmartTAP MD to SmartTAP AS)
TCP 443 DOMAIN/INTERNAL (from SmartTAP MD to SmartTAP AS when
SmartTAP AS is configured with HTTPS)
- 66 -

CHAPTER7 Firewall Configuration
SmartTAP 360° Live | Installation Guide
To record calls traversing Edge Server (with remote users, federated users) enable
A/V/STUN.MSTURN communication with Edge Server Pool on the UDP port 3478 for
compliance with MSFT port and planning requirements.
SmartTAP 360° Live Server
The following Inbound firewall exceptions are required.
Table 7-5: SmartTAP 360° Live Server - INBOUND Firewall
Protocol Allow Port Allowed Network
TCP 80 ■ DOMAIN/INTERNAL (from FE servers)
■ DOMAIN/INTERNAL (from Edge servers)
■ EXTERNAL (Web Browser Access for end-users)
TCP 443 ■ DOMAIN/INTERNAL (from FE to AS when AS is configured
with HTTPS)
■ DOMAIN/INTERNAL (From Edge servers to AS when AS is
configured with HTTPS)
TCP 9090 DOMAIN/INTERNAL (from FE servers)
UDP 40000-
45000¹
DOMAIN/INTERNAL (from MD)
DOMAIN/INTERNAL (from MP servers)
TCP 10125 DOMAIN/INTERNAL (from AS)
Note: The port is only required for CD when AS is installed on
another server.
The following Outbound firewall exceptions are required.
Table 7-6: SmartTAP 360° Live Server - Outbound Firewall
Protocol Allow Port(s) Allowed Network
TCP 9080¹ DOMAIN/INTERNAL (to MD)
TCP 9901 DOMAIN/INTERNAL (to FE servers)
TCP 10123 DOMAIN/INTERNAL (to MP servers)
1
Required when Media Delivery resides on Edge, Mediation or Conference server.
SmartTAP 360° Live Media Proxy Server
The following Inbound firewall exceptions are required.
- 67 -

CHAPTER7 Firewall Configuration
SmartTAP 360° Live | Installation Guide
Table 7-7: SmartTAP 360° Live Media Proxy Server - Inbound Firewall
Protocol Allow Port Allowed Network
TCP 10123 DOMAIN/INTERNAL (from FE and SmartTAP 360° Live servers)
UDP 37000-
39999
DOMAIN/INTERNAL (from Skype for Business clients to MP)
(Audio)
UDP 33000-
36999
DOMAIN/INTERNAL (from Skype for Business clients to MP)
(Video)
The following Outbound firewall exceptions are required.
Table 7-8: SmartTAP 360° Live Media Proxy Server - Outbound Firewall
Protocol Allow Port Allowed Network
UDP 37000-
39999
DOMAIN/INTERNAL (from MP to Skype for Business or Lync
clients) (Audio)
UDP 33000-
36999
DOMAIN/INTERNAL (from Skype for Business clients to MP)
(Video)
UDP 40000-
45000
DOMAIN/INTERNAL (from the MP to the MS)
TCP 80 DOMAIN/INTERNAL (from MP to AS)
TCP 443 DOMAIN/INTERNAL (from MP to AS when AS is configured with
HTTPS)
SmartTAP 360° Live Announcement Server
The following Inbound firewall exceptions are required.
Table 7-9: SmartTAP 360° Live Announcement Server- Inbound Firewall
Protocol Allow Port Allowed Network
TCP 12171 DOMAIN/INTERNAL (from FE servers)
TCP 10124 DOMAIN/INTERNAL (from FE servers)
The following Outbound firewall exceptions are required.
- 68 -

CHAPTER7 Firewall Configuration
SmartTAP 360° Live | Installation Guide
Table 7-10: SmartTAP 360° Live Announcement Server - Outbound Firewall
Protocol Allow Port Allowed Network
TCP 80 DOMAIN/INTERNAL (from ANN to SmartTAP 360° Live AS)
TCP 443 DOMAIN/INTERNAL (from ANN to SmartTAP 360° Live AS
when AS is configured with HTTPS)
For further information regarding Skype for Business port requirements, refer to the following.
http://technet.microsoft.com/en-us/library/gg398798.aspx
Automated Firewall Exception Scripts for Windows Firewall
PowerShell scripts are installed to facilitate in adding firewall exceptions to all of the SmartTAP
and Lync components.They are installed by default in the following location:
…\AUDIOCODES\SmartTAP\Install\EnableFWRules
The following file needs to be modified before it can be used: EnableSmartTAPFWRules.ps1.
The configuration section is at the beginning of the Powershell script.
➢ To use the script, do the following:
1. Populate all of the fields for your installation. Save the file.
2. Copy the entire directory to each component that needs to have firewall exceptions added
(SmartTAP, Skype for Business Edge, Mediation or Conference Server and the Skype for
Business Front Ends).
3. On each server, modify the $machine_type line to match the machines functionality
(SmartTAP, Edge or FE)
4. Run the EnableSmartTAPFWRules.bat to run the script, either by double clicking on it, or
running it from a command prompt.
5. You can now confirm that the firewall exceptions have been added. If there was an error
that you need to correct, just remove the exceptions that the script added, and rerun the
script. All SmartTAP firewall exceptions start with the word "SmartTAP".
Distributed SmartTAP Firewall
The following firewall rules are required in the event that you install each component of the
SmartTAP installation on a physically separate machine (as described in Chapter Installation
Wizard - Distributed Method on page38Installation Wizard - Distributed Method on page38).
Under normal circumstances, when all of the components are on the same machine you would
only need to add an exception for port 80 or 443 (see Section Application Server (AS) on
page71).
- 69 -

CHAPTER7 Firewall Configuration
SmartTAP 360° Live | Installation Guide
The Windows firewall must be setup to allow INBOUND connections on the specified
ports.
Figure 7-2: Distributed SmartTAP Firewall
- 70 -

CHAPTER7 Firewall Configuration
SmartTAP 360° Live | Installation Guide
Application Server (AS)
Table 7-11: Firewall - Application Server (AS)
Protocol
Allow
Port
Allowed Network
TCP 80 EXTERNAL (Web Browser Access for end-users)
DOMAIN/INTERNAL (from other SmartTAP servers)
TCP 443 EXTERNAL (Web Browser Access for end-users)
DOMAIN/INTERNAL (from other SmartTAP servers)
TCP 9001 DOMAIN/INTERNAL (from other SmartTAP servers)
UDP 161 Used for SNMP traffic for managing traps/alarms between AS and
OVOC (Bi-directional)
UDP 162 Used for SNMP traffic for sending Keep-alive messages from ASto
OVOC (Send-only)
UDP 1161 Used for SNMP traffic for sending Keep-alive messages from AS to
OVOC (this port is predominantly used when ASis installed
behind a NAT) (Send-only)
HTTP/S 8861 Communication from OVOC clients (other than SmartTAP servers)
to OVOCMain Agent
HTTP/S 8863 Requests sent from OVOC Main Agent to OVOC client agents
Virtual Machines(they also run on SmartTAPAS)(send-only).
Communications Server (CS)
Table 7-12: Firewall - Communications Server (CS)
Protocol Allow Port Allowed Network
UDP 161, 1161, 5060 DOMAIN/INTERNAL (from other SmartTAP servers)
TCP 554 DOMAIN/INTERNAL (from other SmartTAP servers)
TCP 9000 DOMAIN/INTERNAL (from other SmartTAP servers)
- 71 -

CHAPTER7 Firewall Configuration
SmartTAP 360° Live | Installation Guide
Database Server (DB)
Table 7-13: Firewall - Database Server (DB)
Protocol Allow Port Allowed Network
TCP 3306 DOMAIN/INTERNAL (from other SmartTAP servers)
UDP 161 DOMAIN/INTERNAL (from other SmartTAP servers)
File Server (FS)
Table 7-14: Firewall - File Server (FS)
Protocol Allow Port Allowed Network
SMB Windows Network File Sharing (see
File Server installation)
DOMAIN/INTERNAL
(fromApplication and Media
servers)
UDP 161 DOMAIN/INTERNAL (from other
SmartTAP servers)
Media Server (MS)
Table 7-15: Firewall - Media Server (MS)
Protocol Allow Port Allowed Network
UDP 5064, 40000-
45000
DOMAIN/INTERNAL (from other SmartTAP
servers)
TCP 6023 DOMAIN/INTERNAL (from other SmartTAP
servers)
TCP REST 10131 DOMAIN/INTERNAL (from other SmartTAP
servers)
Remote Transfer Service (RTS)
Table 7-16: Remote Transfer Service (RTS)
Protocol Allow Port Allowed Network
TCP REST 10132 Remote Transfer Service (RTS)
- 72 -

CHAPTER7 Firewall Configuration
SmartTAP 360° Live | Installation Guide
Call Delivery(CD)
Table 7-17: Firewall - Call Delivery(CD)
Protocol Allow Port Allowed Network
UDP
(Add any
required)
11161 – CD-DS DOMAIN/INTERNAL (from other SmartTAP servers)
12161 – All
VoIP
DOMAIN/INTERNAL (from other SmartTAP
servers)
13161 – AES DOMAIN/INTERNAL (from other SmartTAP
servers)
14161 – Analog DOMAIN/INTERNAL (from other SmartTAP
servers)
15161 – SIPRec DOMAIN/INTERNAL (from other SmartTAP
servers)
5062-CD-DS DOMAIN/INTERNAL (from other SmartTAP
servers)
5065-CD-AES DOMAIN/INTERNAL (from other SmartTAP
servers)
5066 – All VoIP DOMAIN/INTERNAL (from other SmartTAP
servers)
5067 – Analog DOMAIN/INTERNAL (from other SmartTAP
servers)
5068 – SIPRec DOMAIN/INTERNAL (from other SmartTAP
servers)
TCP 9090 DOMAIN/INTERNAL (from other SmartTAP
servers)
10125 – All
VoIP
DOMAIN/INTERNAL (from other SmartTAP
servers)
TCP (REST) 10125 DOMAIN/INTERNAL (from other SmartTAP
servers)
TCP (REST) 10126 DOMAIN/INTERNAL (from SIP Recording server)
TCP (REST) 10127 DOMAIN/INTERNAL (from Analog Trunk / Radio)
- 73 -

CHAPTER7 Firewall Configuration
SmartTAP 360° Live | Installation Guide
Media Delivery (MD)
This applies to Skype for Business Edge, Mediation or Conference servers.
Table 7-18: Firewall - Media Delivery (MD)
Protocol Allow Port Allowed Network
TCP 9080 DOMAIN/INTERNAL (from other SmartTAP servers)
TCP REST 10133 DOMAIN/INTERNAL (from other SmartTAP servers)
TCP REST 80 DOMAIN/INTERNAL (from other SmartTAP servers)
Media Proxy (MP)
This applies to SmartTAP Proxy servers exclusively in a Microsoft Skype for Business
environment.
Table 7-19: Firewall - Media Proxy (MP)
Protocol Allow Port Allowed Network
TCP 10123 DOMAIN/INTERNAL (from FE servers)
UDP 37000 -
39999
DOMAIN/INTERNAL (from MP to Skype for Business Skype for
Business clients)
UDP 37000 -
39999
DOMAIN/INTERNAL (from Skype for Business clients to MP)
Announcement Server (AN)
This applies to SmartTAP Announcement servers only in a Microsoft Skype for Business
environment.
Table 7-20: Firewall - Announcement Server (AN)
Protocol
Allow
Port
Allowed Network
TCP 12171 DOMAIN/INTERNAL (from FE servers to SmartTAP
Announcement servers).
TCP 10124 DOMAIN/INTERNAL (from FE servers to SmartTAP
Announcement servers).
- 74 -

CHAPTER7 Firewall Configuration
SmartTAP 360° Live | Installation Guide
Example
In this example, we are setting up the Windows server firewall for the Media Server UDP
connections. The Media Server firewall must allow inbound connections from the Domain and
Internal servers on UDP ports 161, 5064, 10161, and in the range 40000-45000.
➢ To setup the firewall for the MS:
1. Start > Administrative Tools > Windows Firewall with Advanced Security.
2. Select Inbound Rules > New Rule.
3. Select the Port radio button and click Next.
4. Select UDP Specific local ports and type in the UDP ports separated by commas and a dash
separating the range (161, 5064, 10161, 40000-45000).
5. Selectthe Allow the connection and click Next.
6. Check “Domain” and “Private” and click Next.
7. Name the rule and click Finish (the rule will be active immediately).
OVOC Server
The following table describes the ports used for connection with SmartTAP 360° Liveserver. For
more information, refer to the OVOC IOM Manual.
Table 7-21: Firewall -.OVOC Inbound
Protocol
Allow
Port
Allowed Network
UDP 161 Used for SNMP traffic for managing traps/alarms between AS and
OVOC (Bi-directional)
UDP 1161 Used for SNMP traffic for sending Keep-alive messages from AS to
OVOC (this port is predominantly used when ASis installed behind
a NAT) (Send-only)
UDP 162 Used for SNMP traffic for sending Keep-alive messages from ASto
OVOC (Send-only)
- 75 -

CHAPTER8 Microsoft Skype for Business Deployment
SmartTAP 360° Live | Installation Guide
8 Microsoft Skype for Business Deployment
In a Skype for Business environment, SmartTAP will deploy a trusted plugin application on the
standard or enterprise Front End Server (Pool). The configured plugin sends the necessary
signaling from the FE, SBS or SBA to the SmartTAP server(s) so that SmartTAP is aware of call
states only for recorded calls. Using the call signaling, SmartTAP can then correlate the SRTP
data to record the complete call. The SRTP data is captured in various ways depending upon
what call types need to be recorded. See table below for details.
Figure 8-1: Capture Call Signaling - 1
The following table lists the SmartTAP software components and the appropriate deployment
server.
Figure 8-2: Capture Call Signaling - 2
■
1
Assumes Mediation or Conference server are co-located.
■
2
Proxy Server must be installed on dedicated physical or virtual server.
■
3
Requires configuration of Microsoft Skype for Business client. No software is installed.
- 76 -

CHAPTER8 Microsoft Skype for Business Deployment
SmartTAP 360° Live | Installation Guide
Unlike other IP Station side IP PBX, Skype for Business recording requires the installation of the
AudioCodes Microsoft trusted plugin on the Front End (FE) servers, and the Skype for Business
specific configuration on the Call Delivery.
This chapter describes the following procedures for installing and configuring SmartTAP to
Record Skype for Business:
■ Installing SmartTAP 360° Live Skype for Business plugin (see Installing Skype for Business
Plugin on page81)
■ Installing SmartTAP Call Delivery, choose Microsoft Lync as network type (see Installing Call
Delivery for Skype for Business (IP-based Recording) on page101
■ Installing Media Proxy in case of utilizing the Media Proxy solution (see Installing Media
Proxy Server for Skype for Business on page114)
■ Installing SmartTAP Media Delivery (see Installing Media Delivery Server for Skype for
Business on page122)
■ Installing Announcement Server (see Installing Announcement Server on page123)
■ Installing SmartTAPMonitoring Service (see Installing SmartTAP Monitoring Service on
page135)
Skype for Business Remote Branch Site
The Remote site is typically a branch location that connects back to the main data center. The
branch site may or may not have survivable telephony services if the WAN goes down.
SmartTAP 360° Live deployed in the branch location can record user/device calls regardless of
WAN up/down.
- 77 -

CHAPTER8 Microsoft Skype for Business Deployment
SmartTAP 360° Live | Installation Guide
Figure 8-3: Skype for Business Remote Branch Site
In the main datacenter, you may deploy an All-In-One solution or distributed. In the branch, you
will typically use the Distributed configuration setup because not all components are required
in the branch site.
In the branch, the following components are required:
Microsoft SBA:
■ Install Skype for Business plugin on SBA (Separate installer not part of the distributed setup
package). See Section Microsoft Skype for Business Deployment on page76.
■ (Optional) Install Media Delivery to record PSTN calls. See Section Installing Media Proxy
Server for Skype for Business on page114.
SmartTAP 360° Live Server:
■ Install Communication Server. See Section Installing SmartTAP Communication Server on
page43.
■ Install Media Server. See Section Installing SmartTAP Media Server on page44.
■ Install Call Delivery Server. See Section Installing SmartTAP Call Delivery IP-Server on
page51.
Media Proxy: (Optional):
■ Install Media Proxy (Optional method to record Internal IP-to-IP and PSTN calls). See
Section Installing Media Proxy Server for Skype for Business on page114.
- 78 -

CHAPTER8 Microsoft Skype for Business Deployment
SmartTAP 360° Live | Installation Guide
Before Installing Microsoft Skype for Business Components
This section lists the Microsoft requirements for the SmartTAP 360° Livecomponents for dif-
ferent Skype for Business deployments.
■ Unified Communications Managed API (UCMA):
● For Announcement server, SmartTAPMonitoring Service, Microsoft Lync Server 2013
Plugin, Skype for Business 2015 Plugin and Skype for Business 2019 Plugin, this
component must be pre-installed with the following versions:
◆ Skype for Business 2019:
UCMA 6.0
◆ Skype for Business 2015:UCMA 5.0
◆ Lync Server 2013: UCMA 4.0
● For Media Proxy server, installation is not required
● UCMA6 Windows Server Updates:
◆ Windows Server 2016 with the latest update
◆ Windows Server 2019 with the latest update
● UCMA6 Runtime requirements:
◆ The target platform must be a 64-bit computer
◆ Microsoft .NETframework 4.7 or later service packs
◆ For details on the latest UCMA6 updates, see: https://www.microsoft.com/en-
us/download/details.aspx?id=57507
■ Windows Server 2016:
● The Announcement Server, SmartTAPMonitoring Service and the Skype for Business
2019 Plugin must run on Windows Server 2016 when running on the Skype for Business
2019 platform.
■ Anti-virus software If the Windows server run anti-virus software, then SmartTAP
components should be included in the anti-virus software's exception list.
■ HTTPS:several of the installation setups includes an option to enable an HTTPS connection
between the SmartTAPApplication server and the Announcement server. These settings,
do not entirely complete the HTTPSsetup, therefore you must also run the procedures
described in Configuring HTTP/S on page171.
■ For Announcement server-specific requirements, see Announcement Server-Specific
Requirements on the next page
■ For SmartTAPMonitoring Service-specific, see SmartTAP 360° Live Monitoring Service-
Specific Requirements on the next page
■ For details on configuring a remote branch site in a Skype for Business deployment, see
Skype for Business Remote Branch Site on page77
- 79 -

CHAPTER8 Microsoft Skype for Business Deployment
SmartTAP 360° Live | Installation Guide
Announcement Server-Specific Requirements
■ Ensure the Announcement installation server platform is joined to the domain
■ Stand-alone Physical or Virtual server
■ Microsoft Windows Server 2012/R2 and Microsoft Windows Server 2016
■ Microsoft Windows Server 2012 and Microsoft Windows Server 2016 features:
● Windows Server Media Foundation
● Windows Identify Foundation
■ Windows Server 2016 is required when recording on the Skype for Business 2019 platform.
■ From the Skype for Business Installation Media:
● Skype for Business Local Config Store - (Skype for Business Install CD) - Core
components
● Skype for Business Administration Tools (Skype for Business Install CD)
Firewall Configuration
It is highly recommended to configure the Firewall with the required ports to ensure proper
communication prior to the software installation. See Chapter Firewall Configuration on
page65.
SmartTAP 360° Live Monitoring Service-Specific Requirements
The SmartTAP 360° Live Monitoring Service-Specific requirements are described below:
■ Should be installed on a server that is joined to the domain
■ Media Foundation
■ Health Monitor installed locally or on a remote machine.
● For the Skype for Business 2015 and 2019 deployment:
◆ Skype for Business Local Config Store - (Skype for Business Install CD) - Core
components
◆ Skype for Business Administration Tools (Skype for Business Install CD)
● For the Lync 2013 deployment:
◆ Lync 2013 Local Config Store - (Lync 2013 Install CD) - Core components
◆ Skype for Business Administration Tools (Lync 2013 Install CD)
◆ Make sure UCMA 4.0 is installed.
- 80 -

CHAPTER8 Microsoft Skype for Business Deployment
SmartTAP 360° Live | Installation Guide
Installing Skype for Business Plugin
The Skype for Business plugin is a Microsoft trusted application that communicates with the
Front End Software and provides the SmartTAP server with the signaling and metadata of calls
to record. The Skype for Business plugin must be installed on every Front End Server, SBA or
SBS that may process calls to record.
The following pre installation actions must be performed:
■ Skype for Business Plugin-Pre-install Setup on ADDomain Controller below
■ Skype for Business Plugin Pre-install Setup on each Front End, SBS or SBA on page85
The installation procedure is described in Skype for Business Plugin Installation Procedure on
page94
● It is highly recommended to configure the Firewall with the required ports to
ensure proper communication prior to the software installation. See Firewall
Configuration on page65.
● Install the Skype for Business plugin described in this section on every Front End
Server processing calls to record.
● Before proceeding, ensure that you have noted the installation requirements (see
Before Installing Microsoft Skype for Business Components on page79.
Skype for Business Plugin-Pre-install Setup on ADDomain Controller
This section describes the pre-install setup for the Skype for Business Plugin on the Active
Directory Domain Controller.
➢ Do the following:
1. Create a user account for SmartTAP 360° Live on the domain. For example
“SmartTAPUser”:
a. In the Active Directory Users and Computers folder, select the Users folder and then
right-click New > User.
- 81 -

CHAPTER8 Microsoft Skype for Business Deployment
SmartTAP 360° Live | Installation Guide
Figure 8-4: Active Directory Users and Computers
Figure 8-5: New SmartTAP 360° Live User
- 82 -

CHAPTER8 Microsoft Skype for Business Deployment
SmartTAP 360° Live | Installation Guide
b. Enter the name of the SmartTAP 360° Live user in the First Name and User logon name
fields and click Next.
Figure 8-6: Password Never Expires
c. Enter a password, confirm the new password, select the “Password never expires”
check box and click Next.
The following confirmation dialog is displayed:
Figure 8-7: User Add Confirmation
d. Click Finish.
2. (Optional) Add the account to the "CSAdministrator" group. This membership is not
mandatory; however, may be required for running the Plugin installation. The account can
be removed from the group after the installation:
- 83 -

CHAPTER8 Microsoft Skype for Business Deployment
SmartTAP 360° Live | Installation Guide
a. Right-click the newly created SmartTAP 360° Live user and choose Add to a group.
Figure 8-8: Add SmartTAP 360° Live user to CSAdministrators group
b. Enter CSAdministrator and then click Check Names. The successfully recognized entry is
underlined.
- 84 -

CHAPTER8 Microsoft Skype for Business Deployment
SmartTAP 360° Live | Installation Guide
Figure 8-9: Add Smart TAP User to CSAdministrator
c. Click OK. A confirmation screen is displayed.
3. Add the SmartTAP 360° Live account to the RTCUniversalReadOnlyAdmins group. This
account must be part of "RTCUniversalReadOnlyAdmins" group. This group membership
enables the Plug-in to retrieve the Skype For Business topology:
a. Right-click the newly created SmartTAP 360° Live user and choose Add to a group.
b. Enter RTCUniversalReadOnlyAdmins and then click Check Names. The successfully
recognized entry is underlined.
Figure 8-10: Add Smart TAP User to RTCUniversalReadOnlyAdmins
c. Click OK. A confirmation screen is displayed.
Skype for Business Plugin Pre-install Setup on each Front End, SBS or
SBA
This section describes the setup on the Front End, SBS or SBA.
➢ Do the following:
1. Add new “SmartTAP 360° Live User” to the local “Administrators” group:
a. Log in to the machine using a local administrator or a domain administrator account.
b. Open the Computer Management window.
- 85 -

CHAPTER8 Microsoft Skype for Business Deployment
SmartTAP 360° Live | Installation Guide
c. Open the Local Users and Groups folder.
d. Select the Groups folder and then select the Administrators entity.
e. Right-click and choose Add to Group.
Figure 8-11: Add SmartTAP 360° Live user to the Administrators group
f. In the Administrator Properties window, click Add.
- 86 -

CHAPTER8 Microsoft Skype for Business Deployment
SmartTAP 360° Live | Installation Guide
Figure 8-12: Administrators Properties
g. Enter the name of the SmartTAP 360° Live user (that you created on the Domain
Controller) and then click Check Names. The successfully added entry is highlighted.
Figure 8-13: SmartTAP 360° Live User Added to Administrators
h. Click OK. A confirmation screen is displayed.
2. Add the SmartTAP 360° Live user to the RTCServerApplications group. The group
membership enables the Plug-in to register and operate as a Skype For Business Trusted
application:
a. Select the RTCServerApplications entity, right-click and choose Add to Group.
- 87 -
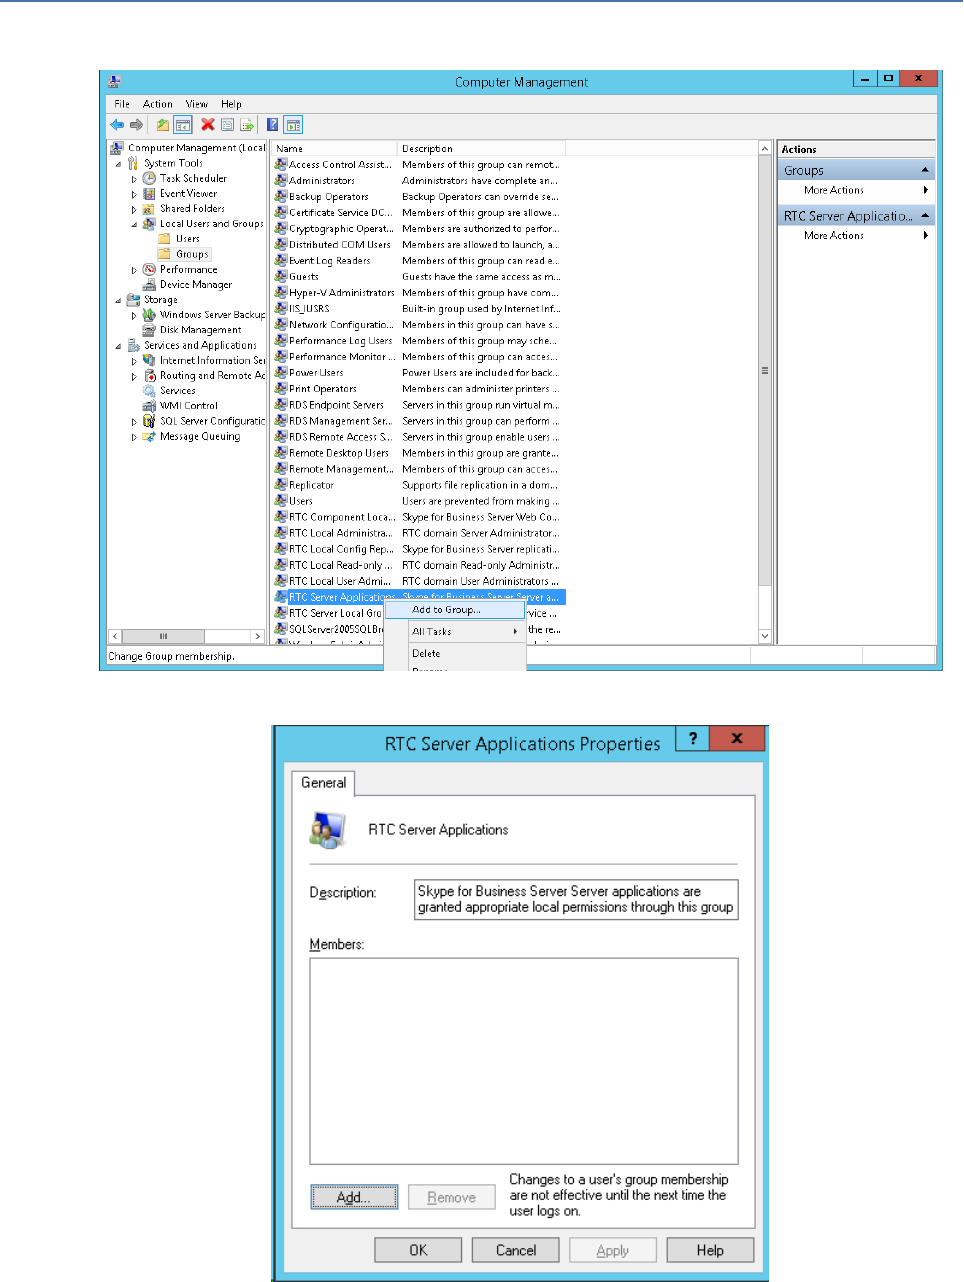
CHAPTER8 Microsoft Skype for Business Deployment
SmartTAP 360° Live | Installation Guide
Figure 8-14: RTCServerApplications
Figure 8-15: RTC Server Applications Properties
b. In the RTC Server Applications Properties screen, click Add.
c. Enter the name of the SmartTAP 360° Live user (that you created above on the Domain
Controller) and then click Check Names. The successfully added entry is highlighted.
- 88 -

CHAPTER8 Microsoft Skype for Business Deployment
SmartTAP 360° Live | Installation Guide
Figure 8-16: Add RTC Server Applications User
d. Click OK. A confirmation screen is displayed.
3. Assign “logon as service” privileges to the “SmartTAPUser” account:
a. Open Administrative Tools > Local Policies > User Rights Assignment.
b. Select the Log on as a service entity.
c. Enable the Computer Browser service.
Figure 8-17: Local Security Policy
- 89 -

CHAPTER8 Microsoft Skype for Business Deployment
SmartTAP 360° Live | Installation Guide
Figure 8-18: Log on as a service Properties
4. Assign the SmartTAP 360° Live user account with at least RemoteSigned execution policy.
RemoteSigned execution policy is required for executing PowerShell scripts during the
Plugin’s installation and run time.
a. Run PowerShell as the "SmartTapUser" that you defined on the Domain Controller
using one of the following methods:
◆ Command line:
Enter the following command and press enter:
Runas /user:[domain]\SmartTapUser powershell.exe
- 90 -

CHAPTER8 Microsoft Skype for Business Deployment
SmartTAP 360° Live | Installation Guide
Figure 8-19: SmartTAP 360° Live User
Enter the SmartTAP 360° Live User password that you defined for the user defined
on the Domain Controller and press enter.
If the SmartTAP 360° Live username contains spaces, ensure that you insert
quotation marks at the beginning and end of the user name string in the command
line e.g. “SmartTAP 360° Live User”.
◆ Using PowerShell:
-On the Domain Controller in the Start menu, right-click the Windows PowerShell
icon and choose Run as different user:
- 91 -

CHAPTER8 Microsoft Skype for Business Deployment
SmartTAP 360° Live | Installation Guide
Figure 8-20: Start Menu
-Enter the credentials for the "SmartTapUser" that you defined on the Domain
Controller:
- 92 -

CHAPTER8 Microsoft Skype for Business Deployment
SmartTAP 360° Live | Installation Guide
Figure 8-21: Windows Security
-Open the Windows PowerShell and set the following Execution Policy for this
user:
Set-ExecutionPolicy –Scope CurrentUser RemoteSigned
Figure 8-22: Windows PowerShell
- 93 -

CHAPTER8 Microsoft Skype for Business Deployment
SmartTAP 360° Live | Installation Guide
A Domain Admin account may be required to perform Plug-in installation; however,
the created “SmartTAPUSer” account is recommended to be used to run the Plug-in
service.
Skype for Business Plugin Installation Procedure
This section describes the procedure for installing the Skype for Business plugin.
➢ To install the plugin:
1. Copy the Skype for Business installation application SmartTAP 360° Live <Plugin_type>
Plugin Setup to the FE, SBS or SBA desktop.
■ Where <Plugin_type> is one of the following:
● Lync2010
● Lync2013
● Skype for Business
AudioCodes recommends enabling the “Computer Browser” service prior to running
the installer. Once the installation is complete, the “Computer Browser” service can
be disabled.
1. Right-click on the file and select Run as Administrator.
- 94 -
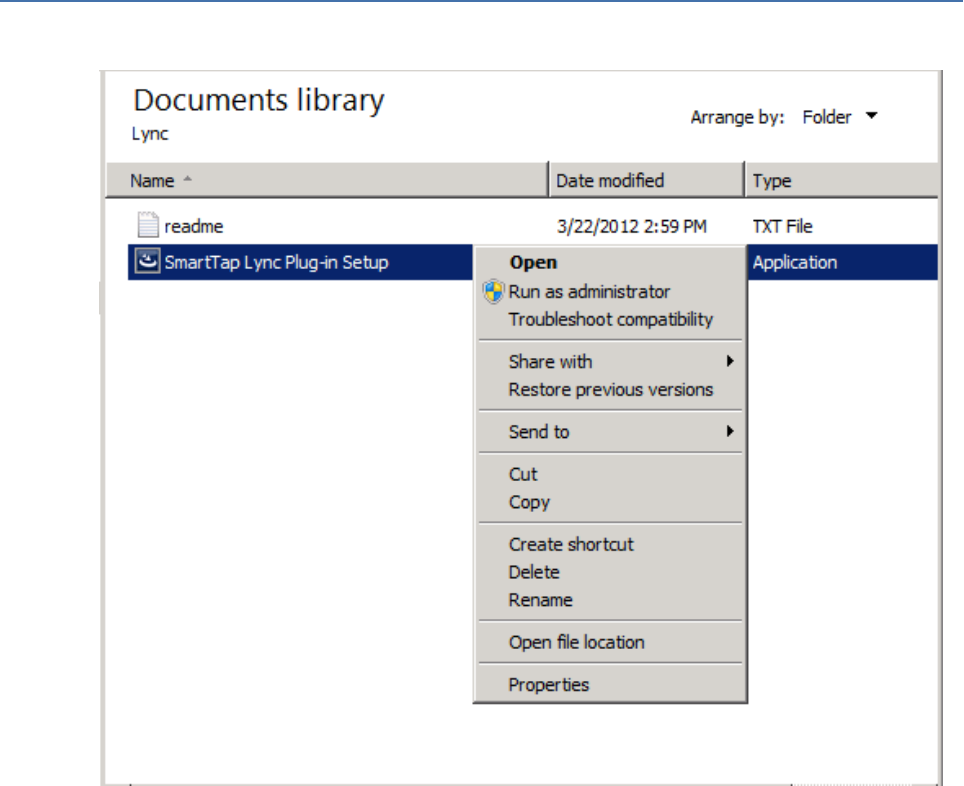
CHAPTER8 Microsoft Skype for Business Deployment
SmartTAP 360° Live | Installation Guide
Figure 8-23: Documents Library
2. If you see the warning, “Computer Browser” service is not running as shown below it is
highly recommended to cancel the install. Enable the Computer Browser Service then
restart the install. You can disable the “Computer Browser” service once install is complete.
3. If you are performing an upgrade and have changed the default values for the following
parameters, an informative message is displayed.
● RecordExternalCallsOnly – If exists and value is true then we prompt
● recordPSTNCallsOnly – If exists and value is true then we prompt
● EnableAnnouncements - If exists and value is true then we prompt
- 95 -

CHAPTER8 Microsoft Skype for Business Deployment
SmartTAP 360° Live | Installation Guide
Figure 8-24: Lync Plug-in Server
4. Click Next to continue.
5. Click the I accept the terms in the license agreement radio button, and then click Next.
- 96 -
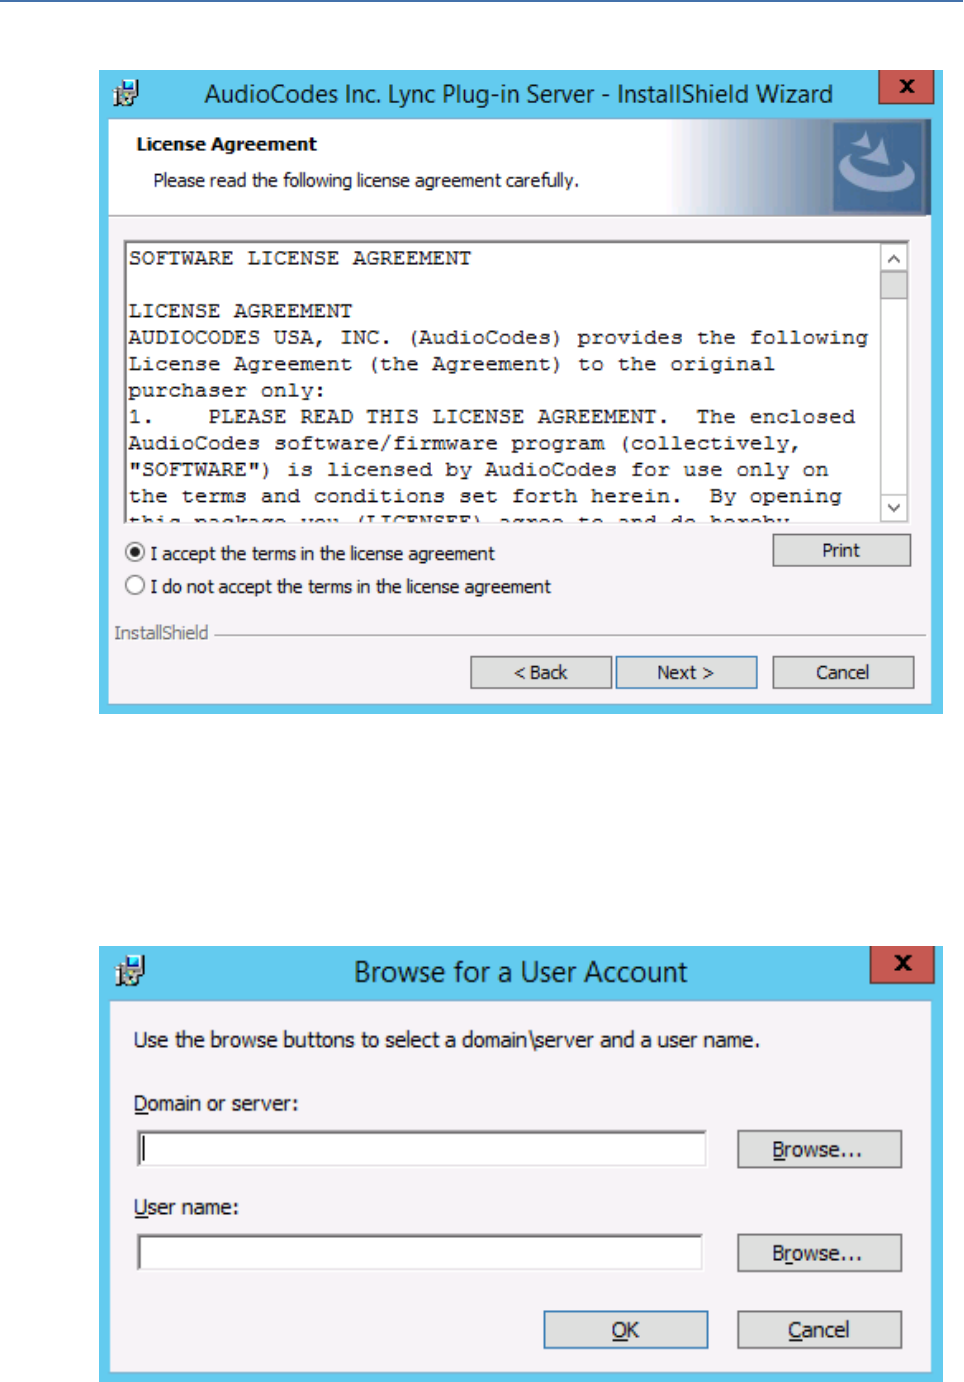
CHAPTER8 Microsoft Skype for Business Deployment
SmartTAP 360° Live | Installation Guide
Figure 8-25: Software License Agreement
6. Enter the user account that the service will use to log:
● This user must be the “SmartTAPUser” account created previously on the domain.
● The user account must be in the form DOMAIN\Username.
● Optionally click the Browse… button to locate the user in the Active Directory.
Figure 8-26: Browse for a User Account
7. Click Next to continue.
- 97 -

CHAPTER8 Microsoft Skype for Business Deployment
SmartTAP 360° Live | Installation Guide
Figure 8-27: Logon Information
8. Select the host or pool that the Plug-in will use to register, and then click Next.
Figure 8-28: Lync Plug-in Registrar Select
9. Click Next.
- 98 -

CHAPTER8 Microsoft Skype for Business Deployment
SmartTAP 360° Live | Installation Guide
10. Enter IP addresses of Media Proxy servers in case the Media Proxy recording method is
utilized for the SmartTAP 360° Live installation, otherwise leave the fields empty.
Figure 8-29: Media Proxy Server Configuration
11. Click Next.
12. Enter IP addresses of Announcement servers in case SmartTAP 360° Live Announcement
servers are installed, otherwise leave the fields empty.
- 99 -

CHAPTER8 Microsoft Skype for Business Deployment
SmartTAP 360° Live | Installation Guide
Figure 8-30: Announcement Server Configuration
13. Click Next. Click the Complete installation to install the plugin in the default path on C:
drive, otherwise click Custom to change the install path.
- 100 -

CHAPTER8 Microsoft Skype for Business Deployment
SmartTAP 360° Live | Installation Guide
Figure 8-31: Setup Type
14. Click Next.
15. Click Install to install the plugin.
16. Click Finish to complete installation.
If the plugin installation fails, refer to Troubleshoot Skype for Business Recording on
page203
Installing Call Delivery for Skype for Business (IP-based
Recording)
It is highly recommended to configure the Firewall with the required ports to ensure
proper communication prior to the software installation. See Firewall Configuration on
page65.
➢ To install IP-based recording (Skype for Business):
1. Click Next tocontinue.
- 101 -

CHAPTER8 Microsoft Skype for Business Deployment
SmartTAP 360° Live | Installation Guide
Figure 8-32: Call Delivery-IP
Assuming you are setting up for a Skype for Business installation, select “Microsoft Lync”
when prompted for the network type.
2. Click Next on the Server IP Setup.
Figure 8-33: Network Type
- 102 -
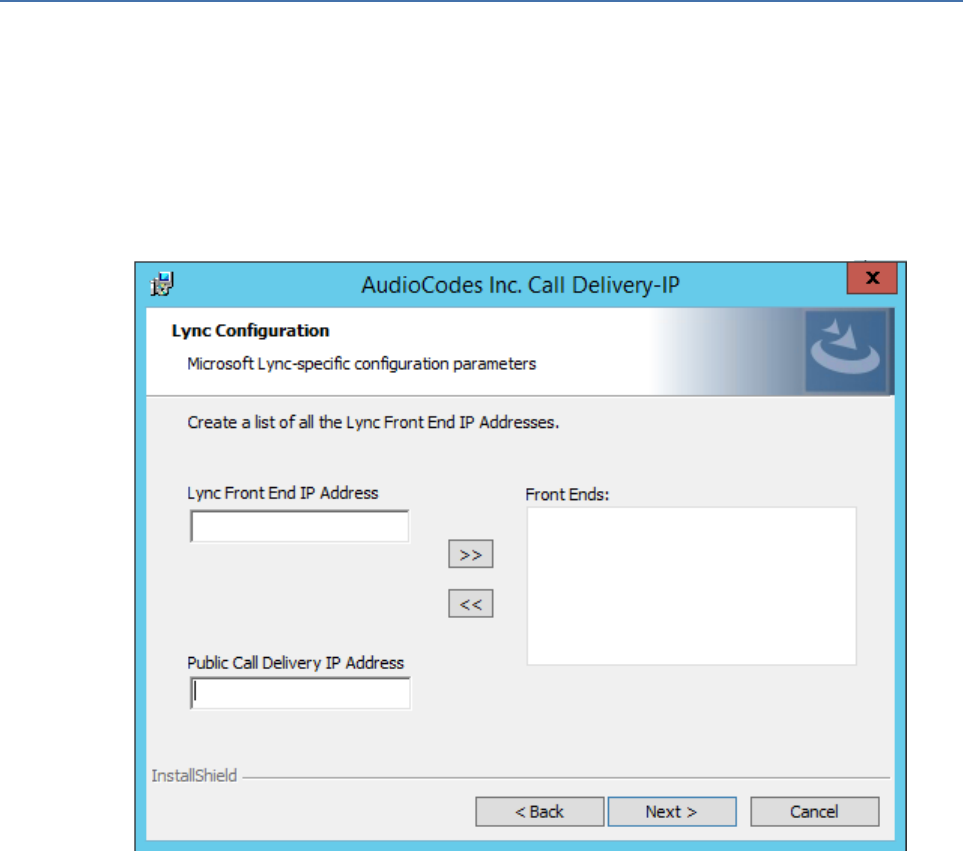
CHAPTER8 Microsoft Skype for Business Deployment
SmartTAP 360° Live | Installation Guide
3. Add each of your Skype for Business Front End IP addresses to the “Lync Front End IP
Address” field, and click on the right arrow, to add it to the Front Ends list on the right.
4. Under “Public Call Delivery IP Address”, type in the IP address of the computer you are
currently installing the Call Delivery component on.
5. Click Next on the Server IP Setup.
Figure 8-34: Lync Configuration
6. To capture the audio:
● See Section Monitoring below:
◆ Local – Port Mirroring
◆ Remote – Conference or Mediation Server
● See Section Edge on page108
● See Section Configuring Media Proxy for Call Delivery-IP on page110.
7. Click Next to select the Recording Type.
Monitoring
This section describes how to configure the location for capturing monitored recording:
■ Local is typically used with Port Mirroring in a Skype for Business environment.
■ Remote is typically used when Media Delivery is installed on Mediation or AV Conferencing
server to capture SRTP.
- 103 -

CHAPTER8 Microsoft Skype for Business Deployment
SmartTAP 360° Live | Installation Guide
➢ To capture monitored recordings locally:
1. From the Recording Type drop-down list, select Monitoring.
Figure 8-35: Choose Recording Mode
2. From the Media Tap Location drop-down list, select Local.
- 104 -

CHAPTER8 Microsoft Skype for Business Deployment
SmartTAP 360° Live | Installation Guide
Figure 8-36: Choose Media Tap Location
3. Select the appropriate interfaces from the dropdown menu in the Interface Setup screen.
Figure 8-37: Interface Setup
- 105 -

CHAPTER8 Microsoft Skype for Business Deployment
SmartTAP 360° Live | Installation Guide
In case of distributed or remote branch deployment, enter the IP address of the Application
Server (AS), Communication Server (CS), and IP address of the Host Machine. In case of all-
in-one deployment, use the drop down list and choose the SmartTAP IP address.
Figure 8-38: Server IP Setup
4. Click Next on the Server IP Setup.
5. Click Next on the Setup Type screen.
6. Click Install on the install screen.
7. Click Finish to finish.
➢ To capture monitored recordings remotely:
1. From the Media Tap Location drop-down list, select Remote.
- 106 -

CHAPTER8 Microsoft Skype for Business Deployment
SmartTAP 360° Live | Installation Guide
Figure 8-39: Choose Media Tap Location
2. Specify the IP Address of the Media Delivery Host machine and click >> to add it to the IP
Address list.
3. Repeat for each Host machine where Media Delivery is installed.
Figure 8-40: Media Delivery Configuration
- 107 -

CHAPTER8 Microsoft Skype for Business Deployment
SmartTAP 360° Live | Installation Guide
In case of distributed or remote branch deployment, type in the real IP address of the
Application Server (AS), Communication Server (CS), and IP address of the Host Machine (don’t
type in 127.0.0.1). In case of all-in-one deployment use the AS, CS, and the Host machine
parameters drop down list and choose the SmartTAP IP address.
Figure 8-41: Server IP Setup
4. Click Next on the Server IP Setup.
5. Click Next on the Setup Type screen.
6. Click Install on the install screen.
7. Click Finish.
Edge
The Media Delivery component is installed on each Edge server in the Pool. Use the Edge
solution to record any call scenario in a Microsoft environment.
- 108 -

CHAPTER8 Microsoft Skype for Business Deployment
SmartTAP 360° Live | Installation Guide
➢ To install the Edge server:
Figure 8-42: Choose Recording Mode
1. Click Next to select Record Type “Edge”.
Figure 8-43: Lync Edge Servers Configuration
2. Specify the Internal, External & NAT IP then click the >> to add to list.
3. Repeat for each Edge server in the pool.
In case of distributed or remote branch deployment, type in the real IP address of the
Application Server (AS), Communication Server (CS), and IP address of the Host Machine
- 109 -

CHAPTER8 Microsoft Skype for Business Deployment
SmartTAP 360° Live | Installation Guide
(don’t type in 127.0.0.1). In case of all-in-one deployment use the AS, CS, and the Host
machine parameters drop down list to choose the SmartTAP IP address.
Figure 8-44: Server IP Setup
4. Click Next on the Server IP Setup.
5. Click Next on the Setup Type screen
6. Click Install on the install screen
7. Click Finish.
Firewall Exceptions
Firewall exceptions are REQUIRED for this solution to work. See Firewall Configuration on
page65 Firewall Configuration on page65 for the required exceptions.
Configuring Media Proxy for Call Delivery-IP
The SmartTAP Media Proxy is a stand-alone server designed to relay the SRTP “Voice” to the
final destination providing SmartTAP 360° Live with a centralized point to capture the audio.
The SmartTAP Skype for Business plugin on the FE / SBA will pin the media through the proxy so
SmartTAP 360° Live has a central point to capture the SRTP for Internal, PSTN, and Conference
calls.
➢ To configure Media Proxy for Call Delivery-IP:
1. Select the Media Proxy recording type.
- 110 -

CHAPTER8 Microsoft Skype for Business Deployment
SmartTAP 360° Live | Installation Guide
Figure 8-45: Choose Recording Mode – Media Proxy
2. Specify the IP Address of the Media Proxy server.
3. Specify the Media proxy port to use (default 10123).
Figure 8-46: Media Proxy Configuration
- 111 -

CHAPTER8 Microsoft Skype for Business Deployment
SmartTAP 360° Live | Installation Guide
You can combine the Media proxy model that records Internal, PSTN and Conference calls with
the Edge recording model, which will record (Remote, Federated and Mobile calls). If you
intend to use the Edge model in conjunction with the Media proxy, provide the Edge details in
the following screen and install the Media Delivery software on the Edge server:
1. Provide the Internal & External Edge IP.
2. Add the NAT IP if configured.
Figure 8-47: Lync Edge Servers Configuration
3. Specify the real IP addresses of the SmartTAP Communication Server and Application
Server.
4. Select the NIC interface of the local server.
- 112 -

CHAPTER8 Microsoft Skype for Business Deployment
SmartTAP 360° Live | Installation Guide
Figure 8-48: Server IP Setup
5. Select Complete setup type, and then click Next to continue.
6. Click Install to complete installation.
Configuring Call Delivery for Skype for Business
The Voip.cfg file located in the target path of the Call Delivery will automatically be configured
during the SmartTAP software installation. Remember to restart the service if any changes are
made manually to the voip.cfg file.
Default Path: ......\AUDIOCODES\SmartTAP\CD-IP\Config\Voip.cfg
Do not make changes to the Voip.cfg unless the IP address assigned to the FE/SBA
or the SmartTAP server has changed.
Figure 8-49: Description of the Skype for Business Specific Changes
Field Default Description
MICROSOFT=[…] N/A The MICROSOFT field defines the CD configuration
specific to Skype for Business recording. The # must be
removed from every line starting with MICROSOFT line
and the matching ] at the end of the definition
SWSERVERPORT TCP,
9090
- 113 -

CHAPTER8 Microsoft Skype for Business Deployment
SmartTAP 360° Live | Installation Guide
Field Default Description
CC ON
PLUGINLIST blank Add list of Front End Server IP Addresses in the pool
separated by “,” connecting to this Call Delivery
service. Each server in pool should be listed.
SWSERVER blank Set to SmartTAP server IP where Call Delivery resides
RECORDINGTYPE 0 ■ 0 = Mediation, Conference server or Port
Monitoring
■ 3 = Use with Edge
■ 4 = Use the Media Proxy and Edge (Optional)
MEDIAPROXYURL blank IP Address:Port of Media Proxy server (Port default
10123)
Voip.cfg changes in bold below:
MICROSOFT =
[ SWSERVERPORT=TCP,9090 CC=ON PLUGINLIST=Front End / SBA IP:9901 SWSERVER=SmartTAP
Server IP RECORDINGTYPE=# # 0 - monitoring(default), 3 - EdgeProxy (used on the Edge
server), 4 - MediaProxy MEDIAPROXYURL=http://IP:10123 # required if RECORDINGTYPE=4
(MediaProxy)
Installing Media Proxy Server for Skype for Business
The Media Proxy (MP) is used specifically in Microsoft Skype for Business environment as a
voice media proxy. The SmartTAP Skype for Business plugin on the FE will redirect the targeted
SRTP “voice” only to the Media Proxy, which then sends the voice on to the original destination.
A copy of the SRTP “voice” call that traverses the MP is sent to the SmartTAP server for long-
term storage.
● It is highly recommended to configure the Firewall with the required ports to
ensure proper communication prior to the software installation. See Firewall
Configuration on page65.
● Before proceeding, ensure that you have noted the installation requirements (see
Before Installing Microsoft Skype for Business Components on page79
➢ To install the Media Proxy:
1. When the Media Proxy installation wizard starts, click Next to install.
- 114 -
CHAPTER8 Microsoft Skype for Business Deployment
SmartTAP 360° Live | Installation Guide
Figure 8-50: Media Proxy Welcome
If you are installing from a Suite, the following screen may not be displayed.
- 115 -

CHAPTER8 Microsoft Skype for Business Deployment
SmartTAP 360° Live | Installation Guide
Figure 8-51: License Agreement
2. Select the “I accept the terms in the license agreement” radio button and click Next.
- 116 -

CHAPTER8 Microsoft Skype for Business Deployment
SmartTAP 360° Live | Installation Guide
Figure 8-52: Choose Media Proxy IP Address
3. Enter the external Media-Proxy local IP address i.e. do not enter the IP address of the local
host, and click Next.
- 117 -

CHAPTER8 Microsoft Skype for Business Deployment
SmartTAP 360° Live | Installation Guide
Figure 8-53: Choose Application Server IP Address
4. Configure the external Application Server IP address . Click >> to add the IP address to the
list of Application Servers. Use the << button to remove an entry from the list. Click the
entry that you wish to remove. At least one entry should be configured. Click Next to
proceed.
An example configuration is shown in the figure below:
- 118 -

CHAPTER8 Microsoft Skype for Business Deployment
SmartTAP 360° Live | Installation Guide
Figure 8-54: Choose Application Server IP Address
5. When you have completed the configuration, click Next to proceed.
If you are performing an upgrade, the following screen may not be displayed.
- 119 -

CHAPTER8 Microsoft Skype for Business Deployment
SmartTAP 360° Live | Installation Guide
Figure 8-55: Media Proxy Setup Type
6. Choose one of the following setup types and click Next:
● Complete: Install to the default location: C:\Program Files\AudioCodes\SmartTAP\MP
● Custom: Change the destination location.
- 120 -

CHAPTER8 Microsoft Skype for Business Deployment
SmartTAP 360° Live | Installation Guide
Figure 8-56: Media Proxy Install
7. Click Install.
Modifying Media Proxy Server Parameters
This section describes how to modify Media Proxy parameters after installation.
➢ To modify Media Proxy parameters:
1. Edit the System.config file at Program Files\AudioCodes\SmartTAP\MP\Config\.
2. If there is more than one interface in this machine, the Media Proxy server will use this
interface.
<System
key: localIpInterfaceAddress =”<local IP address>” />
Where =”<local IP address> refers to the IP address of the IP interface when the installed
machine has multiple IP interfaces.
3. Add option asList =”< Application Server Web Address>” to specify the list of Application
servers for the Media Server.
<System
key: asList =” "http://172.26.144.23:80, "http://172.26.144.24:80"/>
<System
key: asList =” "https://172.26.144.23:443, "https://172.26.144.24:443"/>
- 121 -

CHAPTER8 Microsoft Skype for Business Deployment
SmartTAP 360° Live | Installation Guide
Where < list of Application Server IP Web addresses>contains a comma separated list of the
Application servers for the Media Proxy server in the SmartTAP Active/Active
Configuration.
4. (Optional) Modify the following Beep tone parameters (see table below for details):
<System beepEnabled="true" beepDurationMs="1000" voiceGain="1"
beepGaindBm="15"intervalDurationSeconds="15"/>
Beep tones can also be enabled to play in the Recording Profile in SmartTAP 360°
Live Web interface.
Table 8-1: Beep Tone Parameters
Parameter Description Default
beepEnabled Set true to play beep during calls.
Default : true
beepEnabled
beepDurationMs Beep duration in milliseconds, valid range
[1-30000].
1000
voiceGain 0 – voice is removed, 1 – voice is added to
tone as is, valid range [0-1].
1
beepGaindBm Beep gain in -dBm units. range [3-31] (-
3dBm to -31dBm), 3-Loudest, 31-Quietest
15
intervalDurationSeconds Interval between each beep. 15
5. Restart Media Proxy Service.
Installing Media Delivery Server for Skype for Business
The Media Delivery is used specifically in Microsoft Skype for Business environment. The
SmartTAP CD-IP will instruct the MD running on the Skype for Business Mediation, Conference
or Edge server to capture a copy of the SRTP “voice” call that is traversing the Skype for
Business server and send the copied SRTP “voice“to the SmartTAP server for long-term storage.
● The Media Delivery is only required for deployments that involve Microsoft Skype
for Business when utilizing the Edge, Mediation or Conference server to capture
the SRTP.
● It is highly recommended to configure the Firewall with the required ports to
ensure proper communication prior to the software installation. See Firewall
Configuration on page65.
- 122 -

CHAPTER8 Microsoft Skype for Business Deployment
SmartTAP 360° Live | Installation Guide
➢ To Install Media Delivery (Skype for Business only):
1. Run the Install.bat from the SmartTAP “Suite\” folder.
2. Select the Distributed software Custom Setup type.
3. Click AudioCodes Inc. Media Delivery Server.
4. Click Install to continue.
5. Select Recording Type Monitoring or Edge.
6. Select Monitoring when utilizing the Mediation or Conference server.
● Specify the physical NIC interfaces to monitor. In a NIC teaming environment do not
select the virtual NIC.
7. Select Edge when utilizing the Edge server.
● Specify the Edge Internal & External NIC interface to monitor. Select the physical NIC
interfaces.
8. Select Complete, click Next to continue.
9. Click Install.
10. Click Finish to complete installation.
Installing Announcement Server
The Announcement Server (AN) is used specifically in the Microsoft Skype for Business
environment as a call recording announcement service to let PSTN callers know their call will be
recorded.
The SmartTAP 360° Live Skype for Business plugin on the FE will redirect the inbound PSTN calls
to the targeted to be recorded users to the AN to play the announcement. Once the
announcement is played, the call will be redirected to the original destination.
If you need to setup a group of Announcement Servers for redundancy or scalability, make sure
to execute the following steps on each Announcement Server.
Do the following:
1. Announcement Server Preparation:Install Core Components & Local Replica Configuration
Store
2. Announcement Server Software Installation Procedure on page128
3. Announcement Server-Post Installation Procedures on page133
Before proceeding, ensure that you have noted the installation requirements (see
Before Installing Microsoft Skype for Business Components on page79.
- 123 -

CHAPTER8 Microsoft Skype for Business Deployment
SmartTAP 360° Live | Installation Guide
Announcement Server Preinstall of Core Components and Local Replica
Configuration Store
This section describes ther installation of the Core components & Local Replica Configuration
store using the Deployment wizard as a prerequisite for installation of the Announcement
Server.
➢ To install the Deployment wizard:
1. Start the Skype for Business Server 2015 Deployment Wizard.
Figure 8-57: Skype for Business Server 2015 – Deploy
2. Select Install Administrative Tools and click Next.
- 124 -

CHAPTER8 Microsoft Skype for Business Deployment
SmartTAP 360° Live | Installation Guide
Figure 8-58: Install Administrative Tools
When completed, the following is displayed:
Figure 8-59: Install Status
3. Click Next to continue.
- 125 -

CHAPTER8 Microsoft Skype for Business Deployment
SmartTAP 360° Live | Installation Guide
Figure 8-60: Install Local Configuration Store
4. Choose option Step 1:Install Local Configuration Store and click Run.
Installs core components & local replica configuration store.
- 126 -

CHAPTER8 Microsoft Skype for Business Deployment
SmartTAP 360° Live | Installation Guide
Figure 8-61: Configure Local Replica of Central Management Store Store
5. Click Next to continue.
Once completed, a screen similar to the following is displayed:
- 127 -

CHAPTER8 Microsoft Skype for Business Deployment
SmartTAP 360° Live | Installation Guide
Figure 8-62: Executing Commands
6. Click Finish.
Announcement Server Software Installation Procedure
This section describes the installation of the Announcement server using the wizard.
➢ To install the announcement server using the wizard:
1. Launch the Installation wizard.
- 128 -

CHAPTER8 Microsoft Skype for Business Deployment
SmartTAP 360° Live | Installation Guide
Figure 8-63: Announcement Server Installation Wizard
The following screen may appear if the .NET Framework 4.7 is not installed.
2. Click Install to continue.
- 129 -

CHAPTER8 Microsoft Skype for Business Deployment
SmartTAP 360° Live | Installation Guide
3. Click Next.
If you are installing from a Suite, then the following screen may not be displayed.
Figure 8-64: License Agreement
4. Click Next to agree to the license.
Figure 8-65: Announcement Server
5. Select the type of Announcement server and click Next:
- 130 -

CHAPTER8 Microsoft Skype for Business Deployment
SmartTAP 360° Live | Installation Guide
● Announcement Server for Lync 2013
● Announcement Server for Skype for Business 2015
● Announcement Server for Skype for Business 2019
Figure 8-66: Choose Application Server IP Address
6. Configure external Application Server IP address and select either the HTTP or HTTPS
protocol. Click >> to add the IP address to the list of Application Servers. Use the << button
to remove an entry from the list. Click the entry that you wish to move. At least one entry
should be configured. An example configuration is shown in the figure below.
- 131 -

CHAPTER8 Microsoft Skype for Business Deployment
SmartTAP 360° Live | Installation Guide
Figure 8-67: Application Server IP Address
Figure 8-68: Setup Type
7. Choose the Setup Type and click Next:
● Complete: Install to the default location: C:\Program Files\AudioCodes\SmartTAP\ANN
● Custom: Change the destination location.
- 132 -

CHAPTER8 Microsoft Skype for Business Deployment
SmartTAP 360° Live | Installation Guide
If you are performing an upgrade, this screen may not be displayed.
Figure 8-69: Install Commences
8. Click Install to commence the installation process.
● Do not install on the SmartTAP server.
● The Announcement Service will not start automatically. It needs to be started
manually after configuring the Announcement Services (see below).
Announcement Server-Post Installation Procedures
This section describes the following procedures required following the installation of the
announcement server:
■ Step 1-Activate Announcement Services below
■ Step 2-Add Announcement Servers to DNS on the next page
■ Step 3-Configuring Announcement Server (Skype for Business) on the next page
Step 1-Activate Announcement Services
This section describes how to configure Announcement Services.
➢ To activate announcement services:
1. Start the PowerShell console as an Administrator user with the following permissions:
- 133 -

CHAPTER8 Microsoft Skype for Business Deployment
SmartTAP 360° Live | Installation Guide
● The user must be a member of RTCUniversalServerAdmins for creating the trusted-
application.
● In addition, for creating a certificate to use by AN service, the account must be a local
administrator and have rights to the specified certification authority.
The CA is sometimes configured to not allow creating certificates online, and in that
case, the activation will always fail regardless of the account. In this case it is required
to create and assign a certificate using the Skype for Business deployment wizard
and re-run the activation script. The activation script will detect an installed certificate
and continue execution.
2. Change the working folder to the PowerShell folder in the Announcement Server
installation folder: SmartTAP 360° Live\AN\PowerShell\.
3. Run the .\Activate.ps1 command.
4. Enter port 12171 when prompted.
5. Save the AnnouncementsApp application endpoint name. It should be logged in the
PowerShell command line window as shown in red color below:
6. “…AnnouncementsApp application endpoint name sip:[email protected]...”
7. Save the NAME string and use it in the “Steps to add Announcement Servers to DNS”
section.
8. Start AudioCodes Announcement Service.
Step 2-Add Announcement Servers to DNS
➢ To Add Announcement Servers to DNS
■ Add DNS ‘A’ record to the appropriate zone on the configured DNS server per
Announcement server against the AnnouncementApp name that was saved in “Steps to
activate Announcement Services” section (NAME, example: AnnouncementsApp-pool-
2013-1, AnnouncementsApp-pool-2015-1).
Step 3-Configuring Announcement Server (Skype for Business)
This section describes how to setup the Announcement server for recording Announcements
and attaching audio files.
➢ To configure the Announcement server:
1. Copy all ANNfiles and IVRfiles that you wish to configure for Announcements to the
following location:
Program Files\AudioCodes\SmartTAP\AN\Config\StateMachineConfig
- 134 -

CHAPTER8 Microsoft Skype for Business Deployment
SmartTAP 360° Live | Installation Guide
Figure 8-70: StateMachineConfig File Location
This action enables you to attach ANNand IVR files to the Recording Profile in the
SmartTAP 360° Live Web interface.
All ANNfiles must be saved in the WMAformat and all IVR files must be saved in
JSON format. For configuration of recording profiles, Refer to the SmartTAP 360°
LiveAdministrators Guide.
2. Edit the System.config file from the following location:
Program Files\AudioCodes\SmartTAP\AN\Config\
3. Add option ‘normalizeNumbers=”true” when normalization of called numbers for the
Announcement Server is required.
<System
normalizeNumbers =”true”
/>
4. Add option asList =”< Application Server Web address>” to specify the Web address of the
Application server (AS) for the Announcement server.
<System
key: asList =”<Application Server IP address>”
/>
5. Restart AN Service.
Installing SmartTAP Monitoring Service
SmartTAP Monitoring Service(STMonitoringSvc) is designed to test SmartTAPrecording func-
tionality using AudioCodes HealthMonitor (HM) and Microsoft UCMA. It will generate a test call
between two trusted application endpoints and will update the results to the Health Monitor .
The Health Monitor will then validate the recording metadata and the call media and send an
alarm or email to SmartTAPif required. For more information on the Health Monitor, refer to
the SmartTAPAdministrator Guide.
- 135 -

CHAPTER8 Microsoft Skype for Business Deployment
SmartTAP 360° Live | Installation Guide
● The CA is sometimes configured to not allow creating certificates online, and in
this case, the activation will always fail regardless of the account and users are
required to create and assign a certificate using the Skype for Business
deployment wizard and re-run the activation script. The activation script will
detect an installed certificate and continue execution.
● One additional Target and Recorder license is is required for the test endpoints.
➢ Do the following:
1. Install the SmartTAPMonitoring Service (SmartTAP 360° Live Monitoring Service
Installation Procedure below
2. Activate the SmartTAPMonitoring Service (Activating the SmartTAP 360° Live Monitoring
Service on the next page
3. Configure the SmartTAP Monitoring Service (Configuring the SmartTAP Monitoring Service
on page138)
SmartTAP 360° Live Monitoring Service Installation Procedure
This section describes the SmartTAP 360° Live Monitoring Service Installation procedure.
➢ To install the SmartTAP 360° LiveMonitoring service:
1. "SmartTAP 360° Live Monitoring Service" can be installed using SmartTAP 360° Live
Installation Suite or dedicated installer inside Suite folder (Suite\Monitoring Ser-
vice\SmartTapMonitoringService Setup.exe).
2. Choose Accept and continue with Next.
- 136 -

CHAPTER8 Microsoft Skype for Business Deployment
SmartTAP 360° Live | Installation Guide
Figure 8-71: Monitoring Service Skype for Business Platform
3. Select the Lync/Skype for Business platform that you wish to install.
4. Specify the machine’s IP address where the Health Monitor is installed.
It is possible to choose from the drop-down menu or write manually.
If the Health monitor is configured to localhost, then enter the Health Monitor IP
address..
5. Choose complete for installation on a default drive or custom to change it.
6. Click Next.
The installation folder is found at the following path:
<rootDrive>:\Program Files\AUDIOCODES\Tools\SmartTapMonitoringService
Activating the SmartTAP 360° Live Monitoring Service
This section describes how to activate the SmartTAP 360° Live Monitoring Service.
➢ To activate SmartTapMonitoringService service:
1. Start the PowerShell console as an Administrator user with the following permissions:
● The user must be a member of RTCUniversalServerAdmins for creating the trusted-
application.
- 137 -

CHAPTER8 Microsoft Skype for Business Deployment
SmartTAP 360° Live | Installation Guide
● In addition, for creating a certificate to be used by SmartTapMonitoringService, the
account must be a local administrator with rights to the specified certification
authority.
2. Change the working folder to the PowerShell folder in the SmartTapMonitoringService
installation folder.
3. Run the .\Activate.ps1 command.
4. Enter custom port when prompted (ex. 10145).
5. Save the SmartTapMonitoringService application endpoint names – caller and agent. It
should be logged in the PowerShell command line window as below:
“…application endpoint name sip:SmartTapTestCallGeneratorAgent@domain...”
“…application endpoint name sip:SmartTapTestCallGeneratorCaller@domain...”
6. Save the Trusted application name, ex.:
“Creating SmartTapTestCallGenerator trusted application on SmartTapTestCallGenerator-
pool-2015-1”
7. Add DNS ‘A’ record of saved in previous step to the appropriate zone on the configured
DNS server.
example: SmartTapTestCallGenerator-pool-2015-1.
8. Start the service.
Configuring the SmartTAP Monitoring Service
This section describes how to configure the SmartTAP Monitoring Service. The configuration file
is found in <STMonitoringSvc root>\Config\System.config. The SmartTAPMonitoring service
retrieves its configuration from the HealthMonitor (REST), therefore the Health Monitor's IP
address is required. If this IPaddress was not configured in installation, it can be configured as
follows:
<System
healthMonitoringRestServerBaseUrl="http://localhost:10101/"
/>
All the configuration default values are remarked in the System.config, for example:
key: restClientKeepAliveInterval
Default Value: 30
Description: Time in seconds for Rest client to send keep alive message.
key: callerMediaFilePath
Default Value: "Music\callerMusic.wma"
Description: caller media file path.
key: agentMediaFilePath
- 138 -

CHAPTER8 Microsoft Skype for Business Deployment
SmartTAP 360° Live | Installation Guide
Default Value: "Music\agentMusic.wma"
Description: agent media file path.
In addition, these parameters can be added to the ‘System’ section if they need to be
overwritten:
<System
callerMediaFilePath ="Music\OtherCallerFile.wma"
agentMediaFilePath ="Music\OtherAgentFile.wma"
restClientKeepAliveInterval="40"
/>
UcmaMonitoringConfig section Example
<UcmaMonitoringConfig>
<IsActivationMode>true</IsActivationMode>
<Endpoints/>
<ActionTimes>15:30,15:40</ActionTimes>
<KeepAliveTimeoutSec>60</KeepAliveTimeoutSec> -> NEW Field.
</UcmaMonitoringConfig>
In case the caller is created by the above script sip:S-
The test call scenario is a Basic call wherethe Caller calls the Agent and the Agent answers auto-
matically. Both partiesplay ‘callerMediaFilePath’\’agentMediaFilePath’ media files accordingly,
with default values of ‘Music\callerMusic.wma’ and ‘Music\agentMusic.wma’.
STMonitoringSvc informs the Health Monitor when the call is has ended, and the Health Mon-
itor validates that the call has been recorded.
In case the call was not recorded or recorded with silent media, the Health Monitor sends an
alarm to the ApplicationServer and will notify by email to the list of recipients configured in
<smtpProperties> section.
■ The above users must be targeted users in the SmartTAP system (one additional target and
recorder license should be available for this purpose)).
■ Also Call retention policy for one day is required in order not to overload the Database.
ActionTimes
ActionTimes configures the time of the day to generate the test call (generated daily).
<ActionTimes>15:30, 15:40, 15:50</ActionTimes>
KeepAliveTimeoutSec
A Keep Alive mechanism between the Health Monitor and STMonitoringSvc was added to
theHealth Monitor.If you already have installed the Health Monitor , add the <Keep-
AliveTimeoutSec> field under the <UcmaMonitoringConfig> section as is shown in
- 139 -

CHAPTER8 Microsoft Skype for Business Deployment
SmartTAP 360° Live | Installation Guide
the example below. This field is for the purpose of maintaining communication between the
STMonitoringSvc and the Health Monitor. The KeepAliveTimeoutSec configures the time in
seconds that the Health Monitor receives a Keep-alive message from STMonitoringSvc. If this
time is exceeded, the Health Monitor sends a Communication Down alarm.
<KeepAliveTimeoutSec>60</KeepAliveTimeoutSec>
- 140 -

CHAPTER9 Integration Configuration
SmartTAP 360° Live | Installation Guide
9 Integration Configuration
SmartTAP supports several telephony integration options. Go to the appropriate integration to
configure Call Delivery for your environment:
■ Microsoft Skype for Business - See Section Microsoft Skype for Business Deployment on
page76
■ SIPRec – See SIP Recording (SIPRec) on page157
■ Voip Mirror Port (SIP, H.323, Avaya, Cisco, etc.) – seeVoIP Port Mirroring below
■ Analog Trunk, Station & Radio – see Analog Trunk / Radio on page147
VoIP Port Mirroring
The SmartTAP 360° Live software supports many different IP PBX station side- tapping
configurations using a mirror port or network tap appliance to receive the unencrypted
Signaling and RTP.
Inbound / Outbound
This is the easiest configuration as seen in the following image because you can mirror the
traffic at the highest-level switch before the PBX. Tapping between the PBX and the phone is
crucial to determining the call Initiator and Recipient.
Figure 9-1: Inbound/Outbound
Station to Station
To record station-to-station calls, it is important to understand that once the call is established
between two endpoints that reside on the same switch, the RTP “Voice” will travel directly
- 141 -

CHAPTER9 Integration Configuration
SmartTAP 360° Live | Installation Guide
between them. The recorder will miss the RTP, if you tap at the highest-level switch as in the
diagram above. To avoid missing the RTP, mirror the traffic from the lower level switch with
endpoints connected that need to be recorded.
Figure 9-2: Station to Station
Call Delivery Install for VoIP (Port Mirror)
This section describes how to install Call Delivery Install for VoIP (Port Mirror).
➢ To install Call Delivery Install for VoIP (Port Mirror)
1. Click Next to continue.
- 142 -
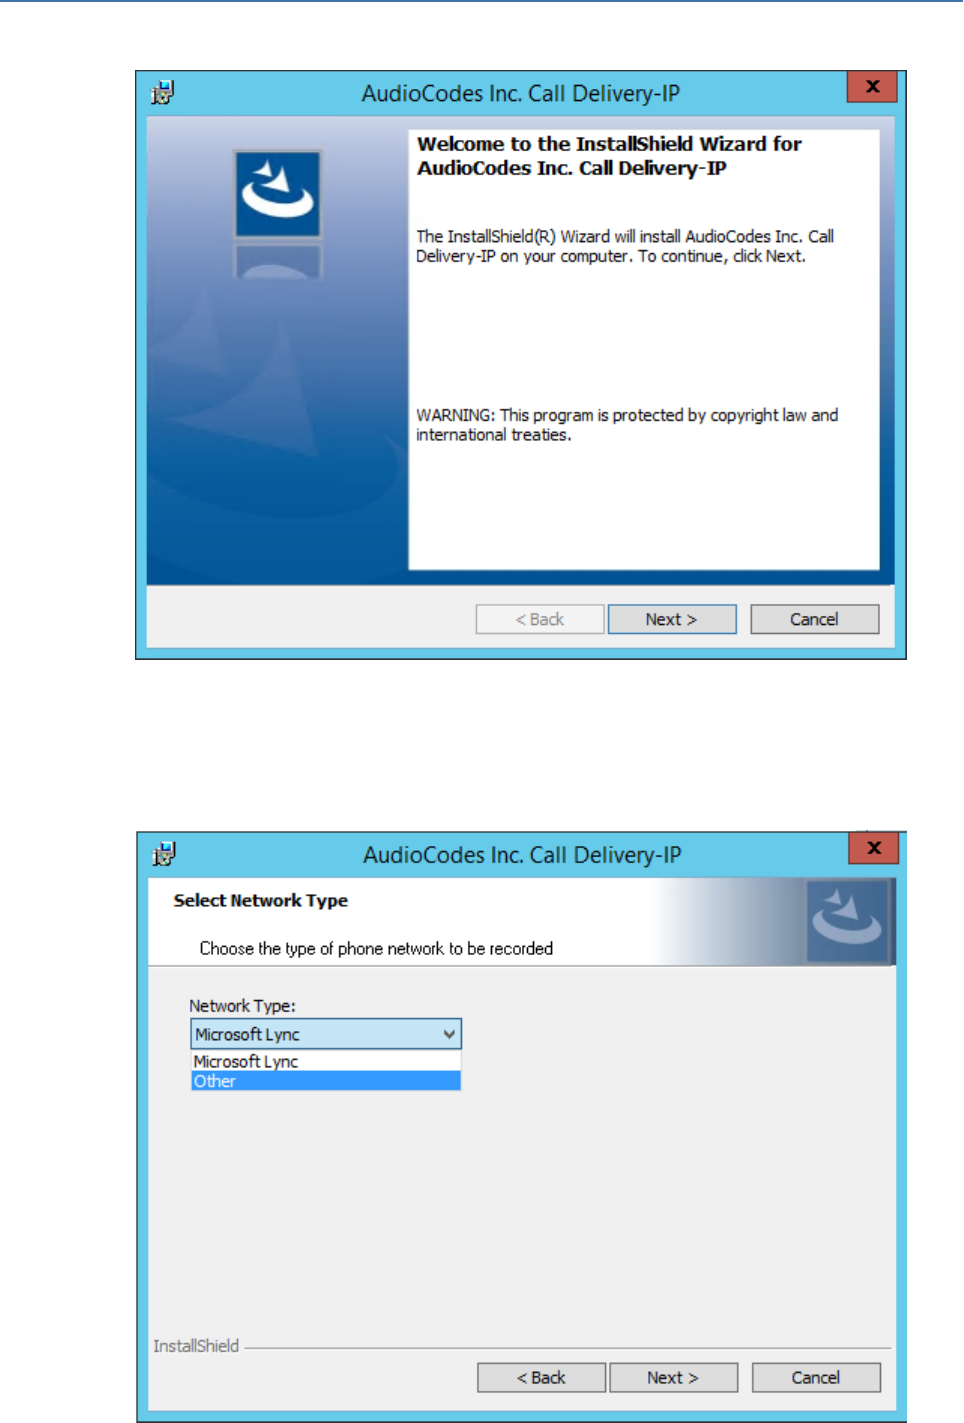
CHAPTER9 Integration Configuration
SmartTAP 360° Live | Installation Guide
Figure 9-3: Call Delivery IP
Assuming you are NOT setting up for a Skype for Business installation, select “Other” when
prompted for the network type.
2. Click Next on the Server IP Setup.
Figure 9-4: Select Network Type
- 143 -
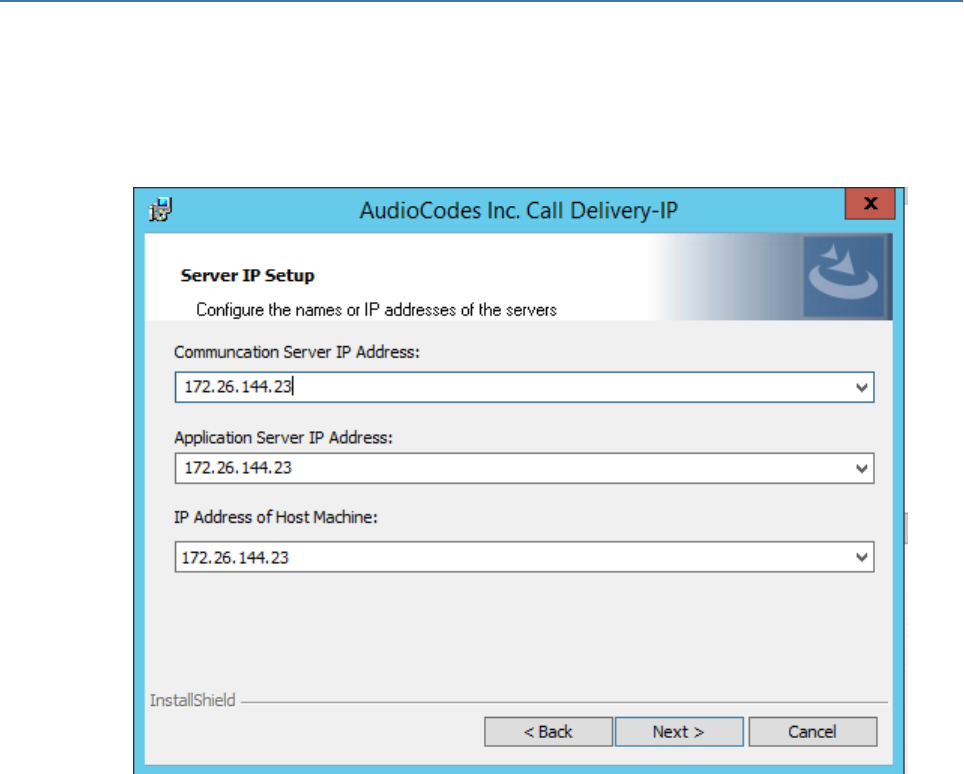
CHAPTER9 Integration Configuration
SmartTAP 360° Live | Installation Guide
Assuming the Call Delivery Service is on the same machine as the Application and
Communication service leave the default below settings.
3. Click Next on the Server IP Setup.
Figure 9-5: Server IP Setup
SmartTAP passive IP integration supports monitoring up to 8 NIC interfaces. In a typical
server, there are a minimum of two NIC interfaces. NIC 1 is used to connect the SmartTAP
server to the LAN for user access. The 2
nd
NIC is connected to the mirror port on the switch
to receive the signaling and RTP.
From the Monitoring Port 0 drop down list, select the appropriate NIC interface that is
connected to the mirror port on the switch. Monitoring Port 1 is used in the event a 3
rd
NIC
is required to connect to a different mirror port on a 2
nd
switch.
4. Select the appropriate Monitoring Port 0/1 interfaces from the dropdown menu in the
Interface Setup screen
- 144 -

CHAPTER9 Integration Configuration
SmartTAP 360° Live | Installation Guide
Figure 9-6: Interface Setup
5. Click Next on the Setup Type screen.
6. Click Install on the install screen.
7. Click Finish to finish.
Additional Configuration for VoIP Port Mirroring
This section describes addition configuration for VoIP Port mirroring.
➢ To perform additional configuration:
1. Configure VoIP.cfg file to match IP PBX.
2. Configure mirror port on switch to mirror traffic to SmartTAP server.
3. ConfigureCall Delivery configuration files.
The following files located in the target path of the Call Delivery are the most common files that
are required for the IP environment:
Default Path: ......\AudioCodes\SmartTAP\CD-IP\Config\Voip.cfg
Table 9-1: Description of the Avaya H.323 Specific Changes
Field Default Description
Avaya_
H323=[…]
N/A Changes specific to Avaya H.323 recording.Uncomment
section by removing hashes (#) at the beginning of each
- 145 -
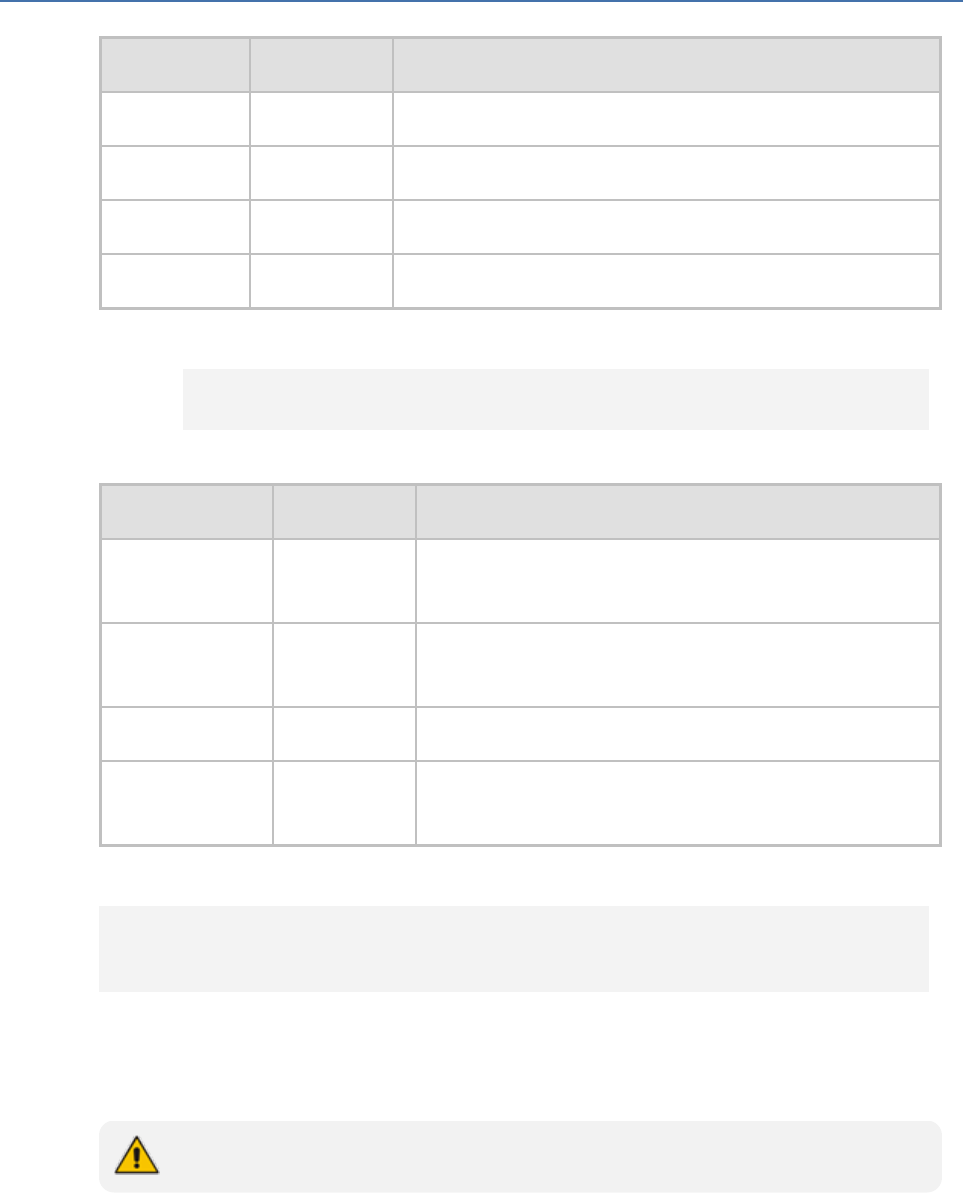
CHAPTER9 Integration Configuration
SmartTAP 360° Live | Installation Guide
Field Default Description
line
H225CS 1720,TCP H.323 Call Control port
H225RAS 1719,UDP H.323 RAS port
SERVERIPS N/A IP address of Avaya PBX
VoIP.cfg changes for recording Avaya H.323 (unencrypted) are shown below:
#Avaya_H323 = #[ H225CS=1720,TCP # H225RAS=1719,UDP #
SERVERIPS= # DCH=ON # DCHFILTER=OFF # CC=ON # SUBTYPE=CM]
Table 9-2: Description of the SIP Recording Specific Changes
Field Default Description
SIP=[…] N/A Changes specific to SIP recording. Uncomment section
by removing hashes (#) at the beginning of each line.
SERVERIPS N/A IP address of PBX, or list of IP addresses of PBXs
(separated by comma).
TRANSPORT UDP,5060 SIP signaling.
ADD_
TRANSPORTS
(optional
field)
Additional transports such as (TCP,5060) when SIP uses
TCP for signaling in addition to UDP.
Voip.cfg changes for recording SIP (unencrypted) are shown below:
SIP =
[ SERVERIPS=192.168.70.6,10.250.0.5,192.168.70.5 TRANSPORT=UDP,5060 ADD_
TRANSPORTS=TCP,5060 CC=ON ] ]
Setting Up Monitoring Interfaces
This section describes how to manually setup the monitoring interfaces.
SmartControl is no longer available for CD-IP.
➢ To setup the monitoring interfaces:
1. Run the System Profile Tool, C:\Program Files\AudioCodes\SmartTAP\tools\system_
profile.exe.
This tool generates a report file called report.txt. This file contains a list of network
interfaces. Choose the interfaces you wish to monitor and then extract the respective
GUIDs and interface names from the data provided in the report.
- 146 -

CHAPTER9 Integration Configuration
SmartTAP 360° Live | Installation Guide
2. Open the C:\Program Files\AudioCodes\SmartTAP\tools\report.txt file and extract the
GUIDs and interface names for those interfaces that you wish to monitor (example values
are indicated in red in the extract below):
Fri Mar 31 13:19:31 2017: Details of network interfaces.
Fri Mar 31 13:19:31 2017: 0x0000000e:
Fri Mar 31 13:19:31 2017: Link encap:Ethernet
Fri Mar 31 13:19:31 2017: HWaddr 02:00:4c:4f:4f:50
Fri Mar 31 13:19:31 2017: name:\DEVICE\TCPIP_{65E31628-075A-4DEB-A09E-
C4041EC5F750}
Fri Mar 31 13:19:31 2017: MTU:1500 Speed:1215.75 Mbps
Fri Mar 31 13:19:31 2017: Admin status:UP Oper status:OPERATIONAL
Fri Mar 31 13:19:31 2017: RX packets:0 dropped:0 errors:0 unknown:0
Fri Mar 31 13:19:31 2017: TX packets:0 dropped:0 errors:0 txqueuelen:0
Fri Mar 31 13:19:31 2017: Descr: "Microsoft KM-TEST Loopback Adapter"
3. Edit the C:\Program Files (x86)\AudioCodes\SmartTAP\CD-IP\config\calldeliveryconfig.xml
file:
a. Add the extracted GUID and interface name:
<monitoringInterfaces> <interface enabled="1" guid="{65E31628-075A-4DEB-A09E-
C4041EC5F750}" adapterName="Microsoft KM-TEST Loopback Adapter"
/> </monitoringInterfaces>
b. Set “enabled” to 1 for all those interfaces that you wish to monitor.
Analog Trunk / Radio
The SmartTAP software supports analog loop start phone line trunk or station side and VOX
activity based recording. The SmartWORKS LD card is designed for high impedance tapping.
Loop Start Trunk / Station
The battery voltage of the analog line may be different between Trunk and Station
side.Adjusting SmartTAP to match the environment is easily achieved and discussed in the next
chapter.
The 24-channel card is a Hi-Impedance tap card designed to passively tap the phone line. In the
event of a card or server hardware failure, there will be no impact to normal operation of the
phone or analog line.
The figure below represents a typical passive tap implementation using a 66 block. The
maximum distance tested from PBX to Analog phone while tapping is 2200’.
- 147 -
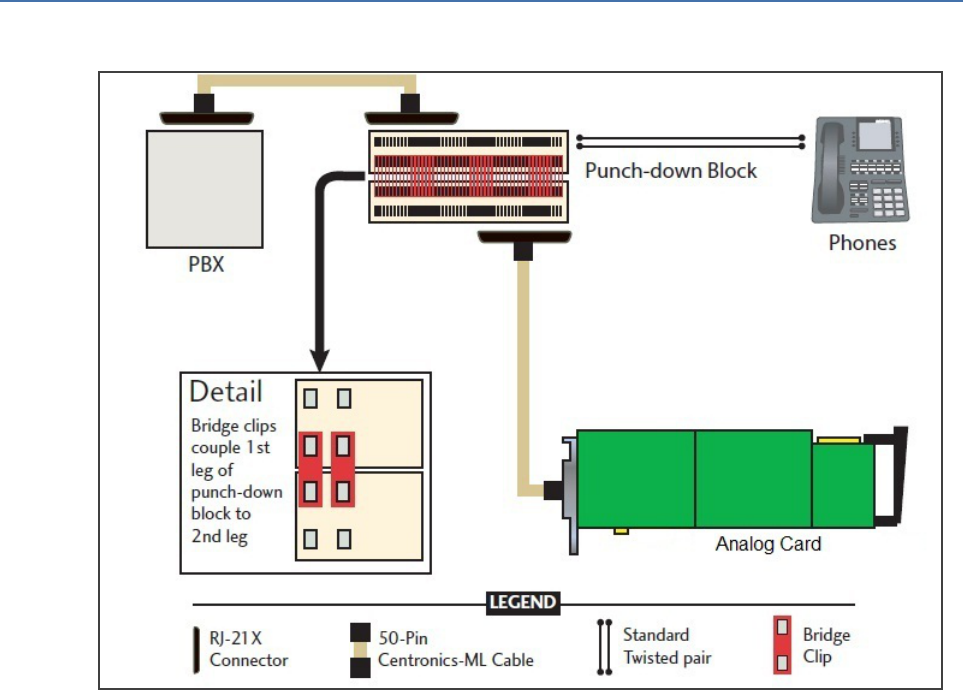
CHAPTER9 Integration Configuration
SmartTAP 360° Live | Installation Guide
Figure 9-7: Passive Tap Implementation
The image in Figure 1 represents the female connector on the Analog board.The pin-out follows
industry standard wiring.The image in Figure 2 is typical color coded wiring used in 25 pair telco
grade CAT 3 or higher cables.
- 148 -

CHAPTER9 Integration Configuration
SmartTAP 360° Live | Installation Guide
Figure 9-8: Color-Coded Wiring-RJ21x Female Connector
- 149 -

CHAPTER9 Integration Configuration
SmartTAP 360° Live | Installation Guide
Figure 9-9: Color Coded Wiring-25-Pair Color Coding
Call Delivery Install for Analog Recording (Passive Tap)
The Call Delivery Install for Analog Recording is executed when an LD card is detected on the
server. The LD card records Analog phones.
The screens shown in the procedure below are specific to the installation when a LD
card is detected on the server.
➢ To install Call Delivery for Analog Recording (Passive Tap):
1. Click Next to continue on the Wizard for Call Delivery LD screen.
- 150 -

CHAPTER9 Integration Configuration
SmartTAP 360° Live | Installation Guide
Figure 9-10: Call Delivery LD
In case of distributed or remote branch deployment, type in the real IP address of the
Application Server (AS), Communication Server (CS), and the Local IP address machine
(don’t type in 127.0.0.1). In case of all-in-one deployment use the AS, CS, and the Local IP
address parameters drop down list to choose the SmartTAP IP address.
2. Click Next on the Server IP Setup.
- 151 -

CHAPTER9 Integration Configuration
SmartTAP 360° Live | Installation Guide
Figure 9-11: Server IP Setup
3. Click Next on the Setup Type screen.
4. Click Install on the install screen.
5. Click Finish to finish.
Additional Configuration for Analog Trunk and Radio
The LD.xml file located in the target path of the Call Delivery is the most common file that
needs to be configured for the analog environment.There is only one LD.xml file for all Analog
cards.Using XML, you can specify in the LD.xml specific board and channel configurations.For
example, board 0, channels 0-7 are voltage trigger based recording and 8-16 are VOX based
recording.
Default Path: ......\AUDIOCODES\SmartTAP\CD-AL\Config\
■ LD.xml – Configuration file
■ LD.xsd – Contains parameter definition and valid values.
- 152 -

CHAPTER9 Integration Configuration
SmartTAP 360° Live | Installation Guide
Figure 9-12: LD.xml Basic Structure Diagram
Most Common Values that may need to be adjusted per board or channel.
Figure 9-13: Most Common Values to be Adjusted per Board or Channel
Element Name Attribute Name Description Default
deglitch loopDeglitchTime Min = 10ms, Max =
2550ms. Ignore Voltage
signal bounce on line
during hang-up to avoid
false call records.
Recommend 500ms
minimum.
250ms
ringDeglitchTime Min = 10ms, Max =
2550ms. Ignore ringing
signal bounce on line on
incoming call. Avoid
false start of recording.
250ms
voltage thresholdHigh Min = -60vdc, Max =
60vdc. On Hook voltage
must be greater than
thresholdHigh.
16vdc
thresholdLow Min = -60vdc, Max =
60vdc. Off Hook voltage
must be greater than
4vdc
- 153 -

CHAPTER9 Integration Configuration
SmartTAP 360° Live | Installation Guide
Element Name Attribute Name Description Default
thresdholdLow and
below thresholdHigh.
Polarity type Normal, will cosmetically
change line polarity to
positive.
Reversed, will
cosmetically change line
polarity to negative.
normal
alertTone enable True = Audible tone will
be played on line for
both callers to hear to
indicate call is being
recorded.
false
stateMachine file ldgeneric.scxml = User
for analog loop start
lines
activitydetection.scxml =
Used for Vox or radio
lines
ldgeneric.scxml
CallerID sensitivity Min = 2, Max = 128 2
- 154 -

CHAPTER9 Integration Configuration
SmartTAP 360° Live | Installation Guide
Element Name Attribute Name Description Default
activityDetection enable
thresholdLow Min = -60, Max = 0dBm,
Must be less than
thresholdHigh by 3dBm.
-51dBm
thresholdHigh Min = -60, Max = 0dBm,
Must be greater than
thresholdHigh by 3dBm.
-48dBm
minActivity Min = 40ms, Max =
2000, Used to trigger
recording.
40ms
maxActivity Min = 40ms, Max =
20000
10000ms
minSilence Min = 500, Max = 20000 5000ms
maxSilenece Min = 500, Max = 20000 5000ms
boardID 0 – 31 All
lineID 0 – 23, 24 channels per
board
All
Activity Detection
The Activity detector measures input signal energy in 20 ms samples.The energy measurement
is then converted to average power and the result is compared against two programmable
thresholds:
■ The silence threshold thresholdLlow
■ The activity threshold thresholdHigh
Whenever the detector is in the silence state and the measured input signal energy remains
above thresholdHigh for the minActivity duration, the detector changes to the activity state.
Whenever the detector is in the activity state and the measured input signal energy remains
below thresholdLow for the minSilence duration, the detector changes to the silence state.
- 155 -

CHAPTER9 Integration Configuration
SmartTAP 360° Live | Installation Guide
Figure 9-14: Activity Detection
SmartCONTROL
Use the applet in the Windows control panel to configure the Analog card using the Board tab.
The only setting that requires configuration is TDM Encoding:
■ U-LAW = North America
■ A-LAW = Europe, APAC, etc…
- 156 -
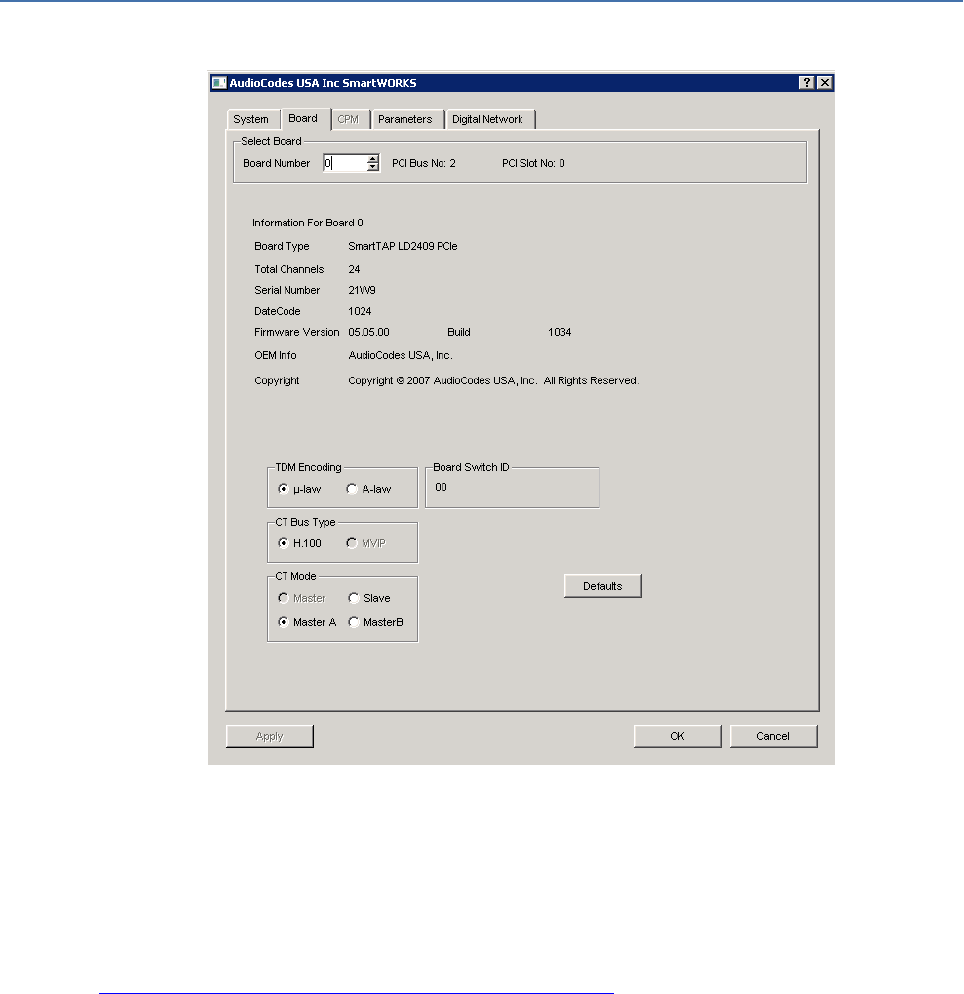
CHAPTER9 Integration Configuration
SmartTAP 360° Live | Installation Guide
Figure 9-15: Board Tab
SIP Recording (SIPRec)
This section describes the SIP Recording (SIPRec) integration with SmartTAP 360° Live. In
reference to the IETF Charter: The Session Recording Protocol (SIPREC) working group is
chartered to define a SIP-based protocol for controlling a session (media) recorder.
https://datatracker.ietf.org/doc/draft-ietf-siprec-protocol/
The scope of the activity includes:
■ Recorder Control
■ Session metadata content and format
■ Security mechanisms, including transport and media encryption
■ Privacy concerns, including end-user notification
■ Negotiation of recording media streams
What is SIPRec?
The Session Recording Protocol is used for establishing an active recording session and
reporting of the metadata of the communication session.
- 157 -

CHAPTER9 Integration Configuration
SmartTAP 360° Live | Installation Guide
Session Recording Server (SRS)
A Session Recording Server (SRS) is a SIP User Agent (UA) that acts as the sink of the recorded
media. An SRS is a logical function that typically archives media for extended durations of time
and provides interfaces for search and retrieval of the archived media.
Session Recording Client (SRC)
A Session Recording Client (SRC) is a SIP User Agent (UA) that acts as the source of the recorded
media, sending it to the Session Recording Server. In practice, a Session Recording Client could
be a personal device (such as a SIP phone), a SIP Media Gateway (MG), a Session Border
Controller (SBC), Media Server, or an Application Server. The Session Recording Client is also
the source of the recorded session metadata.
Figure 9-16: Session Recording Client
➢ To configure SIPRec:
1. Ensure the Gateway / SBC (SRC) is properly configured to send call data to SmartTAP 360°
Live (SRS).
2. Configure Call Delivery to receive from SRC.
Configuring Gateway & SBC for SIP Recording
You must configure the AudioCodes E-SBC for interworking between the SBC and the SIP
Recording Server for the following entities:
■ Skype for Business Server environment
■ SIP Trunking environment
■ SIP Recording server
For configuring Load Balancing between multiple SmartTAP servers, see Configuring Load
Balancing on the SBC Device on the next page
For configuring alternative routing, see Configuring Alternative Routing on the SBC on page160
- 158 -
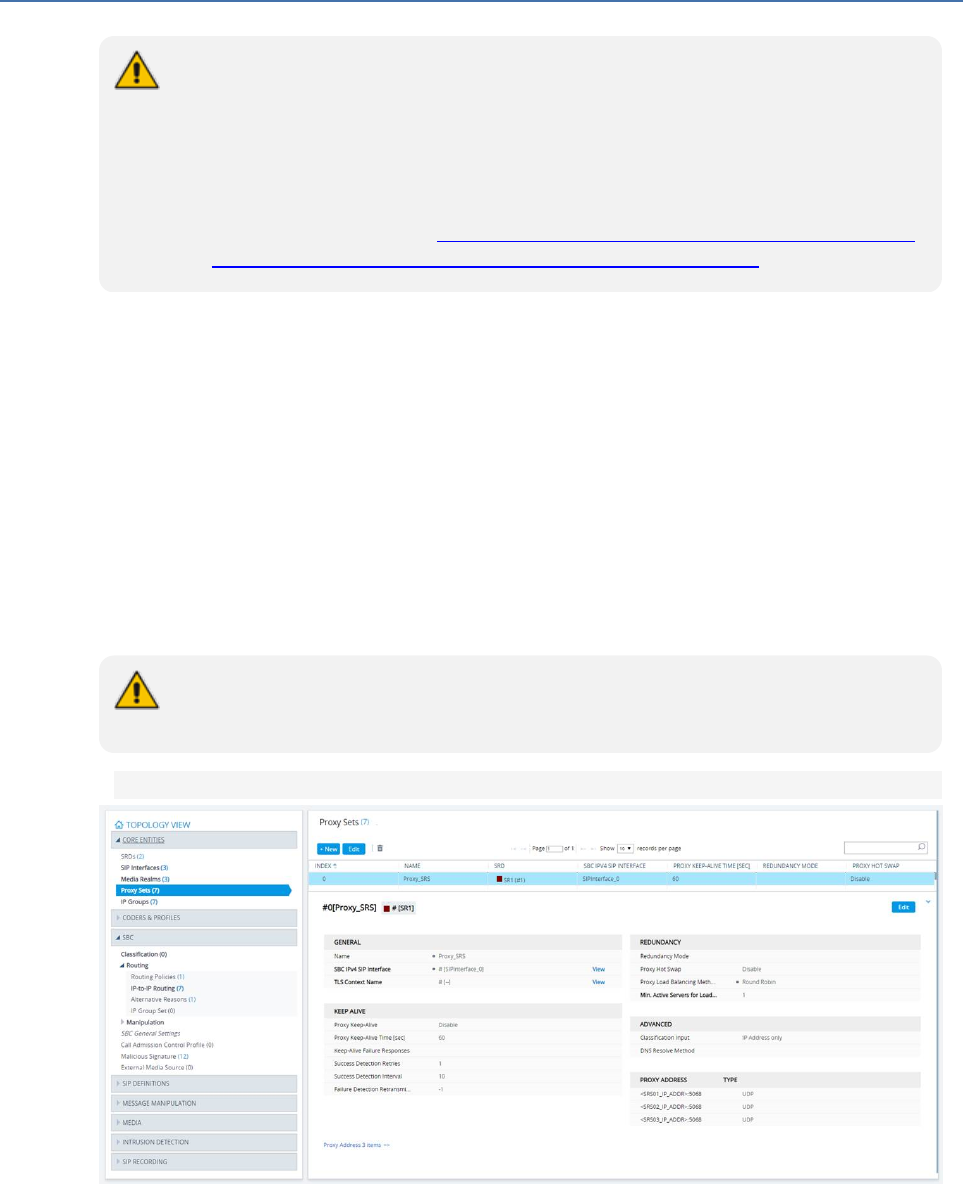
CHAPTER9 Integration Configuration
SmartTAP 360° Live | Installation Guide
● For implementing the SBC SIPRecording configuration, the AudioCodes SBC
must be installed with an appropriate License Key. For more information, contact
your AudioCodes sales representative.
● For detailed information on configuring the SBC for SIPRecording, refer to the
appropriate device SIPUser's Manual.
● For deploying SmartTAPfrom the Azure Marketplace with SIPRec-based
recording of calls, refer to https://www.audiocodes.com/media/14106/SmartTAP
360° Live-siprec-in-azure-marketplace-configuration-guide.pdf
Configuring Load Balancing on the SBC Device
This step describes how to configure the SBC for load balancing. This configuration is required
when SmartTAP 360° Liveis deployed on multiple servers to balance the load.
➢ To configure Gateway & SBC for SIP Recording:
1. Open the Proxy Sets table (Setup menu > Signaling & Media tab > Core Entities
folder>Proxy Sets).
2. Add all the CD-SIPREC servers to the SRS's Proxy Set under 'CORE ENTITIES > Proxy Sets >
[Index###] > Proxy Address'.
This step is only necessary when there is more than one SmartTAP 360° Liveserver
deployed.
Figure 9-17: Proxy Set
- 159 -

CHAPTER9 Integration Configuration
SmartTAP 360° Live | Installation Guide
Figure 9-18: Proxy Set IPAddresses
3. After adding the SIPREC servers to the list, edit the Proxy Set's configuration under Core
Entities > Proxy Sets > [Index###] > Edit' and set 'Proxy Load Balancing Method' to 'Round
Robin'.
Figure 9-19: Proxy Load Balancing Method
Configuring Alternative Routing on the SBC
This step describes how to configure an alternative reason (reject messages). The RELEASE
CAUSE should match the reason configured in CD-SIPREC config file (see . CD-SIPREC Con-
figuration on page184). This configuration is required when SmartTAP 360° Liveis deployed on
multiple servers as a load.
➢ To configure alternative routing:
1. Open the Alternative Reasons page (Setup tab > SBC folder > Routing > Alternative
Reasons).
- 160 -

CHAPTER9 Integration Configuration
SmartTAP 360° Live | Installation Guide
Figure 9-20: Alternative Routing Reasons
Installing SmartTAP 360° Live for SIP Recording
This section describes how to install SmartTAPfor SIP Recording.
➢ To install SmartTAPrecording:
1. Launch install.bat from the “Suite” folder with "administrator" privileges.
2. Select the check boxes for the components as shown in the figure below.
- 161 -
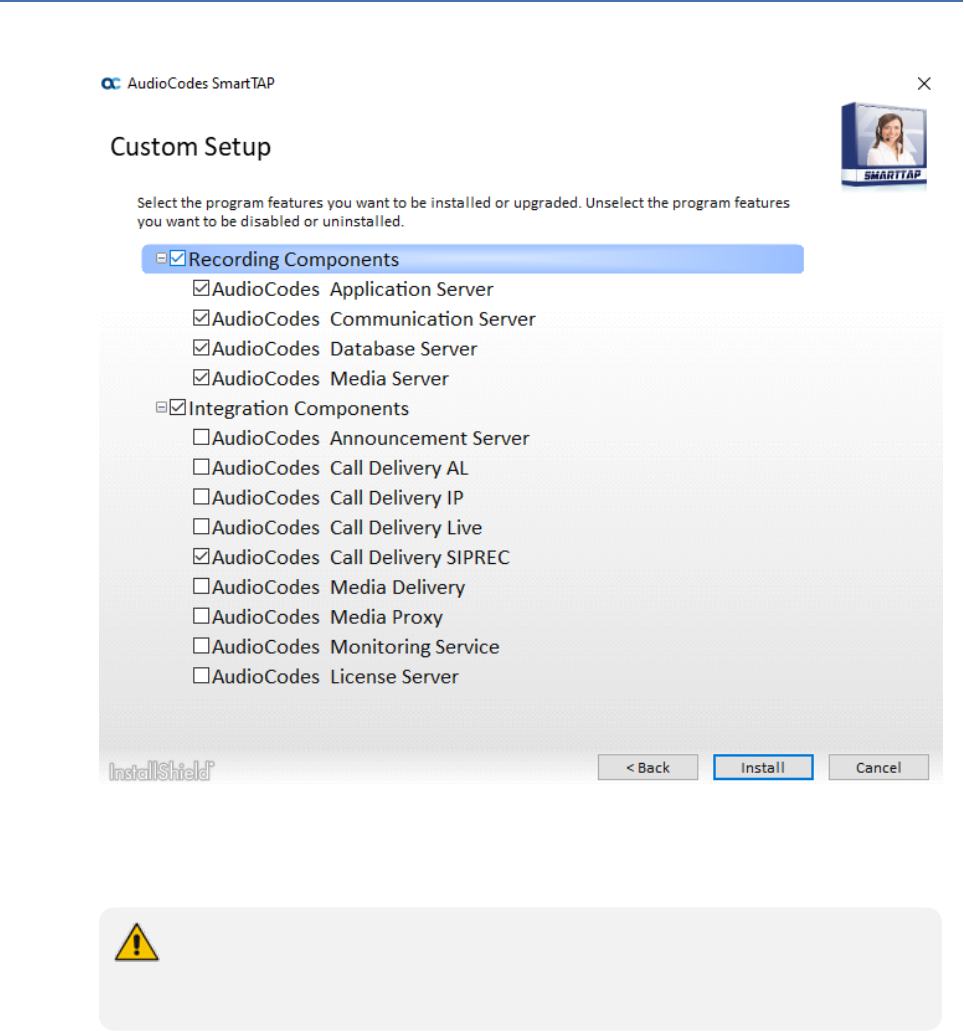
CHAPTER9 Integration Configuration
SmartTAP 360° Live | Installation Guide
Figure 9-21: Install SIPRecording
3. Click Install and then choose the default configuration.
4. Proceed to Configuring Call Delivery for SIP Recording below.
It is highly recommended to configure the Firewall with the required ports to ensure
proper communication prior to the software installation. See Firewall Configuration on
page65.
Configuring Call Delivery for SIP Recording
During the software installation, configure the CD with the necessary information to connect to
the SRC. Configure the Local SIPRec listener IP Address and Port on the SmartTAP server that
will be used to receive from the SRC as in the following image. In case of distributed or remote
branch deployment, type in the real IP address of the Application Server (AS), Communication
Server (CS), and the local IP (don’t type in 127.0.0.1). The Local IP and The SIPREC listener IP
should be of the server the CD- SIPREC component is running on. In case of all- in- one
deployment use the drop down list and choose the SmartTAP IP address.
- 162 -

CHAPTER9 Integration Configuration
SmartTAP 360° Live | Installation Guide
Figure 9-22: Server IP Setup
Assuming the default parameters are insufficient, additional configuration options are available
in the following configuration files.
Table 9-3: SIP Recording – Additional Configuration Files
Configuration File Purpose
CdSipRecConfig.xml Sets the IP & Port to receive the SIPRec data. Typically the
SmartTAP server.
Calldeliveryconfig.xml ■ Sets the IP of the SmartTAP Application server. The default
value is 127.0.0.1 assuming that the AS and CD are installed
on the same server.
■ Configures the Regular Expressions to match the specific
needs of each customer network. Refer to Target Attributes
for more information (see Verify the Target List in Each Call
Delivery on page183).
Recording Genesys PureCloud Contact Center Calls Locally
SmartTAP 360° Live can record PureCloud Contact Center calls and save them on the SmartTAP
360° Live server or on a local storage device. The following diagram illustrates the solution archi-
tecture.
- 163 -

CHAPTER9 Integration Configuration
SmartTAP 360° Live | Installation Guide
Figure 9-23: Genesys PureCloud Contact Center Calls
This solution requires termination of the PSTN calls on-premises and requires a Bring Your Own
Carrier (BYOC) Premises telephony connection. The BYOC Premises makes it possible to use a
premises-based trunk and requires the installation of a PureCloud Edge server. AudioCodes SBC
provides the connectivity between a service provider’s network and the PureCloud Edge server
and integrates with SmartTAP 360° Live to record these calls. SmartTAP 360° Live records the
Contact Center calls while persisting and presenting the associated call’s “interaction id” as part
of the recording meta-data in the SysCall ID field.
■ The SBC device must be configured to ensure seamless integration of the call recordings
mechanism (see Configuring Message Manipulation Rules Genesys PureCloud Contact
Center Calls below
■ The SmartTAP 360° Livedevice can be added to the PureCloud Contact Center (see Adding
SmartTAP to the Genesys PureCloud Contact Center User Interface on page166)
Configuring Message Manipulation Rules Genesys PureCloud Contact
Center Calls
This section describes the configuration of message manipulation rules on the SBCdevice for
supporting the Geneys PureCloud Contact Center solution. These message manipulation rules
are for SIPmessages recorded and saved by the SmartTAPRecording server.
- 164 -

CHAPTER9 Integration Configuration
SmartTAP 360° Live | Installation Guide
Ensure that you have configured the device for SIPRecording (see Configuring
Gateway & SBC for SIP Recording on page158) and have configured all other
relevant SIPentities, including IPGroups for PureCloud and the SmartTAPserver.
For further assistance, contact AudioCodes support.
➢ To configure message manipulation rules on the SBC:
1. Open the Message Manipulations table (Setup tab > Signaling & Media folder > Message
Manipulations).
2. Configure Message manipulation rules as shown in the following table:
Table 9-4: Message Manipulation Rules
Configure the following rules (Manipulation Set IDs are examples only):
● Index 0:Verifies the inbound request from the PureCloud IP Group to determine
whether SBC call leg should be recorded. If true, stores header.x-inin-cnv in
var.session.0”.
● Index 1:Verifies the Var.Session.0 value from Index 0, inserts in Header.x-audc-call-id
and sends to the SmartTAP Call Recording server IP Group.
Ind-
ex
Manip-
ulation
Name
Ma-
n
Set
ID
Message
Type
Condition
Action
Subject
Actio-
n
Type
Action
Value
Row
Role
0 Store x-
header
in
var.ses-
sion
11 Any Head-
er.-
header.x-
inin-
cnv.-
con-
tentexists
And
Header
header.x-
inin-cnv.-
content !=
''
Var.Ses-
sion.0
2
(Mod-
ify)
Head-
er.x-inin-
cnv
0 (Use
Cur-
rent
Condi-
tion)
1 Send x-
header
to SIPRec
12 Invite.Re-
quest
Var.Ses-
sion.0 != ''
Head-
er.x-
audc-
call-id
0
(Add)
Var.Ses-
sion.0
0 (Use
Cur-
rent
Condi-
tion)
3. Open the IP Group page (Setup tab > Signaling and Media folder > IP Groups).
- 165 -

CHAPTER9 Integration Configuration
SmartTAP 360° Live | Installation Guide
4. Add an IPGroup for PureCloud.
5. Set Inbound Manipulation Set to 11.
6. Add and IPGroup for the SmartTAPServer.
7. Set Outbound Message Manipulation Set to 12.
Adding SmartTAP to the Genesys PureCloud Contact Center User
Interface
This section describes how to add the SmartTAPapplication to the PureCloud Contact Center
user interface.
➢ To add SmartTAP to Genesys PureCloud :
1. Open the PureCloud Admin interface.
Figure 9-24: Genesys PureCloud Admin
2. From the Integrations menu, choose Integrations, select to add an integration and choose
to install on the Custom Client Application tile.
- 166 -

CHAPTER9 Integration Configuration
SmartTAP 360° Live | Installation Guide
Figure 9-25: Custom Client Application Tile
3. In the Integrations menu, name the application SmartTAP.
Figure 9-26: Application Name
4.Under the Configuration tab paste the SmartTAP URL in the Application URL field:
4. Save and Activate the application.
- 167 -

CHAPTER9 Integration Configuration
SmartTAP 360° Live | Installation Guide
Figure 9-27: Save the Application
5. To open the SmartTAPWeb, from the Toolbar choose Apps.
Figure 9-28: SmartTAPOpened from Genesys PureCloud
- 168 -

CHAPTER10 Additional Configuration Options
SmartTAP 360° Live | Installation Guide
10 Additional Configuration Options
This chapter describes the following additional configuration options:
■ Configuring Digital Signatures below
■ Configuring LDAP on the next page
■ Configuring SSO on page171
■ Configuring HTTP/S on page171
Configuring Digital Signatures
Configuring Digital Signature is a two-stage process:
■ Setup in the SmartTAP 360° Live Web interface – Refer to the Certificate and Digital
Signature sections in the SmartTAP 360° Live Administrator Guide
■ Setup at the Client PC (each client PC) see Installing the Digital Signatures Property Sheet
below
Installing the Digital Signatures Property Sheet
This section describes how to install the digital signatures property sheet.
➢ To configure the PC client:
1. Open SmartTAP installer root folder and navigate to Tools\DigitalSignaturesPropertySheet\
2. Right-click the install.bat file and select Run as administrator.
3. Once installed, the Digital Signatures tab is displayed in the file properties of the
downloaded audio recording.
4. Click the Digital Signatures tab to view the certificate and verify it is from a trusted source.
- 169 -

CHAPTER10 Additional Configuration Options
SmartTAP 360° Live | Installation Guide
Figure 10-1: Digital Signatures
You may need to reboot the PC to complete the installation.
Configuring LDAP
The SmartTAP LDAP feature allows you to use your Windows Active Directory users and groups
in SmartTAP 360° Live, and map them into users, groups and security groups in SmartTAP 360°
Live. The users and groups are not imported into SmartTAP 360° Live, instead they are
represented in real time Active Directory image. For example, if an AD attribute such as a user
name is modified, this change is reflected almost instantly in SmartTAP 360° Live.
To configure the LDAPserver connection, refer to the SmartTAP 360° Live Administrator Guide .
Pre-Requisites
■ Create or provide a user account with read-only access to Active Directory. Should be part
of read-only domain controller group]
■ The password for this service account should be set to “never expire”
- 170 -

CHAPTER10 Additional Configuration Options
SmartTAP 360° Live | Installation Guide
Configuring SSO
Single Sign-on (SSO) simplifies the login process for domain administrators. The administrator
logs into their machine using domain credentials. The user then attempts to access the
Application Server's web service via a web browser such as Edge, Chrome or Firefox. When SSO
is not configured, the administrator is directed to a login form where Username and Password
are entered and sent to SmartTAP to authenticate. When SSO is configured, the administrator is
authenticated in the background through Active Directory using the same domain credentials
that were used to log into the machine. This mechanism bypasses the login page and
immediately opens the Welcome page.
The SmartTAP server must be added to the domain. For information on configuring
SSO, refer to the SmartTAP 360° Live Administrators Manual.
Configuring HTTP/S
This section describes how to configure HTTP/S.
Disabling HTTP Communications on Application Server (Optional)
This section describes how to disable non- encrypted HTTP communication on SmartTAP
Application Server. This ensures that all communications with the Application Server are
encrypted. This can be done automatically or manually. If you are implementing SSL (HTTPS),
then this action ensures that all incoming traffic to the Application Server is over HTTPS.
Configuring SmartTAP Application Server for HTTPS does not automatically disable
the HTTP (non-encrypted) interface. While the SmartTAP management Web page is
available over HTTPS, SmartTAP components would continue to communicate with
SmartTAP Application Server over HTTP. To convert the entire application to
encrypted communications (over SSL), after disabling HTTP in Application Server as
described below, SmartTAP components must be configured as described in Section
Configuring SmartTAP 360° Live Components for HTTPS on the next page
(Configuring SmartTAP Components for HTTPS).
Automatic Disabling of HTTP
This section describes the automatic procedure. This method requires a mandatory username
and password to access Wildfly management console.
➢ Do the following:
1. Go to the Application Server Install directory.
2. Locate the PowerShell directory. For example C:\Program Files\AUDIOCODES\S-
martTAP\AS\PowerShell.
- 171 -

CHAPTER10 Additional Configuration Options
SmartTAP 360° Live | Installation Guide
3. Run the DisableHttp.ps1 script (located in the “Tools” folder of SmartTAP installation) with
the following parameters:
● [Mandatory] managementIP – IP address of HTTP Management interface (Application
Server IP)
● Management user credentials:
◆ [Mandatory] username
◆ [Mandatory] password – input prompt will be displayed as a part of the current
run
● [Optional] jbossCliPath – Full path to jboss-cli.bat (Command Line Interface)
For example: DisableHttp.ps1 -managementIP 192.168.1.100 -username
username - -jbossCliPath C:\Program
Files\AUDIOCODES\SmartTAP\AS\Bin\jboss-cli.bat
4. Restart the requested service.
Manual Disabling of HTTP
This section describes how to manually disable HTTP.
➢ Do the following:
1. Stop the SmartTAPApplication Server service.
2. Edit ../AudioCodes/SmartTAP/AS/Domain/Configuration/domain.xml
3. In urn:jboss:domain:undertow:4.0, comment out the listener element:
Remove http-listener
4. Under urn:jboss:domain:messaging-activemq:2.0 subsystem:
● Change element http-connector attribute Value socket-binding from “http” to “https”
● Change http-connector-throughput socket-binding from “http” to “https”
● Change http-acceptor http-listener from “default” to “https”
● Change http-acceptor-throughput http-listener from “default” to “https”
5. Under subsystem urn:jboss:domain:remoting:4.0 change http-remoting-connector
connector-ref from “default” to “https”.
6. Restart the SmartTAPApplication service.
Configuring SmartTAP 360° Live Components for HTTPS
This section describes how to configure HTTPS on SmartTAP 360° Live components. CA Root
Certificate/s used to sign the Application Server certificate must be installed on each machine
where SmartTAP 360° Live components are installed. SmartTAP 360° Livesupports HTTPS/TLS
1.2.
- 172 -

CHAPTER10 Additional Configuration Options
SmartTAP 360° Live | Installation Guide
■ Communication Server for HTTPS below
■ Call Delivery with HTTPS below
■ Media-Proxy with HTTPS on the next page
■ Announcement Server with HTTPS on the next page
■ Remote Transfer Service with HTTPS on page175
■ Health Monitor with HTTPS on page175
■ Media Delivery with HTTPS on page176
■ Media Server with HTTPS on page177
■ CD-Live with HTTPS on page177
For generating and loading certificates, see ‘Generating and Loading HTTPS
Certificates’ in the SmartTAP 360° Live Administrator Guide.
Communication Server for HTTPS
This section describes how to configure the connection with the Communication server over
HTTPS.
➢ Do the following:
1. On every host where CS is installed, check file “<CS_installation_Dir>\server-
\ngp\data\mbeans\managedDeviceProperties.properties" and note that the entry
“HOST=…” contains a value which is present in the SAN part of the AS certificate. If it is not,
change it accordingly.
2. Find the entry “port=-1” and change it to “port=443”.
3. Change the entry “scheme=http” to “scheme=https”.
4. Restart the CS service to apply the changes.
Call Delivery with HTTPS
This section describes how to configure the connection with the Call Delivery server over
HTTPS.
➢ Do the following:
1. Edit the following file: “…\AudioCodes\SmartTAP\CD-IP\Config\calldeliveryconfig.xml”
2. Use an FQDN in the certificate SAN field in the Call Delivery configuration file
calldeliveryconfig.xml (and make sure that DNS resolution is working correctly for this
FQDN).
An example of calldeliveryconfig.xml HTTPS settings is shown below:
- 173 -

CHAPTER10 Additional Configuration Options
SmartTAP 360° Live | Installation Guide
<applicationServer> <recorder
ip
="SmartTAP.company.com"
port
="443"
>
<protocols>
<protocol>https</protocol> </protocols> </recorder> </applicationServer>
3. Edit the following file: “…\AudioCodes\SmartTAP\CD-IP\Config\persistence.xml
4. Use a FQDN in the certificate SAN field in the Call Delivery configuration file persistence.xml
(and make sure that DNS resolution is working correctly for this FQDN).
url="https://SmartTAP.company.com:443"
Where "SmartTAP.company.com" is the FQDN of the SmartTAP
5. Restart the service to apply the changes.
Media-Proxy with HTTPS
This section describes how to configure the connection with the Media Proxy server over
HTTPS.
➢ Do the following:
1. Edit file System.config in “..\MP\Config” and change asList attribute’s value in the following
section of the Media Proxy Service file:
<System asList="http://AS_FQDN:80"/>
2. Modify to the following:
<System asList="https://AS_FQDN:443"/>
3. Make sure AS_FQDN is includedin the certificate SAN field and is resolvable by DNS.
4. Restart the service to apply the changes.
Announcement Server with HTTPS
This section describes how to configure the connection with the Announcement server over
HTTPS.
➢ Do the following:
1. Manually edit asList attribute’s value in “..\AS\Config” and change the following section of
the Announcement Service System.config file:
<System asList="http://ASIP:80"/>
- 174 -

CHAPTER10 Additional Configuration Options
SmartTAP 360° Live | Installation Guide
2. Change to the following:
<System asList="https://AS_FQDN:443"/>
3. Make sure AS_FQDN is included in the certificate SAN field and is resolvable by DNS.
4. Restart the service to apply the changes.
Remote Transfer Service with HTTPS
This section describes how to configure the connection with the Remote Transfer Service over
HTTPS.
➢ Do the following:
1. Edit file System.config in “..\RTS\Config” and change asList attribute’s value in the following
section of the Remote Transfer Service file:
<System asList="http://AS_FQDN:80"/>
2. Modify to the following:
<System asList="https://AS_FQDN:443"/>
3. Use the FQDN that is found in the certificate SAN field in these files.
url="https://SmartTAP.company.com:443"
Where "SmartTAP.company.com" is the FQDN of the SmartTAP Server
Make sure DNS resolution is working correctly for this FQDN.
4. Restart the RTSservice to apply the changes.
Health Monitor with HTTPS
This section describes how to configure the connection with the Health Monitor over HTTPS.
➢ Do the following:
1. Edit the file Tools\HealthMonitor\Config\RecordingHealthMonitor.config
2. Find the <RestApi> section below in the configuration file:
http://[ address which is present in the SAN
3. Make the changes as shown below:
https://SmartTAP.company.com] Where "SmartTAP.company.com" is the FQDN of
the SmartTAP Application server
- 175 -

CHAPTER10 Additional Configuration Options
SmartTAP 360° Live | Installation Guide
4. For OAuth configuration only: In the <OAuthConfig> section, configure the FQDNof the
SmartTAPApplication Server in the [Url] field:
<OAuthConfig>
<azureAppRegistration displayName="HealthMonitor Service"
appId="[AppId]"
secret="[Secret]"
tenantId="[TenantId]" />
<applicationServers>
<applicationServer url="[Url]"
displayName="SmartTAP Application
Server"
resource="[Resource]"
tenantId="[ASTenantId]" />
Media Delivery with HTTPS
This section describes how to configure the Media Delivery over HTTPS.
➢ Do the following:
1. Edit the following file: “…..\AudioCodes\SmartTAP\MD\Config\persistence.xml
2. Use a FQDN present in the certificate SAN field in Media Delivery configuration file
persistence.xml (and make sure that DNS resolution is working correctly for this FQDN.
Media Delivery may be connected to multiple SmartTAP servers, so each of these
connections must be edited in the file.
<?xml version="1.0" encoding="UTF-8" standalone="no" ?>
<callDeliveryPersist xmlns="http://www.audiocodes.com/calldelivery">
<managedDevices>
<managedDevice
id="12" url="https://SmartTAP.company.com:443"></managedDevice>
<managedDevice
id="18" url="https://smarttap2.company.com:443"></managedDevice>
</managedDevices>
<version>1</version>
</callDeliveryPersist>
- 176 -

CHAPTER10 Additional Configuration Options
SmartTAP 360° Live | Installation Guide
3. Restart the service to apply the changes.
Media Server with HTTPS
This section describes how to configure the Media Server over HTTPS.
➢ Do the following:
1. Edit the following file: ”…\AudioCodes\SmartTAP\MS\server\bin\mediaserverconfig.xml”
2. Use an FQDN in the certificate SAN field in the Call Delivery configuration file
mediaserverconfig.xml(and make sure that DNS resolution is working correctly for this
FQDN).
An example of mediaserverconfig.xml HTTPS settings is shown below:
https
3. Edit the following file: “…\AudioCodes\SmartTAP\MS\server\bin\persistence.xml”
4. Use an FQDN in the certificate SAN field in the Media Server persistence.xml (make sure
that DNS resolution is working correctly for this FQDN).
url="https://SmartTAP.company.com:443"
Where "SmartTAP.company.com" is the FQDN of the
SmartTAP
5. Restart the service to apply the changes.
CD-Live with HTTPS
This section describes how to configure the connection with the CD-Live server over HTTPS.
➢ To configure HTTPS transport:
1. Using notepad or a text editor, open the‘appsettings.json’ configuration file, and set the AS
FQDN address and port 443:
"SmartTapRestClientConfig": {
"BaseUri":
"https://<FQDN>:443/",
2. Save and close the file.
- 177 -

CHAPTER10 Additional Configuration Options
SmartTAP 360° Live | Installation Guide
Configuring Syslog Server Connection
This section describes how to setup the connection with a syslog server.
Skype for Business Plug-in
This section describes how to setup the syslog server connection between the Skype for
Business Front End and a syslog server. This procedure must be setup on every Front End
machine in the managed pool.
➢ To setup connection:
1. Obtain the machine ip that runs the system viewer , EX: 172.17.127.XXX.
2. In the front-end machine, edit the C:\Program Files\AudioCodes\SmartTAP\Lync Plug-
in\LyncPlugIn.exe.config
Add / Edit required syslog appender. Example : Log and Error logs are defined in the
<log4net debug="true"> section (this section does not include a MAC address)
<appender name="RemoteSyslogAppender"
type="log4net.Appender.RemoteSyslogAppender"> <facility value="Local7" />
<layout type="log4net.Layout.PatternLayout" value="LPI: %d{dd MMM yyyy
HH:mm:ss,fff } %-5p %m\r\n" /> <remoteAddress value="172.17.127.XXX " />
<RemotePort value="514" /> </appender> <appender
name="RemoteSyslogAppenderError"
type="log4net.Appender.RemoteSyslogAppender"> <facility value="user" />
<layout type="log4net.Layout.PatternLayout" value="LPI: %d{dd MMM yyyy
HH:mm:ss,fff } %-5p %m\r\n" /> <param name="Threshold" value="ERROR" />
<remoteAddress value="172.17.127.XXX " /> </appender>
3. On the front-end machine, edit the C:\Program Files\AudioCodes\SmartTAP\Lync Plug-
in\LyncPlugIn.exe.config
Edit the <root> section Add <appender-ref
ref="RemoteSyslogAppender"></appender-ref> <appender-ref
ref="RemoteSyslogAppenderError"></appender-ref>
4. Save the file and restart the Plug-in.
Location-Based Targeting in SmartTAP
This section describes how to assign targets to specific Call Delivery components by assigning a
location attribute to each instance of the Call Delivery server and then mapping targets to those
locations.
By assigning targets to specific Call Delivery components, the physical location of the recording
can be controlled. In addition, the loads on each Call Delivery can be minimized. By default,
when no location attributes are set, Call Delivery tracks all targets. In systems with large
numbers of targets, this can affect the performance of SmartTAP.
- 178 -

CHAPTER10 Additional Configuration Options
SmartTAP 360° Live | Installation Guide
Assign a Location Attribute to each Call Delivery Component
Each Call Delivery instance must be manually assigned a value, which is generally referred to as
a location attribute, although it does not technically have to refer to a location.The location
attribute should be something meaningful within the system topology, which is often a
location.
In the first example below, there are three Remote Data Delivery (RDD) installations, all
managed by a central Application server. Each Call Delivery in the RDD is assigned a location
attribute: “Tasmania”, “London”, and “New York”.
Figure 10-2: Location Attribute for each Call Delivery Component
In the second example below, there are two different Call Delivery components installed on the
same server.Their “location attribute” references the intended functionality rather than a
physical location.In this case, One Call Delivery handles “Skype” targets and the other handles
“SIPREC” targets.
Figure 10-3: Skype and SIPREC Targets
In the case of SmartTAP systems configured in the active/active mode, where Call Delivery
components are organized into pairs for redundancy, both components in the pair must share
the same location attribute value.
The location attribute must be set manually for each Call Delivery instance.This value is not
displayed in the SmartTAP GUI.
- 179 -

CHAPTER10 Additional Configuration Options
SmartTAP 360° Live | Installation Guide
➢ Do the following:
1. Stop the Call Delivery service(s) in the service manager.
2. Open the calldeliveryconfig.xml file for editing.By default, the configuration file is located in
“C:\Program Files (x86)\AudioCodes\SmartTAP\CD-xx\config\calldeliveryconfig.xml”, where
xx represents which type of Call Delivery was installed.
Within this file is an XML element called <targeting>:
If no location attribute has been set, then you will see that the <attributes> element is
empty, as shown above. The <targetConversions> element is not relevant for the purposes
of setting a location attribute.
Add a new entry in the <attributes> element as shown.From the first example, the first RDD
has a location attribute with the value of “Tasmania”, so that is what is shown in the
example.
<targeting>
<attributes>
<attribute
name="Location">
<value>Tasmania</value>
</attribute>
</attributes>
The attribute name should be set as “Location”. This is a convention that makes it easier to
understand what is being configured and how to troubleshoot it.The attribute name can
have any value, though it must be at least one character long.
Call Delivery can support multiple <attribute> elements under the <attributes> element
and multiple <value> elements under each <attribute>.However, the use cases for doing so
are extremely rare.
The entries for the attribute name and <value> are case-sensitive, so it is important to
make a note of exactly how they were entered into the configuration file.These values will
be needed again in a later step.
Once the location attribute is set up, save the configuration file and use the Service
Manager to start up the Call Delivery component.Remember to do this for each Call
Delivery within the SmartTAP system.
- 180 -

CHAPTER10 Additional Configuration Options
SmartTAP 360° Live | Installation Guide
Multiple Call Delivery components can use the same location attribute value.This
means that targets that match this value will be tracked by multiple Call Delivery
components. This is another example of a rare use case.
Create a Location Attribute in the SmartTAP GUI
To assign a location to each target, a new attribute must be created. Attributes are a way to
assign meta-data to each targeted user or device. In this case, we are creating an attribute that
Call Delivery will specifically look at in order to match its location attribute with the targets’.
➢ To create a Location Attribute for a user:
1. Click Users > User Management > Add User Attribute
Figure 10-4: Add User Attribute
2. For the “Attribute Name” enter “Location”. If you decided to use a different attribute name
in the Call Delivery configuration file, then enter that name here instead. You must enter
the value exactly as it appears in the Call Delivery configuration file.
3. Enter a useful description under “Attribute Description”. This field does not need to match
any specific value.
4. Leave the “Network Mapping” checkbox unchecked.
5. Click Submit to add the new user attribute.
If there are devices targeted in addition to (or instead of) users, then create the same
attribute under Users > Device Management > Add Device Attribute. User attributes
and Device attributes do not conflict with each other, therefore they can use the same
“Attribute Name”.
Assign a Location to Each User/Device in the SmartTAP GUI
The last step is to assign a location to each user and/or device that is targeted for recording.The
idea is to associate each target with a specific Call Delivery.
- 181 -

CHAPTER10 Additional Configuration Options
SmartTAP 360° Live | Installation Guide
Below is an example of adding a new user and setting its location attribute at the same time. To
add a user, click on “User” -> “User Management” -> “Add User”. Following the first example,
by setting the “location” field to “Tasmania” as shown below, this new user will only be tracked
by RDD #1. RDD #2 and RDD #3 will disregard this user because its location attribute doesn’t
match what was configured in the Call Delivery configuration file.
Figure 10-5: Add User
➢ To update the location attribute for existing users:
1. Click Users > User Management > View/Modify Users.
2. Click the “pencil” icon in the “Modify” column for the user you wish to edit. Enter the
location attribute value in the “Location” field similar to the screen above.
The procedures for setting up Devices and for setting up Users are identical.
- 182 -

CHAPTER10 Additional Configuration Options
SmartTAP 360° Live | Installation Guide
When SmartTAP is configured to map its users and their attributes from the Active Directory,
the SmartTAP location attribute can be mapped to the LDAP attribute that holds the
appropriate location information through the SmartTAP LDAP Configuration page.
Figure 10-6: SmartTAP LDAP Configuration page
Once the location attribute has been set/changed and submitted, each Call Delivery component
is updated with the new targeting information. For those Call Delivery components that have a
location attribute set, they will ignore any target that does not precisely match their location
attribute.
Verify the Target List in Each Call Delivery
It is possible to optionally check to make sure that each Call Delivery component has been
updated with the intended target list. Open the file call TargetList.xml. By default, the file is
located in “C:\Program Files (x86)\AudioCodes\SmartTAP\CD- xx\TargetList.xml”, where xx
represents the type of installed Call Delivery instance.
Be sure not to edit or save this file as its ‘read only’.
The following is an example of the contents of the file:
<?xml version="1.0" encoding="UTF-8" standalone="no" ?>
<targeting> <version>2</version> <targets> <target
caseId="105" mediaType="15" targetIndex="531" type="CALLSTRING"
value="johns"></target>
</targeting>
In this example, John Smith is targeted by his user name, which was configured to “JohnS”. This
value is found in the TargetList.xml file, if the user’s location attribute matches the equivalent
entry in the Call Delivery configuration file. For example, John has the location attribute ‘New
York’ and there is a CD with the location attribute ‘New York’. Target attributes are not case-
sensitive so the value appears as lowercase “johns” in the TargetList.xml file. You may need to
- 183 -

CHAPTER10 Additional Configuration Options
SmartTAP 360° Live | Installation Guide
wait up to one minute for the file to be updated after setting the location attribute in the
SmartTAP 360° Live GUI.
If the expected target is not present in this file, double-check the location attribute value in the
Call Delivery configuration file and in the SmartTAP 360° Live Web interface. Both the attribute
name and its value are case-sensitive.The user or device may also fail to appear in the list if it is
not targeted for other reasons, such as a lack of licenses or missing targeting attributes.
CD-SIPREC Configuration
The CdSipRecConfig.xml configuration file is displayed as follows:
<SipRecStack>
<Listen IP="127.0.0.1" UDP="5068" />
<!--> NoLicenseRejectMsg - Reject message in case no licenses are available <--
>
<!--> NotTargetedRejectMsg - Reject message for untargeted calls (200Ok with
a=inactive) <-->
<SRS ExtSysCallIdHeader="x-audc-call-
id" NoLicenseRejectMsg="486" NotTargetedRejectMsg="200"/>
</SipRecStack>
■ CD-SIPREC Behavior:
● Available Licenses will be checked for incoming call:
◆ CD-SIPREC will reject the call with the configured ‘NoLicenseRejectMsg’ status
code or with the default '486 Busy Here' if the configured code is not valid.
● Regarding calls without any targeted participant, the call will be rejected with
'NormalRejectMsg' OR with 200OK(a=inactive) if the code is not valid, in which case CD
will keep the call and record a possible transfer to a targeted user.
● In case None of the CDs have an available license, the call will be rejected by all CDs
and multiple alarms will be sent to ST.
‘NotTargetedRejectMsg’ should be configured to a different reject message than the
one configured in the SBC (‘Alternative Reason’) Note the following regarding the
SBCconfiguration:
● The SBC should support Load Balancing between a group of SRSs (Session
Recording Servers)
● A ‘rule’ to refer a call to another SRS (in the list) can be configured, it is the
‘Alternative Reason’ I mentioned, in our case it is a custom reject message and
should match the one configured in ‘NoLicenseRejectMsg’.
■ CD-SIPREC supports parsing of external custom headers that are found in the SDP and use
them as the call’s SysCallId.
- 184 -

CHAPTER10 Additional Configuration Options
SmartTAP 360° Live | Installation Guide
● ExtSysCallIdHeader – Configurable external header that will be parsed and used as
SysCallId (Original call ID), SBC configuration is also required.
Example
INVITE sip:[field1]@[remote_ip]:[remote_port] SIP/2.0
Via: SIP/2.0/[transport] [local_ip]:[local_port];branch=[branch]
From: sipp <sip:[field0]@[local_ip]:[local_port]>;tag=[call_number]
To: sut <sip:[field1]@[remote_ip]:[remote_port]>
Call-ID: [call_id]
CSeq: 1 INVITE
Contact: sip:sipp@[local_ip]:[local_port]
Max-Forwards: 70
Subject: Performance Test
Content-Type: multipart/mixed; boundary=unique-boundary-1
Content-Length: [len]
x-audc-call-id: 545362a9-4cb3-4a55-85b8-b33ca83a6517
The x- audc- call- id header will be parsed and the 545362a9- 4cb3- 4a55- 85b8-
b33ca83a6517 value will be the sysCallId that is displayed in the User Interface.
CD-SIPREC Support in TLS Transport
CD-SIPREC uses the Certificate and the Private Key to maintain a secured, encrypted connection
with the SRC (SBC). In case a certificate-chain is used, all the certificates in the chain MUST be
stored in one of the ‘Trusted Root Certification Authorities’ or ‘Intermediate Certification
Authorities’ certificate stores on the CD-SIPREC platform. CD-SIPREC imports the certificates
that are found in these stores into its local store. You can also provide a path to the CA cer-
tificates folder and CD then loads the certificate files from this location. You can generate the
certificates automatically based on the Common Name ‘TLSCertCN’ or manually from the Cer-
tPEMFile\KeyPEMFile:
■ Generating Certificates Automatically below
■ Generating Certificates Manually on page187
● Load a matching certificate to the SRC (SBC) that is signed by the same Trusted
Root CA.
● Configure a matching port on both the SRC(SBC) and the CD-SIPREC for
securing TLS communication.
Generating Certificates Automatically
This section describes how to generate certificate files automatically based on the Common
Name TLSCertCN.
- 185 -

CHAPTER10 Additional Configuration Options
SmartTAP 360° Live | Installation Guide
TLS transport is associated with only one Certificate and PrivateKey i.e. the
TLSCertCN, therefore ensure that the PEM files CertPEM and KeyPEM files are
empty or deleted in the CdSipRecConfig.xml file.
➢ Do the following:
1. Open the CdSipRecConfig.xml file.
2. Configure the following:
<Listen
IP="0.0.0.0"
TLS="5069"
SSLType="SSLv23"
TLSVerificationMode
="None"
TLSCertCN="AudcTLS"
/>
Where "AudcTLS"is an example Common Name.
Multiple transports can be configured (UDP\TCP\TLS), for example:
<SipRecStack> <Listen IP="0.0.0.0" UDP="5068"/> <Listen IP="0.0.0.0" TLS="5069"
……<params>…… /> <Listen … <Listen … </SipRecStack>
3. Configure SSLType transport type to one of the following:
● "NoSSL"
● "TLSv1" for TLS 1.0 version
● "SSLv23" for TLS 1.2 and above.
4. Configure TLSVerificationMode (Certificate verification as a part of the TLS handshake)to
one of the following:
● "None"
● "Optional": certificate verification will be performed only when requested
● "Mandatory": verification will always be performed
5. Configure TLSCertCN – a Certificate CommonName that is imported and used for the TLS
transport.
CD-SIPREC searches for the certificate in the Local Machine’s Personal certificate store. If
the store cannot be accessed, CD searches in Current User’s Personal store instead.
- 186 -

CHAPTER10 Additional Configuration Options
SmartTAP 360° Live | Installation Guide
The certificate MUST contain an exportable Private Key.
Generating Certificates Manually
This procedure describes how to generate certificates manually using the CertPEM and KeyPEM
files.
TLS transport is associated with only one Certificate and PrivateKey, therefore
ensure that the TLSCertCN entry is empty or deleted in the CdSipRecConfig.xml file.
➢ Do the following:
1. Open the CdSipRecConfig.xml file.
2. Configure the following:
<Listen
IP="0.0.0.0" TLS="5069" SSLType="SSLv23" TLSVerificationMode="None"
CertPEMFile="……\<Path>\cert.pem"
KeyPEMFile= "…...\<Path>\key.pem" CADir="….\<Path>\ Certificates \CA\" />
Where <Path> is the location of the certificate files on the local machine.
Multiple transports can be configured (UDP\TCP\TLS), for example:
<SipRecStack> <Listen IP="0.0.0.0" UDP="5068"/> <Listen IP="0.0.0.0" TLS="5069"
……<params>…… /> <Listen … <Listen … </SipRecStack>
3. Configure SSLType transport type to one of the following:
● "NoSSL"
● "TLSv1" for TLS 1.0 version
● "SSLv23" for TLS 1.2 and above.
4. Configure TLSVerificationMode (Certificate verification as a part of the TLS handshake)to
one of the following:
● "None"
● "Optional": certificate verification will be performed only when requested
● "Mandatory": verification will always be performed
5. Configure CertPEMFile- the path to .pem certificate file to be used for the TLS transport.
6. Configure KeyPEMFile - the path to .pem PrivateKey file to be used for the TLS transport.
- 187 -

CHAPTER10 Additional Configuration Options
SmartTAP 360° Live | Installation Guide
These files must NOT be protected with a password(PassPhrase).
7. Configure CADir - path to CA certificates that is loaded into CD's local store (for chain
certificates).
Delete this text and replace it with your own content.
Example for Creating a Self-Signed Certificate for CD-SIPREC and SBC
Connection
This section describes how to create a Self-Signed Certificate for CD-SIPREC and SBC Con-
nection. Perform the following procedures:
1. Create a Certificate Signing Request (CSR) below
2. Sign the Certificate at the Certificate Authority (CA) on the next page
3. Import Certificate to CD-SIPRECCertificate Store on the next page
Create a Certificate Signing Request (CSR)
This section describes how to create a Self-Signed certificate for the TLS connection between
the Call Delivery server and the SBC.
➢ Do the following:
1. Enter the Local Machine’s certificate store (Action > All Tasks > Advanced Operations >
Create Custom Request).
Figure 10-7: Create Custom Request
2. Click Next on ‘Select Certificate Enrollment Policy’.
3. Click Details and then Properties.
4. In General tab, enter Friendly Name, for example “AudcTLS”
5. In Subject tab, choose ‘Common name’ from the drop-down list and Add a value:
- 188 -

CHAPTER10 Additional Configuration Options
SmartTAP 360° Live | Installation Guide
Figure 10-8: Certificate Properties
6. In Private Key tab, check “Make private key exportable”.
7. Click Apply > Next.
8. Choose a file name\directory and save the certificate request.
Sign the Certificate at the Certificate Authority (CA)
Ensure that the Certificate is appropriately signed by the Certificate Authority (CA).
Import Certificate to CD-SIPRECCertificate Store
This section describes how to import the newly generated certificate to the CD- SIPREC
Certificate Store.
➢ To import the certificate to the Certificate Store:
1. Return to the Local Machine’s certificate store (Action > All Tasks > Import).
2. Enter the certificate’s path and click Next.
3. Under ‘Import Options’, check “Mark this key as exportable…” and click Next.
- 189 -
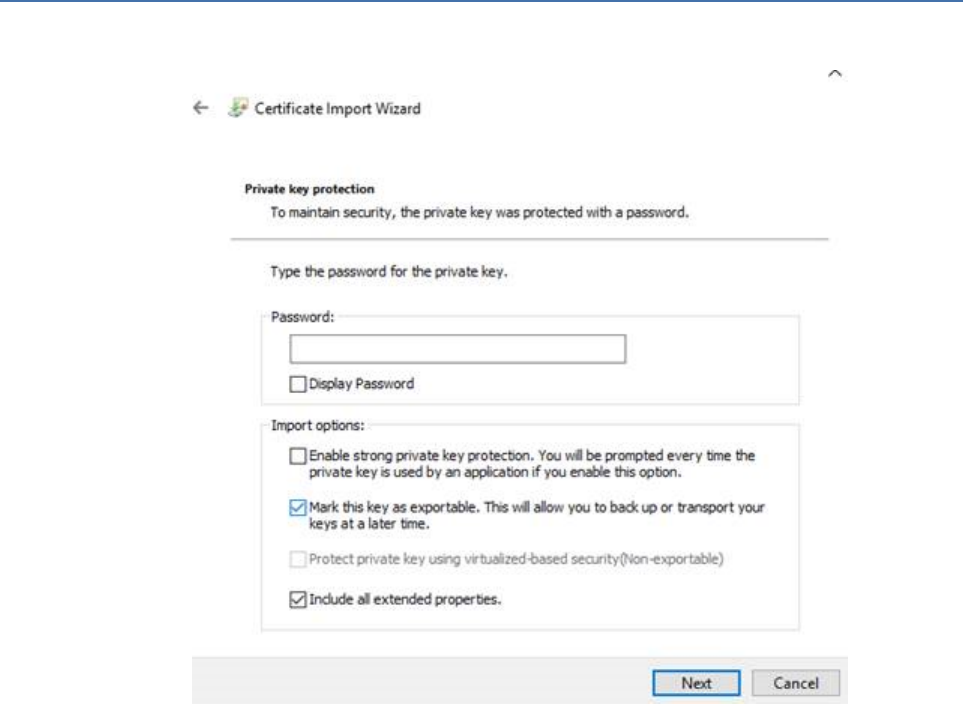
CHAPTER10 Additional Configuration Options
SmartTAP 360° Live | Installation Guide
Figure 10-9: Certificate Import Wizard
4. Choose ‘Place all certificates in the following store’, select Personal store and click Next >
Finish.
5. Try to export the certificate’s and validate that the Private Key is exportable.
- 190 -

CHAPTER11 Backup and Restore
SmartTAP 360° Live | Installation Guide
11 Backup and Restore
This chapter describes the backup and restore procedures.
Prerequisites
This section describes actions that you need to perform before running backup and restore
procedures.
➢ Do the following:
1. Go to the control panel and run SmartCONTROL.
2. Make note of the configuration of the Board tab, take screen shots if necessary.
Figure 11-1: Board Tab Configuration
3. Run services.msc (Start->Run->type “services.msc” enter), and stop all SmartTAP 360° Live
services.
● AudioCodes AS (SmartTAP Server)
● AudioCodes CS (SmartTAP Server)
● AudioCodes MS (SmartTAP Server)
● AudioCodes MS-TR (SmartTAP Server)
● AudioCodes CD-XX (SmartTAP Server)
● AudioCodes MD (Skype for Business Edge, Mediation or Conference Server)
- 191 -

CHAPTER11 Backup and Restore
SmartTAP 360° Live | Installation Guide
● AudioCodes AN (SmartTAP AN Server)
● AudioCodes MP (SmartTAP MP Server)
● AudioCodes Skype for Business plug-In (Skype for Business FE or SBA
● MySQL (SmartTAP 360° Live Server)
● SmartWORKS Service (SmartTAP , Edge, Mediation or Conference Server)
Backup
It is recommended to perform a full backup for all servers running SmartTAP components
according to the organization hosting SmartTAP backup/restore policies.
Restore
This section describes how to restore the SmartTAP 360° Live components.
➢ To restore the SmartTAP 360° Live components:
1. Install SmartTAP 360° Live on the new server.
2. Run services.msc (Start > Run > type “services.msc” enter), and stop all SmartTAP 360° Live
services.
You MUST restore to the same version of SmartTAP 360° Live that was backed up
(with the same major and minor versions).
This section describes how to restore the following components:
■ Call Delivery Service (see Call Delivery Service )
■ Media Service (see Media Service)
■ Media Delivery Service (see Media Delivery Service on the next page )
■ Database (see Database )
■ SmartTAP 360° Live Skype for Business Plug-in (FE, SBS, SBA) (see SmartTAP 360° Live Skype
for Business Plug-in (FE, SBS, SBA)
■ Announcement Server (see Announcement Server (AN) on page74 )
■ Media Proxy (see Media Proxy on page195 )
■ Media (see Restoring Media on page195 )
■ Bot Resiliency (Bot Resiliency on page196)
- 192 -
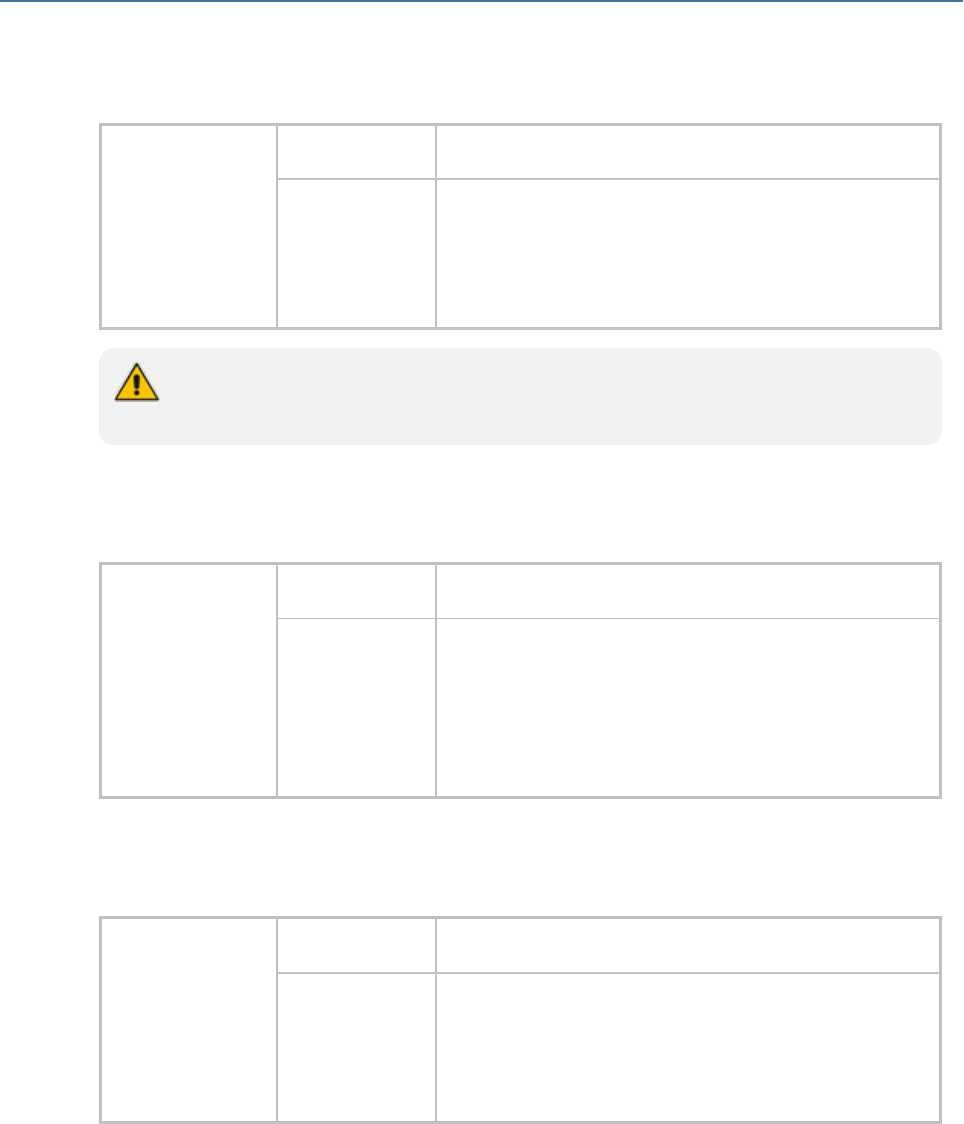
CHAPTER11 Backup and Restore
SmartTAP 360° Live | Installation Guide
Call Delivery Service
Table 11-1: Restore – Call Delivery Service
Configuration Path ...\AudioCodes\SmartTAP\CD-XX\
Instructions Rename ...\AUDIOCODES\SmartTAP\CD-XX\Config to
Config.orig
Copy $backup_dir\CD_XX\Config to
...\AUDIOCODES\SmartTAP\CD-XX\
Replace XX with IP, DS or AL depending upon the type of CallDelivery service
installed.
Media Service
Table 11-2: Restore – Media Service
Configuration Path ...\AudioCodes\SmartTAP\MS\Server\bin\
Instructions Rename
...\AUDIOCODES\SmartTAP\MS\Server\bin\ac-
hmp20.ini to ac-hmp20_orig.ini
Copy $backup_dir\MS\Server\bin\ac-hmp20.ini to
...\AUDIOCODES\SmartTAP\MS\Server\bin\
Media Delivery Service
Table 11-3: Restore – Media Delivery Service
Configuration Path ...\AudioCodes\SmartTAP\MD\
Instructions Rename ...\AudioCodes\SmartTAP\MD\Config\ folder
to \Config.orig
Copy $backup_dir\MD\Config to
...\AudioCodes\SmartTAP\MD\
- 193 -

CHAPTER11 Backup and Restore
SmartTAP 360° Live | Installation Guide
Database
Table 11-4: Restore – Database
Configuration Path ...\MySql\MySql Server 8.0\
Instructions Stop SmartTAP AS service
Stop MySQL service
Rename ...\MySql\MySql Server 8.0\data directory to
data.orig
Copy $backup_dir\ MySql\MySql Server 8.0\data
directory to ...\MySql\MySql Server 5.6\
Path C:\ProgramData\MySQL\
Instructions Rename C:\ProgramData\MySQL\MySql Server 8.0
directory to MySql Server 8.0.orig
Copy $backup_dir\MySql_PD\MySql Server 8.0
directory to C:\ProgramData\MySQL\
Start MySQL service
Start SmartTAP AS service
SmartTAP 360° Live Skype for Business Plug-in (FE, SBS, SBA)
This step is only required if the FE, SBS or SBA was rebuilt
Table 11-5: Restore – SmartTAP 360° Live Skype for Business Plug-in (FE, SBS, SBA)
Configuration Path ...\AudioCodes\SmartTAP\Lync Plug-in\
Instructions Copy $backup_dir\ Lync Plug-
in\\FE#\LyncPlugIn.exe.config to
...\AudioCodes\SmartTAP\Lync Plug-in\
Replace # in instructions above to the actual ID # of the FE server. Repeat above
instructions for each FE in Pool.
- 194 -

CHAPTER11 Backup and Restore
SmartTAP 360° Live | Installation Guide
Announcement Server
Table 11-6: Restore – Announcement Server
Configuration Path ...\AudioCodes\SmartTAP\AN\
Instructions Rename...\AudioCodes\SmartTAP\AN\Config\ folder
to \Config.orig
Copy $backup_dir\AN\Config to
...\AudioCodes\SmartTAP\AN\
Media Proxy
Table 11-7: Restore – Media Proxy
Configuration Path ...\AudioCodes\SmartTAP\MP\
Instructions Rename ...\AudioCodes\SmartTAP\MP\Config\ folder
to \Config.orig
Copy $backup_dir\MP\Config to
...\AudioCodes\SmartTAP\MP\
Restoring Media
This section describes how to restore media.
➢ To restore media:
1. Copy the directory structure and media files from the path defined in the SmartTAP 360°
Live Web interface (See example screen below).
Make sure you retain the same directory structure when backing up media to the backup
location. We recommend that you save the screen capture of the recording location to
retain your Media file settings.
- 195 -
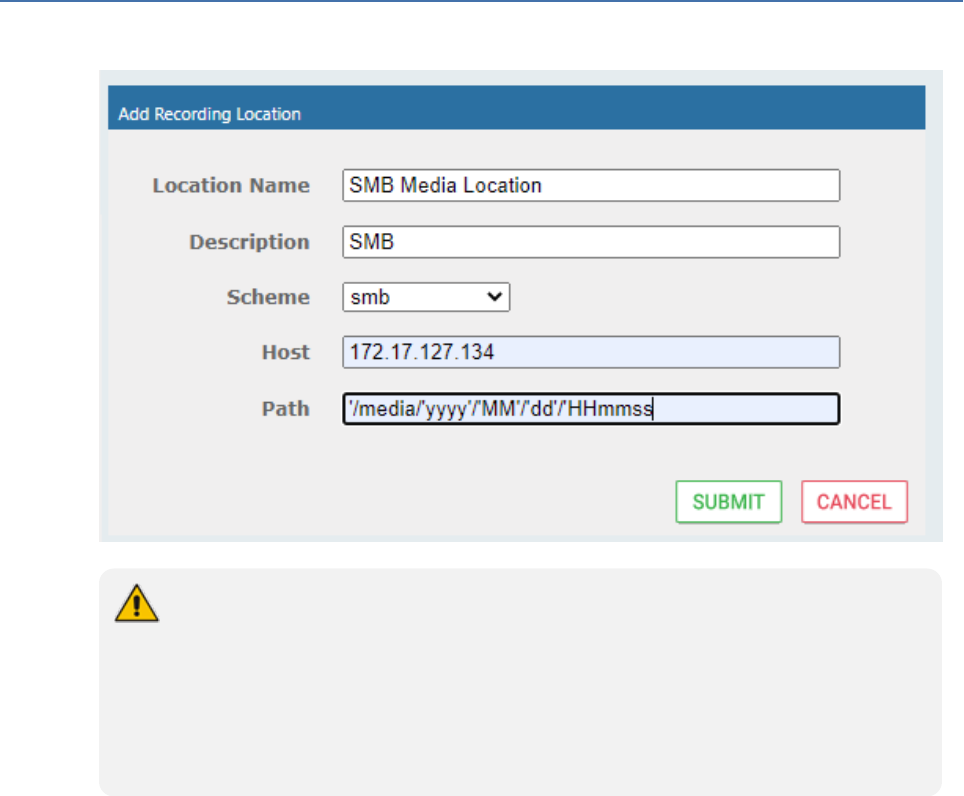
CHAPTER11 Backup and Restore
SmartTAP 360° Live | Installation Guide
Figure 11-2: Add Recording Location
● Its recommended to define the SMB Scheme host machine with an FQDN
instead of an IP address. This prevents situations where the System
administrator changes the IPaddress of the SmartTAP 360° Live application
server and as a consequence, the media files can no longer be accessed.
● If you define the media location in a different domain to the SmartTAP 360°
LiveAS, ensure that write permissions are set for the directory to which you wish
to save the media files.
2. Reboot the SmartTAP 360° Live machine
3. Check SmartTAP 360° Live board info using SmartCONTROL, compared with saved board
info screen shots if necessary
4. System should be restored and functioning. Verify you can play old calls and that the
system can record new calls.
Bot Resiliency
The BOT resiliency feature enables call recordings persistence upon disconnection between
Teams BOTs and SmartTAP servers. This feature is enabled in the CD-Live installation (see
Installing CD-Live Component on page56). For further details, see Section Data Recovery (Bot
Resiliency in the SmartTAP360° Live Deployment Guide.
- 196 -

CHAPTER12 Troubleshooting
SmartTAP 360° Live | Installation Guide
12 Troubleshooting
This chapter is for technical personnel who are responsible for the installation and maintenance
of the SmartTAP 360° Live product.
■ The AudioCodes support team may refer to the sections in the troubleshooting chapter of
this document when assisting customers to resolve technical issues pertaining to the
SmartTAP 360° Live product.
■ This chapter provides the most common troubleshooting information and procedures;
however, does not preclude the need for the customer to contact the AudioCodes support
group for further assistance.
How To Validate Port Mirror for Recording Skype for Business
Calls
■ This section provides a procedure to verify that a proposed or existing
SPAN/RSPAN/Mirrored port location (also referred to as the tapping location) meets the
SmartTAP recording requirements for Skype for Business.
■ The document is not intended as a tutorial. It is assumed that the personnel involved in this
activity will be able to examine a basic SIP call flow, to configure SPAN/RSPAN Mirroring on
the switches/routers, and to administer the Skype for Business servers.
Prerequisites
The following tools and Administrative privileges are required to perform the procedure in this
document:
■ Wireshark or IP sniffer tool on SmartTAP 360° Live server or Testing PC
■ Access to Skype for Business server to enable and collect logs
■ Access to IP Switch/Router to configure port SPAN/MIRROR
■ Ability to place test calls
Introduction: SmartTAP Recording Concepts
The SmartTAP recorder relies on a Microsoft Certified Skype for Business plugin to process the
call signaling and on the availability of the MEDIA for the call at the recording NIC interface(s).
The Skype for Business plugin resides on the Front End Server(s) and provides the call details to
the SmartTAP recorder which records the MEDIA for the call through the recording NIC
interface.
SmartTAP 360° Live Processing of Skype for Business Signaling
The SmartTAP 360° Live Skype for Business recorder requires the installation of a plugin for
every Skype for Business server that is involved in call forwarding/routing decisions. Typically,
- 197 -

CHAPTER12 Troubleshooting
SmartTAP 360° Live | Installation Guide
these are the (FES) Front End Servers; however, could also be a (SBS) Small Business Server, or a
(SBA) Survivable Branch Appliance. The SmartTAP 360° Live plugin is responsible for collecting
the call information (signaling) and sending it to the SmartTAP 360° Live recorder as shown in
the figure below.
Figure 12-1: AudioCodes Software Plugin
Whether the SmartTAP 360° Live Skype for Business plugin is installed, the Skype for Business
Administrator has access to logging facilities that enables the logging of SIP signaling and saving
these logs to a text file. This log file contains the Skype for Business call information and the
MEDIA information that correlates with the call information that the plugin sends to the
SmartTAP 360° Live recorder.
SmartTAP 360° Live Media Processing
The SmartTAP 360° Live recorder uses the call information received through the plugin to locate
the MEDIA associated with the call to record. The MEDIA to record MUST appear on the
recording NIC interface (or interfaces if two recording NICs are used). The recording NIC
interface is connected to the switch/router interface that forwards the mirrored data.
- 198 -

CHAPTER12 Troubleshooting
SmartTAP 360° Live | Installation Guide
Figure 12-2: SmartTAP 360° Live Media Processing
Procedure
This procedure includes a step-by-step sequence to guide the user from the setup of Skype for
Business and network environment, gathering of data, and finally to the analysis of the data
collected.
Setup Skype for Business Logging
This section describes how to setup Skype for Business Logging.
➢ To setup Skype for Business Logging:
1. Log in to the server (FES, SBS, or SBA) as user with Administrative privileges.
2. Open the Lync Server Logging Tool:
● Start > All Programs > Microsoft Lync Server 2010 > Lync Server Logging Tool
3. In the Components list, select SIPStack only.
4. In the Flags list, select TF_PROTOCOL only.
5. In the Level, select All.
- 199 -

CHAPTER12 Troubleshooting
SmartTAP 360° Live | Installation Guide
Figure 12-3: Skype for Business Logging
Setup Sniffer
This section describes how to setup the sniffer.
➢ To setup the sniffer:
1. Log into the test PC (or SmartTAP 360° Live Server).
2. Start the sniffer software (Wireshark).
3. Select the recording NIC interface to monitor.
Capture a Test Call
This section describes how to capture a test call.
➢ To capture a test call:
1. On the Skype for Business server click “Start Logging” button.
2. On the test PC click “Start” to start capturing traffic.
3. Place a Skype for Business test call.
4. On the Skype for Business server click “Stop Logging” button.
5. Click “Analyze” and “Browse” to save the log file.
- 200 -

CHAPTER12 Troubleshooting
SmartTAP 360° Live | Installation Guide
6. On the test PC click “Stop” to stop capturing traffic.
7. Save the capture (File -> Save As…).
Analysis
To verify that the MEDIA for the test call is present on the sniffer log, you must first find the
signaling for the test call in the Skype for Business log.Once you have found the test call
signaling, you must extract the MEDIA information for the call and then examine the sniffer log
and see if in fact there was traffic present on the recorded IP and PORT.
Locate Test Call in Skype for Business Log
A strategy to find the test call quickly is to search the log backwards for the string “INVITE sip”
which corresponds to the initial SIP message associated with the call as shown in the extract
below.
TL_INFO(TF_PROTOCOL) [0]08B8.11C4::12/13/2011-22:14:16.164.0000bab2
(SIPStack,SIPAdminLog::TraceProtocolRecord:SIPAdminLog.cpp(125))$$begin_record
Trace-Correlation-Id: 1066643171
Instance-Id: 000010F8
Direction: outgoing
Peer: 10.133.11.71:1081
Message-Type: request
Start-Line: INVITEsip:10.133.11.71:1081;transport=tls;ms-opaque=f265f30ed4;ms-
received-cid=FB00;grid SIP/2.0
From: <sip:[email protected]ocodes.com>;tag=79882da9cf;epid=518fe1de1d
To: <sip:[email protected]odes.com>;epid=ad43a533af;tag=e63e42b63f
CSeq: 3 INVITE
Call-ID: 3c5eed8dfdc748729bd72ad2c64bf510
… (removed text here)
o=- 0 0 IN IP4 10.133.11.73
s=session
c=IN IP4 10.133.11.73
b=CT:99980
t=0 0
m=audio 1462 RTP/SAVP 114 9 112 111 0 8 116 115 4 97 13 118 101
a=ice-ufrag:E385
a=ice-pwd:x7t5IzxDgQExybbhBdRG1H0F
a=candidate:1 1 UDP 2130706431 10.133.11.73 1462 typ host
a=candidate:1 2 UDP 2130705918 10.133.11.73 1463 typ host
- 201 -

CHAPTER12 Troubleshooting
SmartTAP 360° Live | Installation Guide
a=crypto:2AES_CM_128_HMAC_SHA1_80
inline:94jUIdYJL2x94mTvmABNbD1cjkxywrN77mP4JQ1T|2^31|1:1
a=remote-candidates:1 10.133.11.71 26064 2 10.133.11.71 26065
… (removed text here)
It is possible that the media information shown in the INVITE message (above) is
modified in a later message exchange. If this is the case, further analysis is required.
Compare Call Information with Sniffer Trace
Open the captured sniffer file and search for data to/from the media ports identified in the
Skype for Business log.
Figure 12-4: Sniffer Trace
Determine Whether SmartTAP will Record this Call
If there is a correlation between the call information gathered from the Skype for Business
protocol log and the sniffer data collected for the recording NIC interface (or switch port
forwarding the mirrored traffic), the call meets the SmartTAP recording requirements for Skype
for Business.
Troubleshooting Skype for Business Plugin Installation
This section describes the troubleshooting options when the Skype for Business installation
plugin fails.
- 202 -

CHAPTER12 Troubleshooting
SmartTAP 360° Live | Installation Guide
Enable the Browser Service
The Enable the Browser Service service automatically stops if your registry settings are not
configured to maintain the browse list.
➢ To verify your settings:
1. Navigate to Start > Run
2. Type regedit and click Enter
3. Navigate to HKEY_LOCAL_MACHINE\SYSTEM\Cur-
rentControlSet\Services\Browser\Parameters
The MaintainServerList value should be set to Yes or Auto
● If this Value is set to No the computer browser service will not start.
Use “net view” to Verify
Normally you do NOT have to enable “net view” service to run the install; however, sometimes
it makes a difference. The reason why entering user credentials sometimes does not work is
that the Front End can’t see the domain in order to authenticate the user.
A simple test is to run “net view” from the command line. If the command returns a list of
servers like is shown in the example below, the install should work. If not, then this indicates
that there is a problem with the machine (because it can’t currently see the domain).
C:\Users\Administrator.QALABEE>net view
Server Name Remark ------------------------------------------
-------------------------------------
\\BE
\\EDGE
\\FE1
\\OCS-CLIENT3
\\OCSCLIENT1
\\QA-USER2
\\SmartTAP
The command completed successfully.
Troubleshoot Skype for Business Recording
This section describes troubleshooting for Skype for Business Recording.
No Records for the Calls
When there are no records for calls, verify the following:
■ Make sure the firewall is open for in traffic on port 9901, for out traffic to 9090 on the
plugin machine. Also, open for in traffic on port 9090 and out traffic to port 9901 on
SmartTAP 360° Live machine.
- 203 -

CHAPTER12 Troubleshooting
SmartTAP 360° Live | Installation Guide
■ If there are messages in the Skype for Business plugin logs stating “no SIP messages are
seen”, check for errors and exception in the log files.
■ If the Skype for Business plugin failed to register to the Front End, recheck with the
customer if the pool name that was provided during Skype for Business plugin installation is
correct.
■ When the Skype for Business plugin is installed on SBA machine, plugin fails to register to
FE until the SBA synchronizes with the main FE. It may take 30 minutes or more. It might
need to restart the Skype for Business plugin to trigger registration again.
Calls with No Audio
Run Wireshark to capture the tapping interface and make a call. Make sure there are UDP
packets in Wireshark and if decoded as RTP they appear as RTP instead of RTP unknown
version.
Enabling Promiscuous Mode on VMWare ESXi
■ Using the vSphere client, promiscuous mode needs to be enabled in the following
locations:
■ Configuration -> Networking->Properties (on the applicable vSwitch) ->
● In the Ports tab, vSwitch Configuration, click edit > Policy Exceptions -> Promiscuous
Mode > Change to Accept
● In the Ports tab, VM Network (applicable network name), click edit > Security >
Promiscuous Mode > Change to Accept
- 204 -

CHAPTER13 Configure Microsoft SNMP Service
SmartTAP 360° Live | Installation Guide
13 Configure Microsoft SNMP Service
The SmartTAP 360° Live system optionally uses the Microsoft SNMP agent for configuration and
alarms. All Windows servers that are part of a SmartTAP 360° Live installation can have the
SNMP feature enabled and configured. This service must can be configured on the SmartTAP
Communication Server Installation.
The service must be configured for the SmartTAP Storage server Installation if different from
the SmartTAP server for storage statistics and on the servers in branches for system health
presentation.
● SNMP Trap Service must be disabled on SmartTAP servers running the
Application Server component.
● For each SmartTAP software component, it is only necessary to setup the SNMP
service once per server.
You can install Microsoft SNMP Agent using one of the following methods:
■ Automatic: Automatic SNMP Setup below
■ Manual: Manual SNMP Setup below
Automatic SNMP Setup
Starting from SmartTAP Version 2.2, there is an automated installer for setting up SNMP on a
system. If a system does not have SNMP services installed , this is a simple and easy way to
setup SNMP without performing the manual procedure described in Section Configure
Microsoft SNMP Service above.
By default, the installer is located within the install package as is not installed to the local drive
with the SmartTAP installer.
➢ Do the following:
1. In your SmartTAP distribution directory, locate the following file in either of the following
locations:
● .\Program Files\AUDIOCODES\SmartTAP\Install\EnableSNMPOnServer.bat
● .\installation suite\tools\EnableSNMPOnServer.bat
2. Right-click and choose "Run as administrator".
Manual SNMP Setup
The procedure below describes how to install the SNMP Server feature.
- 205 -

CHAPTER13 Configure Microsoft SNMP Service
SmartTAP 360° Live | Installation Guide
➢ Do the following:
1. Open Turn on Windows features on or off (Control Panel > Programs and Features > Turn
on Windows features on or off).
2. Click Features, and click Add Features.
3. Select SNMP Services.
Figure 13-1: Add Features Wizard
4. Open Services (Start > Run… > services.msc).
5. Right click over the SNMP Service listing.
- 206 -

CHAPTER13 Configure Microsoft SNMP Service
SmartTAP 360° Live | Installation Guide
Figure 13-2: SNMP Service
6. Select Properties > Security; the following screen appears:
- 207 -

CHAPTER13 Configure Microsoft SNMP Service
SmartTAP 360° Live | Installation Guide
Figure 13-3: SNMP Service Properties
7. In the Accepted community names window, add the following;
● public Community with READ ONLY rights
● private Community with READ WRITE rights
The community names must be in lower case.
- 208 -
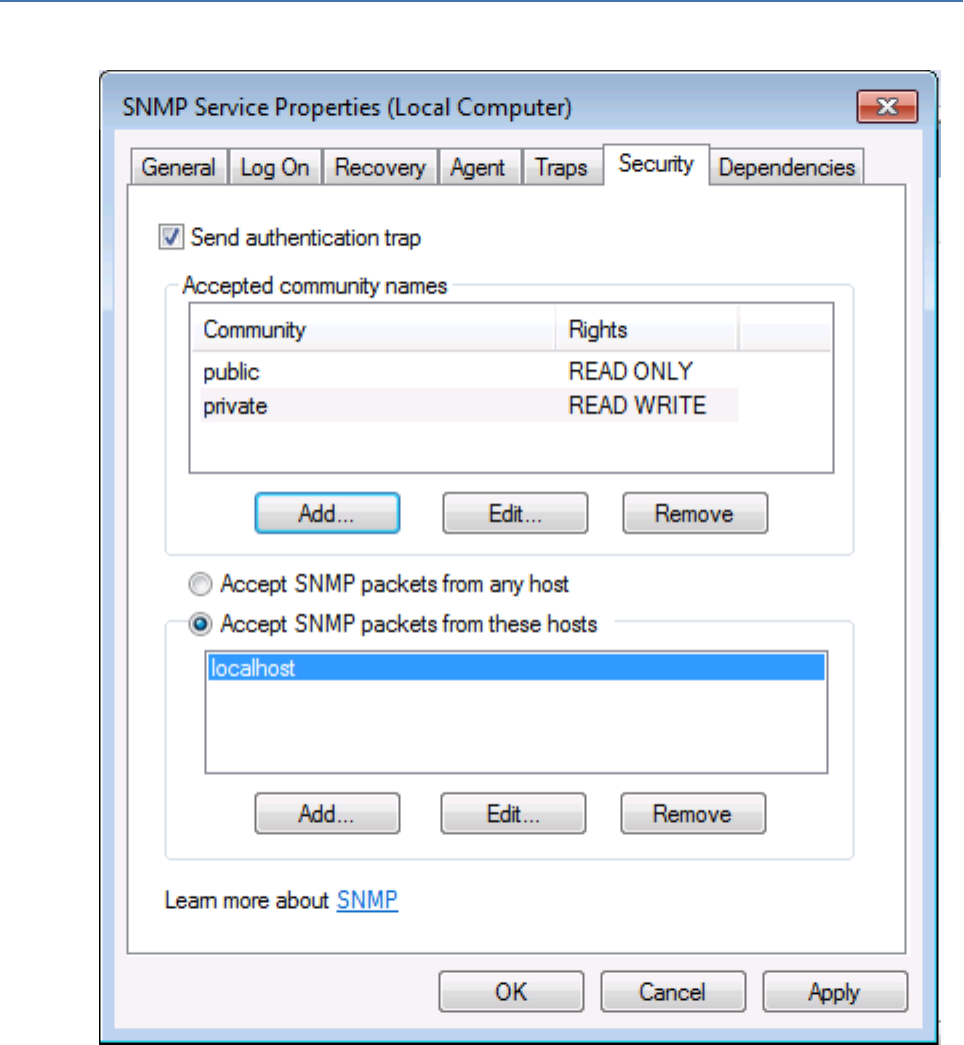
CHAPTER13 Configure Microsoft SNMP Service
SmartTAP 360° Live | Installation Guide
Figure 13-4: SNMP Service Properties - Security
8. In the Accept SNMP packets from these hosts window, click Add… to add the following:
● If this is a standalone SmartTAP server, leave localhost as the only entry
● If this is for a SmartTAP installation that involves more than one server, add the IP
address of the Application Server (AS) instead
9. Click Apply.
10. Select the Traps tab.
11. From the 'Community name' drop-down list, select public.
12. Click Add to list.
- 209 -
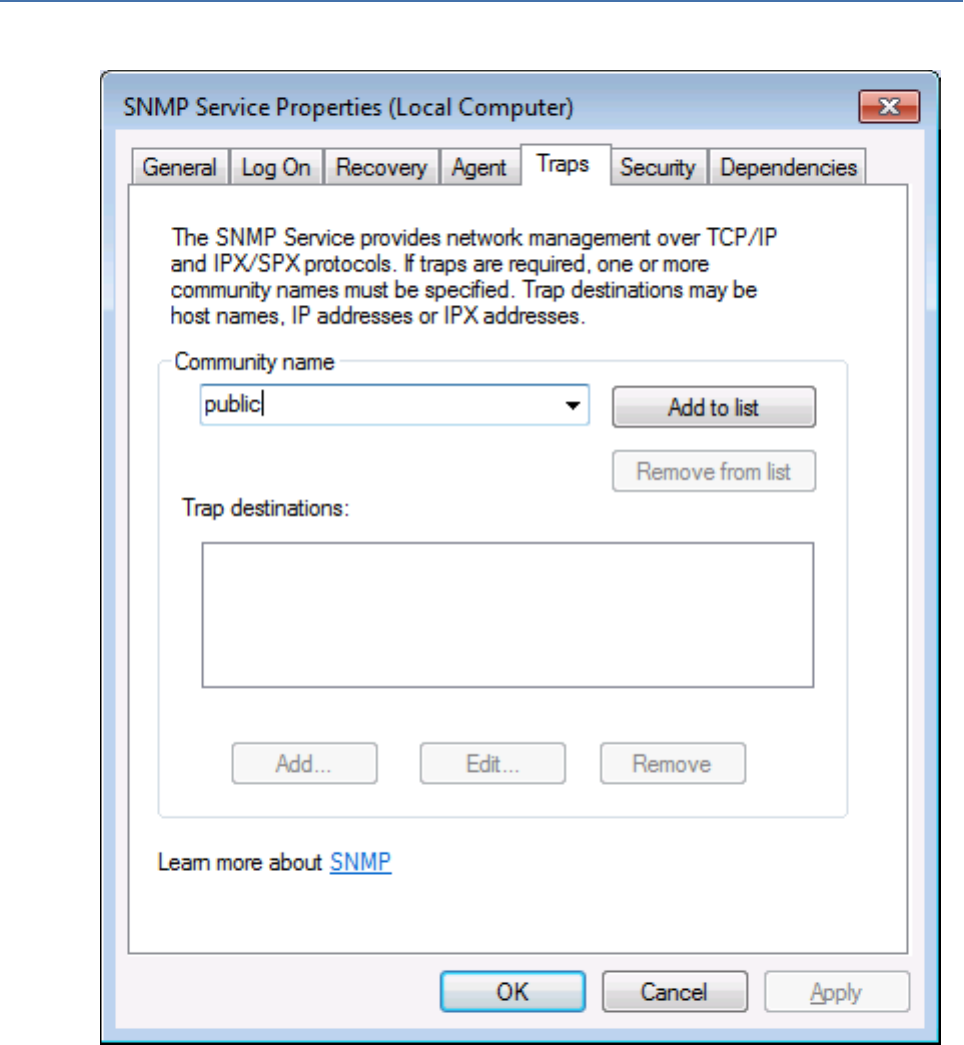
CHAPTER13 Configure Microsoft SNMP Service
SmartTAP 360° Live | Installation Guide
Figure 13-5: SNMP Service Properties - Traps
13. Click Add… to add Trap destinations as follows:
● If this is a standalone server enter localhost
● If this is for a SmartTAP installation that involves more than one server add the IP
address of the Application Server (AS) instead
- 210 -

CHAPTER13 Configure Microsoft SNMP Service
SmartTAP 360° Live | Installation Guide
Figure 13-6: SNMP Service Properties – Traps – Add Trap Destinations
14. Click OK.
- 211 -

International Headquarters
1 Hayarden Street,
Airport City
Lod 7019900, Israel
Tel: +972-3-976-4000
Fax: +972-3-976-4040
AudioCodes Inc.
200 Cottontail Lane
Suite A101E
Somerset NJ 08873
Tel: +1-732-469-0880
Fax: +1-732-469-2298
Contact us: https://www.audiocodes.com/corporate/offices-worldwide
Website: https://www.audiocodes.com/
Documentation Feedback: https://online.audiocodes.com/documentation-
feedback
©2021 AudioCodes Ltd. All rights reserved. AudioCodes, AC, HD VoIP, HD VoIP Sounds Better, IPmedia,
Mediant, MediaPack, What’s Inside Matters, OSN, SmartTAP, User Management Pack, VMAS, VoIPer-
fect, VoIPerfectHD, Your Gateway To VoIP, 3GX, VocaNom, AudioCodes One Voice, AudioCodes Meeting
Insights, AudioCodes Room Experience and CloudBond are trademarks or registered trademarks of Audi-
oCodes Limited. All other products or trademarks are property of their respective owners. Product spe-
cifications are subject to change without notice.
Document #: LTRT-27213
