
DOCUMENT
MANAGEMENT
PORTAL QUICK
REFERENCE GUIDE FOR PROVIDERS

Document Management Portal User Guide
1
Table of Contents
Introduction to the Document Management Portal for Providers ................................................ 2
Access DMP from PRISM thru External Links ............................................................................ 4
Document Upload ...................................................................................................................... 8
User Messages .........................................................................................................................11
Fax Cover Sheet .......................................................................................................................14
Upload Documents Attached to a Claim ....................................................................................18
Viewing or Adding a Document from an Existing Claim .............................................................23
Viewing or Adding a Document from an Existing Claim .............................................................24

Document Management Portal User Guide
2
Introduction to the Document Management Portal for Providers
The PRISM Documentation Management Portal (DMP) enables providers to submit support
documentation for Medicaid claims and documentation pertaining to other Medicaid programs and
services. The Documentation Management Portal (DMP) is accessed through different access points
in PRISM. State objectives achieved with this solution include:
• Having a single content repository and central governance for all Medicaid-related documents
• Leveraging existing technology for Medicaid information submission and exchange
• Providing a browser-based interface to perform various tasks pertaining to submission of
documents, reviews, approvals, collaboration, and retrieval, as described below.
o Document Submissions
Online
Fax
o Document Management
Role-based security
Document archival
o Document Access
Document search and retrieval using keywords
Document access from PRISM
o Document Processing Workflow
Workflow for each document type (review and approval)
o Communication and Collaboration
Messaging between State staff and providers for the submitted documents
Notifications

Document Management Portal User Guide
3
The Document Management Portal Tabs
The Search tab allows users to search for attached documents using a number of tags
that were created during upload. For example, you may search for a claim using the
beneficiary’s information or using the date the claim was loaded into PRISM.
The Upload Documents tab allows users to upload documents. Up to five documents
may be uploaded during a single transaction. Accessing this screen via PRISM screens
will auto populate fields with the information on the claim.
The Messages tab allows users to view messages exchanged within DMP. From this
page, you can also search for a message that has been associated to a specific
document.
The Fax Coversheet tab allows the user to generate a fax cover sheet to submit a
document via fax. This page is also auto populated with information from the entry claim.
Document Management Portal User Guide
4
Access DMP from PRISM thru External Links

Document Management Portal User Guide
5
My Inbox
1. Log into PRISM
2. Select the External Links menu
3. Click Document Management Portal.
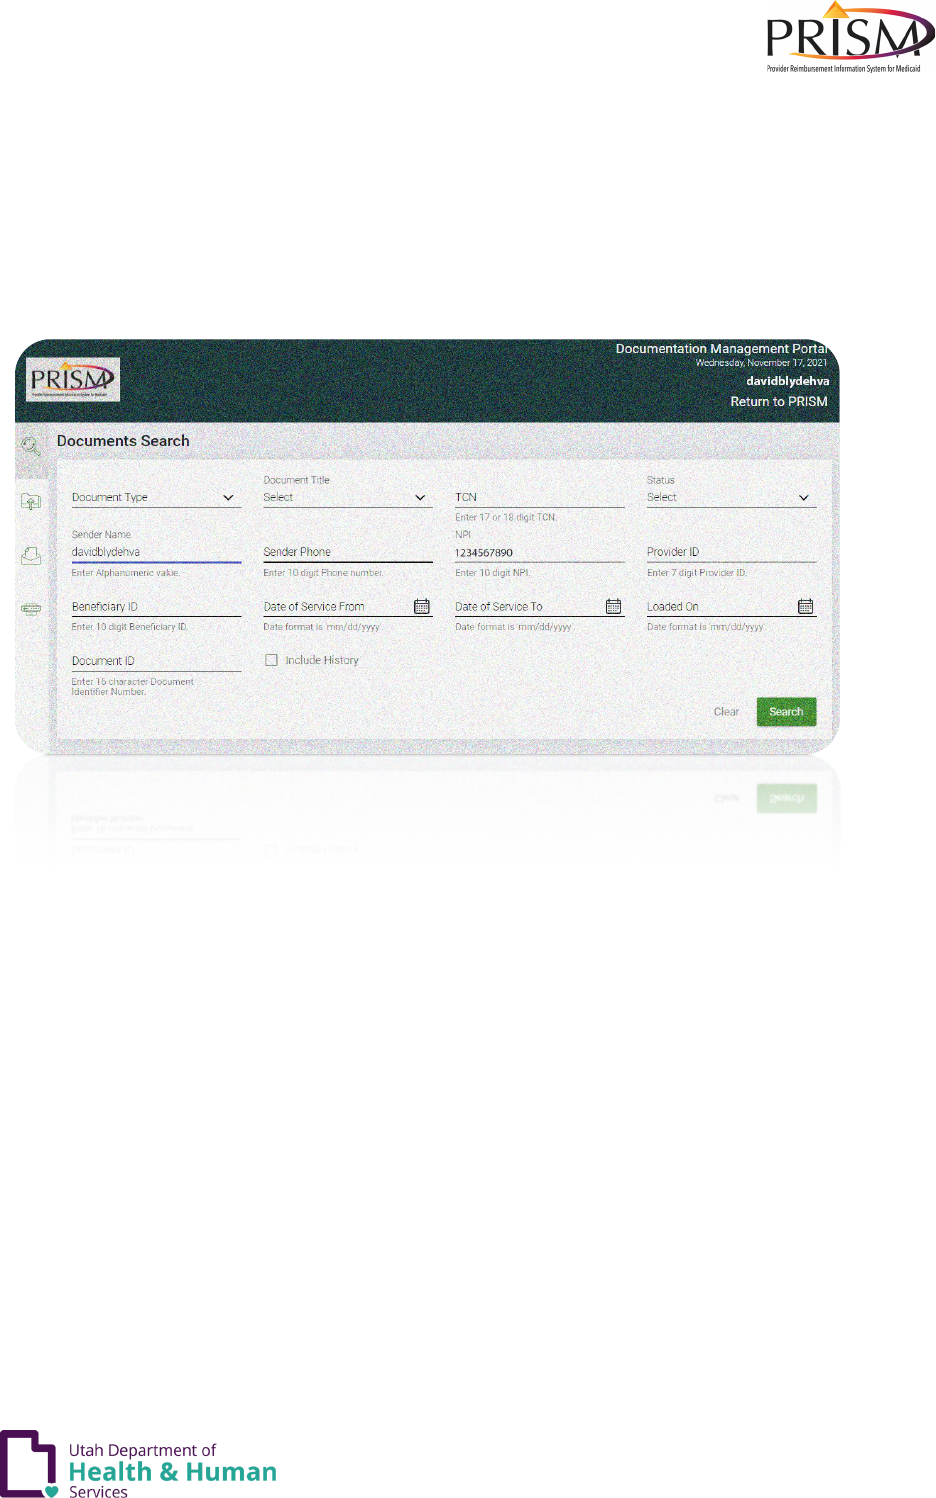
The DMP Homepage (Documents Search)
The Document Management Portal application opens in a pop-up window.
• If the pop-up window does not display, turn off your pop-up blockers off for this site.
• The default tab that displays is “Documents Search”. By default, the Sender Name and NPI or
Provider ID displays.
• From this page, you can search for documents previously uploaded. There are multiple ways
to search for uploaded documents. These are outlined on the following page.

Document Management Portal User Guide
6
The DMP Homepage (Documents Search) - continued
By default, uploaded documents do not display when Documents Search page opens. Different ways
to search for existing uploaded documents include:
1. Click the Magnifying Glass (Refreshes the page)
o All documents uploaded, display at the bottom of the page, 10 at a time
2. Document Type
o Select Claim, Consents, or Letter
o Click Search
o To narrow this search, also select the Document Title
3. TCN (Enter 17 or 18 digit TCN)
o Click Search
4. Beneficiary (Member) ID
o Click Search
5. Document ID
o This is a 16-digit DMP document ID
o Click Search

Document Management Portal User Guide
7
The DMP Homepage (Search Results)
After results display at the bottom of the page, you can take the following actions:
1. Download the uploaded file from the Document Title by clicking on the Document Title hyperlink
2. View the Status of the document. Status’ include:
a. Review/Process
b. Approved
c. Rejected
d. Hold (does this display for provider?)
3. View message
4. Send message
5. To upload a message, select the Document Upload tab in the left-hand navigation menu

Document Management Portal User Guide
8
Document Upload

Document Management Portal User Guide
9
Document Upload Tab
The Provider NPI or Provide ID displays. Basic information that is required (*indicates required) to
upload a document is:
1. Beneficiary ID
2. Beneficiary Last Name
3. Sender Name (name can be changed)
4. Sender Phone # (10-digit phone number)
5. Number of documents to upload (allows 5 documents to be uploaded at a time)
6. Document Type (select from dropdown)
7. Document Title (select from dropdown)
8. Date of Service (if document type selected is Claim)
• Allow users to enter 5 TCNs to link the same document to multiple claims
9. Message (enter a message intended for Utah Medicaid)
• This message is the message that is displayed under the messages tab
10. Click Browse
• Dialog box displays, select document, click open
o Allows upload of jpeg, jpg, pdf, doc, docx, xlsx, zip, and xls formats
o Allows a file size up to 30 Mb to upload.
o Will preserve original file name for the submitted documents
o Assigns a unique Document ID
11. Click Submit

Document Management Portal User Guide
10
Successful Document Upload Message
If document is uploaded successfully, popup “Document uploaded successfully. The Document ID is:
(document ID displays).
• Click Ok
Document Upload
• To view messages, Select Messages in the left-hand navigation pane

Document Management Portal User Guide
11
User Messages
Document Management Portal User Guide
12
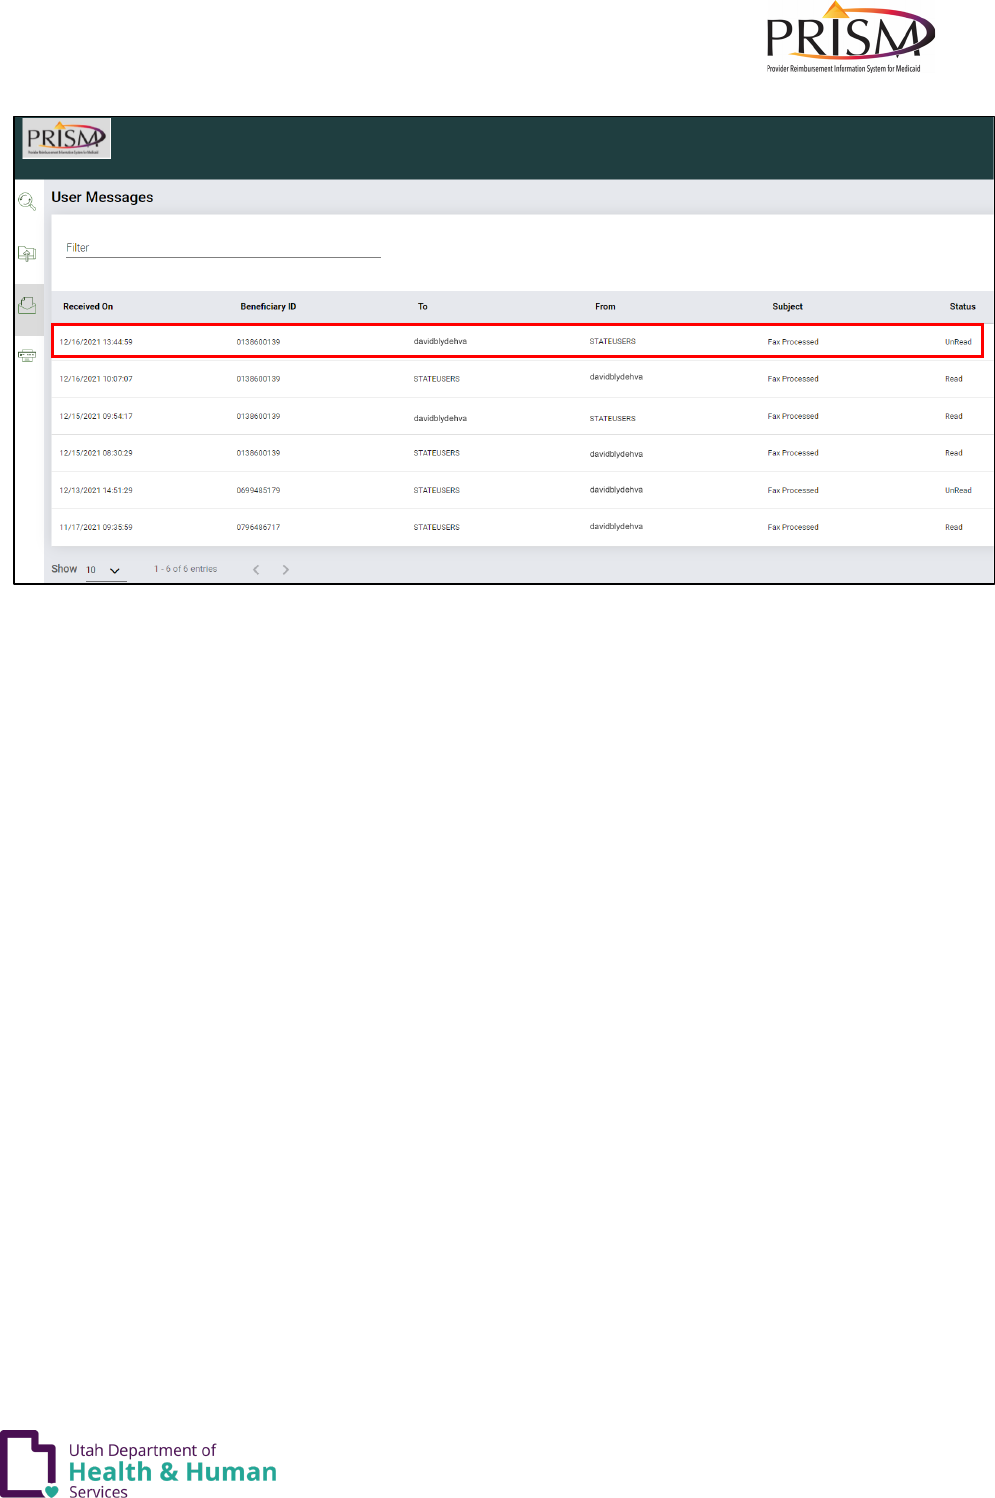
User Messages
Messages are displayed with the most recent messages displayed at the top of the list. These
messages are the same messages that are attached to the document.
• This page will show a history of Read and Unread messages and are displayed by default, 10 at
a time
• To change the number of messages that are displayed at a time, click the Show dropdown
• To view a message, click anywhere on the message row

Document Management Portal User Guide
13
User Message
1. The new message displays at the bottom of the page
2. The original document can be viewed by clicking, View Document
3. To reply to this message, click Reply
4. Click Back to return to User Messages
5. Select Fax Coversheet from the left navigation pane

Document Management Portal User Guide
14
Fax Cover Sheet

Document Management Portal User Guide
15
Fax Cover Sheet
A new fax cover sheet must be created for each new fax submission. Documents associated to the
fax must not contain more than 40 pages.
The NPI and Sender Name will auto-fill. Read the Instructions at the top of the page. It includes
important information when entering multiple TCN’s and NPI’s. Enter the other required information
fields which include:
• Beneficiary ID (Member)
• Date of Service
• Document Type (dropdown)
• Document Title (dropdown)
• Sender Fax
• Sender Phone
• TCN (If “Claim” is selected as the document type)
Fax Cover Sheet (continued)
• Once all required information is entered, click Submit

Document Management Portal User Guide
16
Fax Cover Sheet (continued)
When Submit is clicked, a .pdf will be created and downloaded to the browser.
• Open the fax cover sheet by clicking on the downloaded faxcoversheet.pdf.

Document Management Portal User Guide
17
1. Review the information contained on the document
2. The Medicaid fax #’s are displayed at the top of the document
3. The fax is assigned a unique control number and bar code

Document Management Portal User Guide
18
Upload Documents Attached to a Claim

Document Management Portal User Guide
19
Upload Documents Attached to a Claim
Immediately after a claim is submitted, a popup windows displays claim details with a transaction
control number.
• Click the Upload Documents button

Document Management Portal User Guide
20
Document Upload (From Claim Details)
The Document Upload page in DMP displays. Data from the claim auto-populates fields in the
Document Upload page. The following fields need data:
• Sender Phone
• Document Type
• Document Title
• Message
• Click Browse and navigate to the document to upload

Document Management Portal User Guide
21
Document Upload (From Claim Details) - continued
Once all of the required fields are filled:
• Click Submit
If document is uploaded successfully, popup “Document uploaded successfully. The Document ID is:
(document ID displays).
• Click Ok

Document Management Portal User Guide
22
Document Upload
• Click Return to PRISM hyperlink
Submitted Professional Claim Details
Click Close

Document Management Portal User Guide
23
Viewing or Adding a Document from an Existing Claim

Document Management Portal User Guide
24
Viewing or Adding a Document from an Existing Claim
My Inbox
From the Claims Menu:
• Select Inquire Claim-Provider
Inquire Claims
From the Inquire Claims list page, filter for a claim you have submitted. Select the TCN dropdown
value if you have kept a history of the TCN’s you have submitted. Or you can filter by Beneficiary ID
• Click TCN hyperlink

Document Management Portal User Guide
25
View Claim Header
• Click Upload View/Documents button
Document Upload
Repeat the steps to submit a document as outlined in earlier.
