
OnBase Guide - WorkView Configuration
Goal: To configure successful WorkView Applications
within the CU OnBase environment
Complexity Level: Departmental WorkView
Administrators
7/12/2024

2
Table of Contents
Background ............................................................................................................... 3
Prerequisites .............................................................................................................. 3
Required Trainings .................................................................................................... 3
Resources ................................................................................................................. 3
User Groups & Access .............................................................................................. 4
Functional & WorkView User Groups ..................................................................... 4
MANAGER Group .................................................................................................. 4
Master Security ...................................................................................................... 4
WorkView Configuration Guidelines .......................................................................... 5
Classes & Attributes ............................................................................................... 5
Filters and Filter Bars ............................................................................................. 9
Views ..................................................................................................................... 9
Relationships in WorkView ...................................................................................... 10
Relationship Attribute ........................................................................................... 10
Association Class ................................................................................................. 12
Advanced Association Classes ............................................................................ 13
Application Creation Excelerator ............................................................................. 15
Testing ..................................................................................................................... 15
Importing Data to Classes ....................................................................................... 16
Migration .................................................................................................................. 16
Purging Objects ....................................................................................................... 16
Purge Objects Selectively (Recommended) ......................................................... 16
Purge Objects for a Class (Use Extreme Caution!) .............................................. 17
Purge Objects (Do not use!) ................................................................................. 17
Using Workflow with WorkView ............................................................................... 18
“Related” Items .................................................................................................... 18
Assigning Values to Relationship Attributes ......................................................... 18
System Events ..................................................................................................... 18
Pop Integrations & URL Object Creation ................................................................. 19
Viewing Objects ................................................................................................... 19
Creating Objects .................................................................................................. 19
Viewing Filter Results ........................................................................................... 20
Reporting ................................................................................................................. 20

3
Background
WorkView is a module that enables low-code development of applications suited for
case management. These applications are based on relational database tables
allowing for one-to-many or many-to-many relationships between objects where
applicable.
Since this is within the OnBase database, this also allows for integration with Unity
forms and Workflow, and documents. WorkView applications are accessed through
the Unity and web clients that users are already familiar with.
CU has 50 concurrent licenses for WorkView, meaning 50 users can be using
developed WorkView applications in the Unity/web clients at any time. Developers
configuring in Studio do not count toward this limit.
Prerequisites
OnBase Studio must be installed to configure WorkView (and any related Workflow
processes). OnBase Configuration is needed to create user groups (and any
document types or keyword types related to your application).
Refer to the OnBase Client Guides for installation instructions.
Required Trainings
Due to the complexity and potential impact of WorkView configuration, prior to
receiving access to configure WorkView, training must be completed.
Hyland offers a WorkView Certification which requires System Administration as a
pre-requisite.
The following are also available online through our subscription.
• Work View | Case Manager Hands On Lab
• Work View | Case Manager: Building Your First Solution
• Work View | Case Manager: Intermediate
• Work View | Case Manager: Advanced
• Work View | Case Manager: Troubleshooting
During the first two training days at CommunityLive, WorkView content is also
usually available.
Resources
For more information, refer to:
• the WorkView MRG
• the Application Builder Community
• the WorkView | Case Manager Community

4
Additional recommended trainings:
• Workflow & WorkView: Building a Complete Solution
• WorkView: Calculated Attributes
• WorkView: Data Sets
• WorkView: Notifications with ObjectPop & FilterPop
• WorkView: Associations for Forms, Document Types & Folders
• WorkView: Application Creation Excelerator (ACE)
If you need assistance from UIS, please contact [email protected].
User Groups & Access
Functional & WorkView User Groups
Functional groups exist to support WorkView usage and development:
• Functional - Leve1-4: Provides basic user access to WorkView functionality
in the Unity and web clients.
• Functional - Developer - WorkView: Required to configure WorkView in
Studio (see Required Trainings)
No WorkView configuration (applications, classes, etc.) should be assigned to these
functional groups; they exist only to provide access to WorkView functionality.
All other configuration should be assigned to “WorkView” user groups (not “User
Group” or “Workflow” groups) as outlined in Expectations and Tips for Certified
Admins. No functional permissions should be assigned to these groups in
Configuration, just create the group and add members. Then, assign only WorkView
configuration (applications, classes, views, filter bars, etc.) in Studio.
MANAGER Group
Add the MANAGER group to all WorkView configuration items.
Do not enable the “Always On” option for the MANAGER group. This option can be
selected for your other “WorkView” groups as needed.
Master Security
You can review a group’s access to an application by right clicking the application
and choosing “Master Security”. There you can copy access between groups,
eliminate all access for a group, or grant access to an entire application for a group.

5
WorkView Configuration Guidelines
All WorkView configuration must conform with the OnBase Naming Conventions.
Some items cannot include spaces or non-letter characters in their names, so the
naming convention is modified accordingly.
All configuration must be developed in a non-production environment (DMOTST is
recommended) and thoroughly tested prior to migration to DMOPRD. Refer to the
Admin handbook for more information regarding OnBase environments.
WorkView requires careful consideration of the requirements and desired outcome
before starting configuration, even compared to other OnBase modules.
Classes & Attributes
1. It can be difficult to remove relationships between classes once they are
established. Carefully plan which classes will be needed, how they might
relate to each other, and what type of relationship(s) would exist (one to one,
one to many, many to many) in order to configure the correct type of classes
and relationships between them.
2. Do not configure Shared classes between applications.
• Changes made to a shared class in one application also changes the
class in all other applications using the class.
• Shared classes also cause all other applications using the class to be
included in any export files upon migration.
• Password protection on an application affects other applications using
the shared class.
3. To use existing employee and/or student data (from AutoFill Keyword Sets),
configure External Classes as follows:
• Create a new class and choose External Class.
• Enter the class name.
• Choose Local or Linked Server.
• Set Server as local and the Database as the environment name
(DMOPRD, DMOSTG, DMOTST or DMODEV).
i. For student information, enter HSI.KEYSETDATA112 as the
table name.
ii. For employee information, enter HSI.KEYSETDATA117 as the
table name.

6
• Assign the appropriate user groups (including MANAGER). WorkView
configuration should be assigned using “WorkView” user groups (not
“User Group” or “Workflow” groups).
• For student information, configure attributes as follows.
i. You can exclude any attributes you do not need but must
include KEYSETNUM and Student ID.
ii. You can adjust these names and display names but not other
settings.
Name
Display Name
Data Type
Index
External Data
Column
KEYSETNUM
KEYSETNUM
Integer
Unique
KEYSETNUM
StudentID
Student ID
Alphanumeric (9)
KS113
FirstName
First Name
Alphanumeric
(50)
KS105
MiddleName
Middle Name
Alphanumeric
(50)
KS206
LastName
Last Name
Alphanumeric
(50)
KS104
DateofBirth
Date of Birth
Date
KS106
PreferredFirstName
Preferred First
Name
Alphanumeric
(150)
KS681
• For employee information, configure attributes as follows.
i. You can exclude any attributes you do not need but must
include KEYSETNUM and Employee ID.
ii. You can adjust these names and display names but not other
settings.

7
Name
Display Name
Data Type
Index
External Data
Column
KEYSETNUM
KEYSETNUM
Integer
Unique
KEYSETNUM
EmployeeID
Employee ID
Alphanumeric (15)
KS102
FirstName
First Name
Alphanumeric (50)
KS105
MiddleName
Middle Name
Alphanumeric (50)
KS206
LastName
Last Name
Alphanumeric (50)
KS104
DateofBirth
Date of Birth
Date
KS106
OPERID
Operator ID
Alphanumeric (10)
KS260
Email
Email
Alphanumeric
(100)
KS529
Last4SSN
Last 4 SSN
Alphanumeric (4)
KS640
PreferredFirstName
Preferred First
Name
Alphanumeric
(150)
KS680
4. Extension Classes
• For sibling classes to share attributes, the attributes must be on the
base class.
• For objects that will be converted to another class (ex. Base class =
Person with extension classes of Applicant and Employee, and objects
converted from Applicant to Employee), create relationships on the
base class.
5. External classes can be created to access data that is available in
materialized views from ICS, FIN and HCM. However, these external classes
must be created using an ODBC connection and must be configured by UIS.
• External classes also have some limitations, so please refer to the
MRG. For example, values from external classes cannot be used as
user prompts on a filter.
• This should not be done in a way that exposes data to users who
should not have access to that data.
• Materialized views are refreshed on an interval, the data is not real-
time.
6. Disable direct object creation on classes where applicable (where users
should never be able to create objects (ex. if objects will only be created by
workflow) or where users should only create objects from within an embedded
filter or through another defined process).
7. When creating attributes, keep in mind:
• The appropriate data type and length
• The term “Institution” is reserved and cannot successfully be used as
an attribute name (though it will allow you to configure it). Never name
an attribute Institution.
• Do not replicate default/system values on a class with an attribute. This
will also cause name conflicts when you attempt to use the attributes.

8
i. Object Name
ii. Object ID
iii. Created By
iv. Created Date
v. Revision Date
vi. Revision By
• Naming. It can help to follow a pattern, especially for relationship
attributes, ex. RelLeaveReqToEmployee.
8. WorkView folders are easier to configure than File Cabinet Folders, but do not
have a hierarchical structure. Either type of folder can be added to a view to
show documents related to the object.
9. Limited actions are available directly within WorkView Actions.
• For more advanced functionality:
i. Configure actions to add objects to workflow. Once the object is
in a queue, you can use the full set of rules and actions
available there. This also allows for the processing to be done
on a timer, instead of tying up the user’s session waiting for
complex processing to run.
ii. Configure actions to execute a System Task.
• If an action is configured as a button on a view, it will no longer appear
in the Tasks menu ribbon (it will only be available in one place).
10. Mappings/Associations.
• More information: WorkView: Associations for Forms, Document Types
& Folders and the Class Mappings section of the WorkView MRG.
• When configuring mapping for object creation or document import,
map as many attributes as you can.
• When configuring mapping for searching for existing items, it’s better to
use fewer attributes (since AND logic is used to identify items).
• Mapping/Association Types:
i. Forms: Create forms based on data in the WorkView class
ii. Document Types:
1. Search for documents related to a WorkView object
(including populating a WorkView folder)
2. Create WorkView objects based on a document (from
document retrieval or workflow)
iii. Folder Types: Map WorkView objects to configured (filing
cabinet) folder types to display the documents in the folder
iv. Document Import: Import documents from WorkView and inherit
values from the object to fill keyword values.
v. Keyword Type Mappings: support the other
mapping/association types
11. Create Mappings before creating Triggers.

9
12. Use Triggers when calculating values that will need to update or be used
elsewhere. Calculated attributes are only evaluated once and are not as
widely available for use within the application. See WorkView: Calculated
Attributes for more details.
Filters and Filter Bars
1. Ensure all filters accessible to users in the clients have constraints or required
prompts to limit the result list.
2. Naming filters with a prefix (along with the standard CU naming convention)
makes it easier to identify where and how each filter should be used. It can
also help to add the class name and the view name if applicable.
• UI - User interface, likely used in filter bars
• EMB - Embedded (within a view)
• LU - Lookup (for in a view)
• DS - Data set
• WF - Used for Workflow
3. When assigning the filter to a filter bar as a filter bar item, it can be given a
different display name.
4. Set a User Defined Filter Bar for the application to allow users to create their
own filters.
5. There are a variety of macros available to make filters more complex/flexible
(see the WorkView MRG for more details).
• The ~?FilterName option will not work if the filter used as a
constraint/criteria returns more than 2,000 results.
• Workflow properties are only available from the session property bag.
6. The “Enable Maximum Results” option on each filter overrides the global
setting but use caution and test, as increasing the limit can result in
performance issues.
7. Removing filter bar items requires a cache reset before users can access the
app again. If a filter bar item is removed and cache is not reset, the
application will fail to load in the client.
Views
1. Consider which fields should be required and/or read-only for your process.
2. Making the layout narrower makes it easier to read and use, a width of 85%
works well.
3. Multiple views can be configured which will appear as tabs across the screen
so that users do not need to scroll as much.

10
4. Any embedded items will run queries to load the items within, which can delay
the load time. Embedded items such as folders may be better suited to their
own views to improve load time.
5. Scripting (client side JavaScript) is sometimes necessary to make views
interactive (show/hide elements, make required/not required).
a. In some cases (like if one group should be able to change an attribute
value and another group should not), it may work better to create
copies of the view, adjust the settings for each view and assign to the
appropriate group(s) to each view instead of using scripts.
b. Basic changes can (in theory) be accomplished with the new “rule”
option, but a view can only use a script or rule for a given event type;
you cannot use both concurrently.
c. It is currently recommended that you DO NOT use the rule/custom
action option. A defect in version 22.1 causes orphaned rules which
prevent configuration from being migrated between environments.
This, in addition to limitations with the functionality and inability to
copy/paste make JavaScript the better option.
Relationships in WorkView
This is not meant to be comprehensive, but to give an overview and some examples
of different types of relationships that can be configured between WorkView classes.
Hyland documentation includes additional information. This Community post is also
a great explanation on various relationship types.
Relationship Attribute
A relationship attribute on one class will provide a reference to exactly one object in
the related class.
Example #1: we have a class for leave requests for employees, each leave request
pertains to one employee.
We would add a relationship attribute on the leave request class to the employee
class.

11
It is recommended to always name your relationship attributes in a way that
indicates they are relationship attributes and includes the attribute’s class name and
the related class name. For example, the relationship attribute on the Leave Request
class to relate those objects to Employee objects could be named
RelationshipLeaveReqToEmployee. That way, if multiple classes have relationships
to the Employee class, you know which relationship attribute/class you are working
with based on the name.
When that relationship attribute value is set on a leave request object, the leave
request object is now related to the one employee object referenced by the attribute
value. In the database, this functions as a foreign key on the table containing leave
requests. In this example, the table holding information on Leave Request objects
will reference Employee objects by object ID.
When you are viewing the leave request, information from the employee object can
also be displayed.
Multiple leave request objects can be related to the same employee object. Each
leave request for that employee will have the same relationship attribute value.
When viewing the employee object, the leave requests can be displayed in an
embedded filter (on the leave request class).

12
In this case we would NOT want to put a relationship on the employee class to
reference the leave request class. This would mean that each employee can only
relate to one leave request, but multiple employees could relate to the same leave
request.
Association Class
Association classes allow for many-to-many relationships between objects.
Association classes use two relationship attribute values, and no additional
attributes.
Example #2: There are many actors in a movie and actors are (or at least can be) in
many movies.
We would create one class for actors, one class for movies and an association class
that relates the actor class to the movie class.
In the database, the association class is a table with two foreign keys only. Each
record in the association class table will reference a Movie object by its object ID
and an Actor object by its object ID.
To show an actor’s movies on the actor object, you’d use an embedded filter (on the
association class) showing movie information. To show actors for a movie on a
movie object, you’d use an embedded filter (on the association class) showing actor
information.

13
In this example, we would NOT want to put a relationship on either the actor class or
the movie class, as that would mean each actor could only relate to one movie or
each movie could only relate to one actor.
Advanced Association Classes
Advanced association classes allow for many-to-many relationships between objects
while also allowing for additional attributes to be added. Advanced association
classes use two relationship attribute values plus any other attributes that are
needed.
To configure an advanced association class, create a standard class with exactly
two relationship attributes. Then add your other attributes.
Example #3: Students are in many courses and courses have many students in
them. Students earn a grade for each course.

14
We would create one class for students, one class for courses and an advanced
association class that has a relationship to the student class, a relationship to the
course class and an attribute for the grade.
In the database, the association class is a table with two foreign keys plus a column
for each additional attribute. Each record in the association class table will reference
a Student object by its object ID and a Course object by its object ID, then include
columns for the other attributes on the association
To show a student’s courses on the student object, you’d use an embedded filter (on
the association class) showing course information, which could include the grade as
well. To show students for a course on a course object, you’d use an embedded
filter (on the association class) showing student information, which could include the
grade as well.

15
In this example, we would NOT want to put a relationship on either the student class
or the course class, as that would mean each student could only relate to one
course or each course could only relate to one student.
Application Creation Excelerator
This feature enables WorkView application creation based on a template created in
MS Excel. This can reduce the time needed for development of applications.
Pre-defined ACE files are available on Community. A blank template can also be
created from Studio.
ACE is only available for the initial creation of an application; this method cannot be
used to make changes to an application.
Refer to Application Creation Excelerator in the WorkView MRG and WorkView:
Application Creation Excelerator (ACE) for more details.
Testing
Resetting the app server cache is not sufficient for most WorkView changes to
take effect in the Unity and/or web client; an app pool recycle is needed. However,
recycling the app pool disrupts any other users in the environment, so it is necessary
to wait until the next day to verify changes in the client. This includes, but is not
limited to:
• Class creation/modification
• Permission modification
• Filter/Filter bar creation/modification

16
In general, plan to wait until the next day to test changes in WorkView.
Importing Data to Classes
Test data or pre-existing data can be imported from an Excel or CSV file using the
WorkView menu in Studio. This is separate to any export/import of configuration.
Refer to Exporting and Importing Data in the WorkView MRG for more information.
Importing data (objects) does NOT require a cache reset since it is not changing
configuration.
Item generator can also be used to create objects or documents used to create
objects for testing purposes. Refer to Configuring Item Generators in the Studio
MRG for more information.
Migration
Refer to the Exporting and Importing Configurations guide for details on migration.
There are special considerations for migrating projects involving WorkView,
especially the reporting elements.
Note that the Data Import/Export options on the WorkView menu in Studio cannot be
used for WorkView configuration migration, this only imports or exports data for
objects.
Purging Objects
Similar to how deleted documents can be recovered until they are purged from
Document Maintenance, deleted objects still exist in the database (but are not visible
to users in the client) until they are purged. There are a few different methods of
purging objects, but all are permanent and irreversible so it is essential that you
carefully review and confirm you are taking the right action.
Always confirm which environment/repository you are working in. To avoid any
potential mix-ups, it is recommended to only be connected to one environment in
Studio when performing these actions.
If you have any doubt, please contact [email protected] for assistance
before proceeding.
Purge Objects Selectively (Recommended)
This menu option (WorkView tab in Studio) is the best way to purge objects.

17
A new window will open where you can select the desired application, class and
filter.
By default, filters will only show active objects, so if you want to purge objects that
are already deleted, you will need a filter that is configured to show deleted objects.
This is an option available on the Advanced tab in the filter configuration.
Purge Objects for a Class (Use Extreme Caution!)
After right clicking a class, there is an option in that menu to Purge Objects. This will
purge ALL objects in that class, regardless of whether they are active or deleted.
After doing so, no data will exist in the class.
There are cases where this may be necessary, especially while testing in non-
production. Carefully review what environment you are in and the class name to
ensure the right selection is made.
Purge Objects (Do not use!)
This menu option (WorkView tab in Studio) will purge ALL (regardless of
application/class) inactive and deleted objects in the environment. Inactive objects
are objects that were created, but were never saved. Since this will affect all
applications and not just your own, do not use this option.

18
Using Workflow with WorkView
In order to route WorkView objects through a life cycle, the life cycle will need to be
configured as (or converted to) a Unity life cycle. You can then assign application
classes to the life cycle. Each life cycle can process items of one content type,
documents and objects cannot go through the same life cycle.
You can also identify objects as related items when processing documents in
Workflow.
“Related” Items
The “related item exists” rule type can be crucial to performing processing on or
using objects in Workflow. However, when using this rule you can think of it as “item
exists” or “find items meeting this criteria”. The rule can operate completely
independently of any relationships configured in the WorkView application; no
relationship needs to exist between the item you are processing and the item(s) you
are looking for with the rule.
Depending on whether your primary item is a document or object, you can search for
objects meeting your criteria based on document type mappings, a filter that already
exists, or custom mappings between keywords, properties and/or constant values to
attribute values.
Refer to the Workflow MRG for more details on this rule type and its options, such as
“Use related item for tasks”.
Assigning Values to Relationship Attributes
When creating or updating an object and assigning a value to a relationship attribute
on that object, the value of the relationship attribute should be set equal to the object
ID of the related object.
System Events
You can also use System Events with WorkView to enhance your applications with
workflow functionality. System Events are similar to System Tasks but are triggered
by the specified event (ex. when an object is saved) occurring rather than a user
performing the task.
More information on System Events is in the Workflow MRG (page 246 for EP3).
Make sure you reference the documentation for particular rules/actions since some
are only actually available in certain contexts but will be available to select
regardless such that you configure them where they won’t actually work.

19
Pop Integrations & URL Object Creation
Pop integrations allow for interaction with OnBase content through URLs. More
information on the following is available in the WorkView: Notifications with
ObjectPop & FilterPop course and in the following sections of the WorkView MRG:
• Using ObjectPop in Notifications (page 295 for EP3)
• Using UnityPop in Notifications (page 297 for EP3)
• Creating Objects Using ObjectPop (page 296 for EP3)
• Creating Objects Using a URL (page 396 for EP3)
• FilterPop (page 806 for EP3)
• Displaying Filter URLs (page 397 for EP3)
For any pop integration URLs, use the corresponding values for the environment:
SERVER
VIRTUAL ROOT
DEV
dm-dev.dev.cu.edu
AppNet
TST
dm-tst.qa.cu.edu
AppNet
STG
dm-stg.qa.cu.edu
AppNet
PRD
dm.prod.cu.edu
AppNet
For any of these actions, authentication to an individual OnBase account with
sufficient privileges is required.
Viewing Objects
ObjectPop can be used to direct users (with a URL) to open a WorkView object.
http://<Server>/AppNet/workview/objectPop.aspx?objectid=<object
ID>&classid=<class ID>
This can also be done with a UnityPop URL to open an existing object in the Unity
client. To provide a static link to a specific object, the following format should be
followed:
onbase://wv/object/?classid=<class ID>&objectid=<object ID>
Creating Objects
Objects can also be created using a URL. The ctype property defines whether the
object is active or inactive (0 active; 1 inactive). You can also set attribute values on
the object that is created.
ObjectPop Object Creation Example URL:
http://<Server>/AppNet/workview/objectPop.aspx?classid=<class ID>&ctype=<0
or 1>&<attribute ID>=<attribute value>
Object Creation UnityPop Example URLs:

20
onbase://wv/create/object/?classid=1001&ctype=0
onbase://wv/create/object/?classid=1001&1001=Open&ctype=0
onbase://wv/create/object/?classid=1001&Status=Open&ctype=0
onbase://wv/create/object/?classid=1001&1002.1003=John%20Adams&ctype
=1
Viewing Filter Results
FilterPop can be used to direct users (with a URL) to a WorkView filter. A tool exists
to help with creation of the FilterPop URL:
https://<Server>/AppNet/workview/filterPop.aspx
You will end up with a URL such as:
https://dm.prod.cu.edu/AppNet/Workview/filterPop.aspx?filterPop=true
&filterID=XXXX&Keywords=XXXX_%3D_AND_OPEN
This can also be done with a UnityPop URL to view a filter’s results in the Unity
client. To provide a static link to a filter, the following format should be followed:
onbase://wv/filter/?id=1001
or, with constraints
onbase://wv/filter/?id=1001&constraints=1001.1002_=_and__value
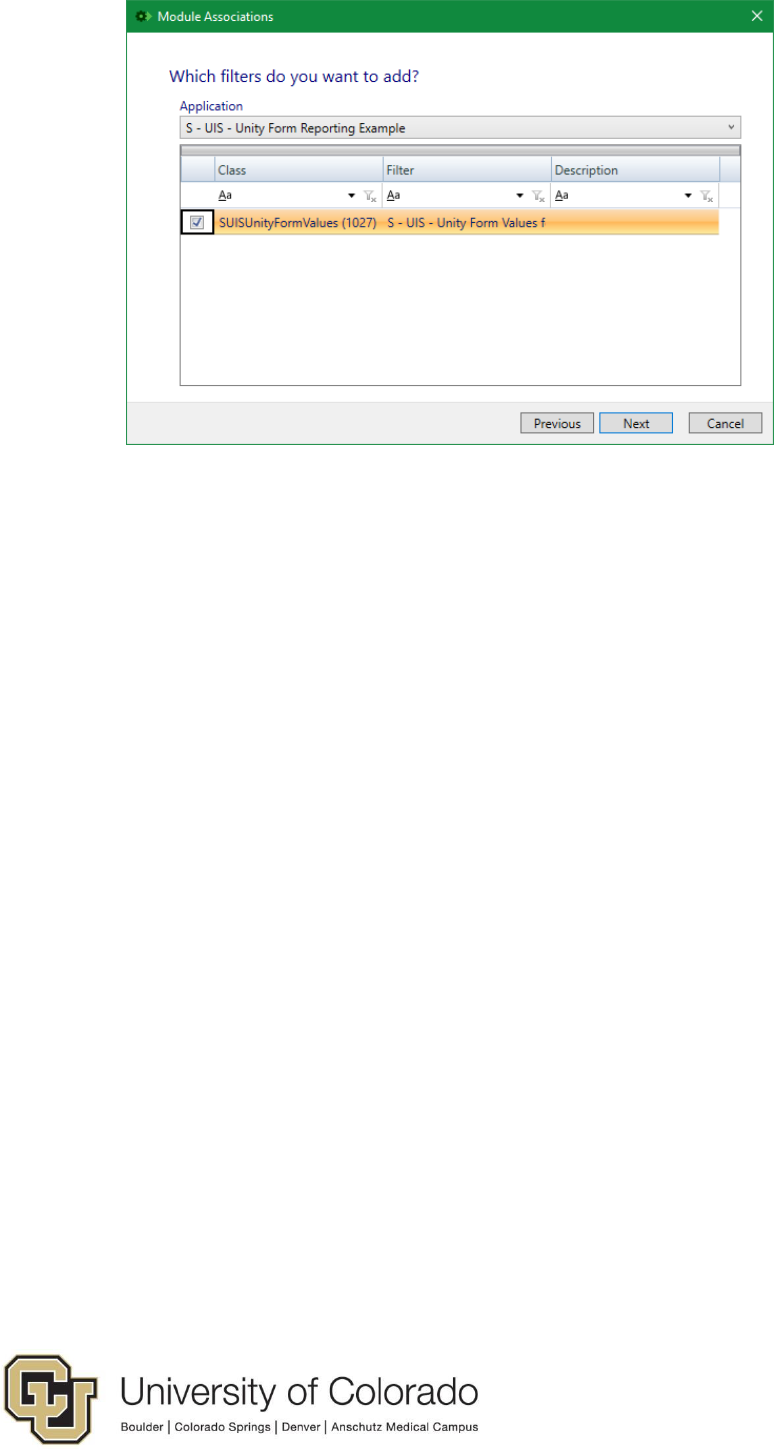
Reporting
Module Associations map to filters from WorkView applications so that they can be
accessed by data providers. Instructions for creating Module Associations are
available in the WorkView MRG and in Section 2 of the Reporting Dashboards
Beyond the Basics course on Premium.
On the WorkView tab in Studio, select Module Associations then click Add to
create new. Choose Reporting Dashboards. Select the application and filter.
Choose the desired user groups and finish.
21
Do not create reportable views from WV filters without consulting with UIS.
